This post was last properly updated on 7/2/2020.
Note 8/19/2022: Since this post seems to be getting attention on Google, I wanted to pop in to let you guys know that at some point after cutting too close to the leaf node, my money tree also developed some sort of pest infection and started suffering.
After we moved to a new place, we unfortunately weren’t able to take good care of it and it eventually died. I never planted Stem2 due to laziness and eventually it got too gross in the jar so I had to throw it away. None of the leaf nodes survived. Stem1, the OG stem that was planted, is still alive but barely.
I always say I have a very, very brown thumb, so I’d maybe look at this post as what not to do if I were you :p
A month ago I wrote a post about trying to grow everything. One of those things was propagating my money tree. I’m amazed to say the first set have so far been successful, and I’m on my second lot now! I’ll update this post as time goes on, so please check back if you’re interested to see if my brown thumb manages to keep these alive.
Disclaimer: I don’t have a good track record, so please enter with the lowest of expectations and hopefully then you’ll have a chance of not being disappointed haha.
14th May
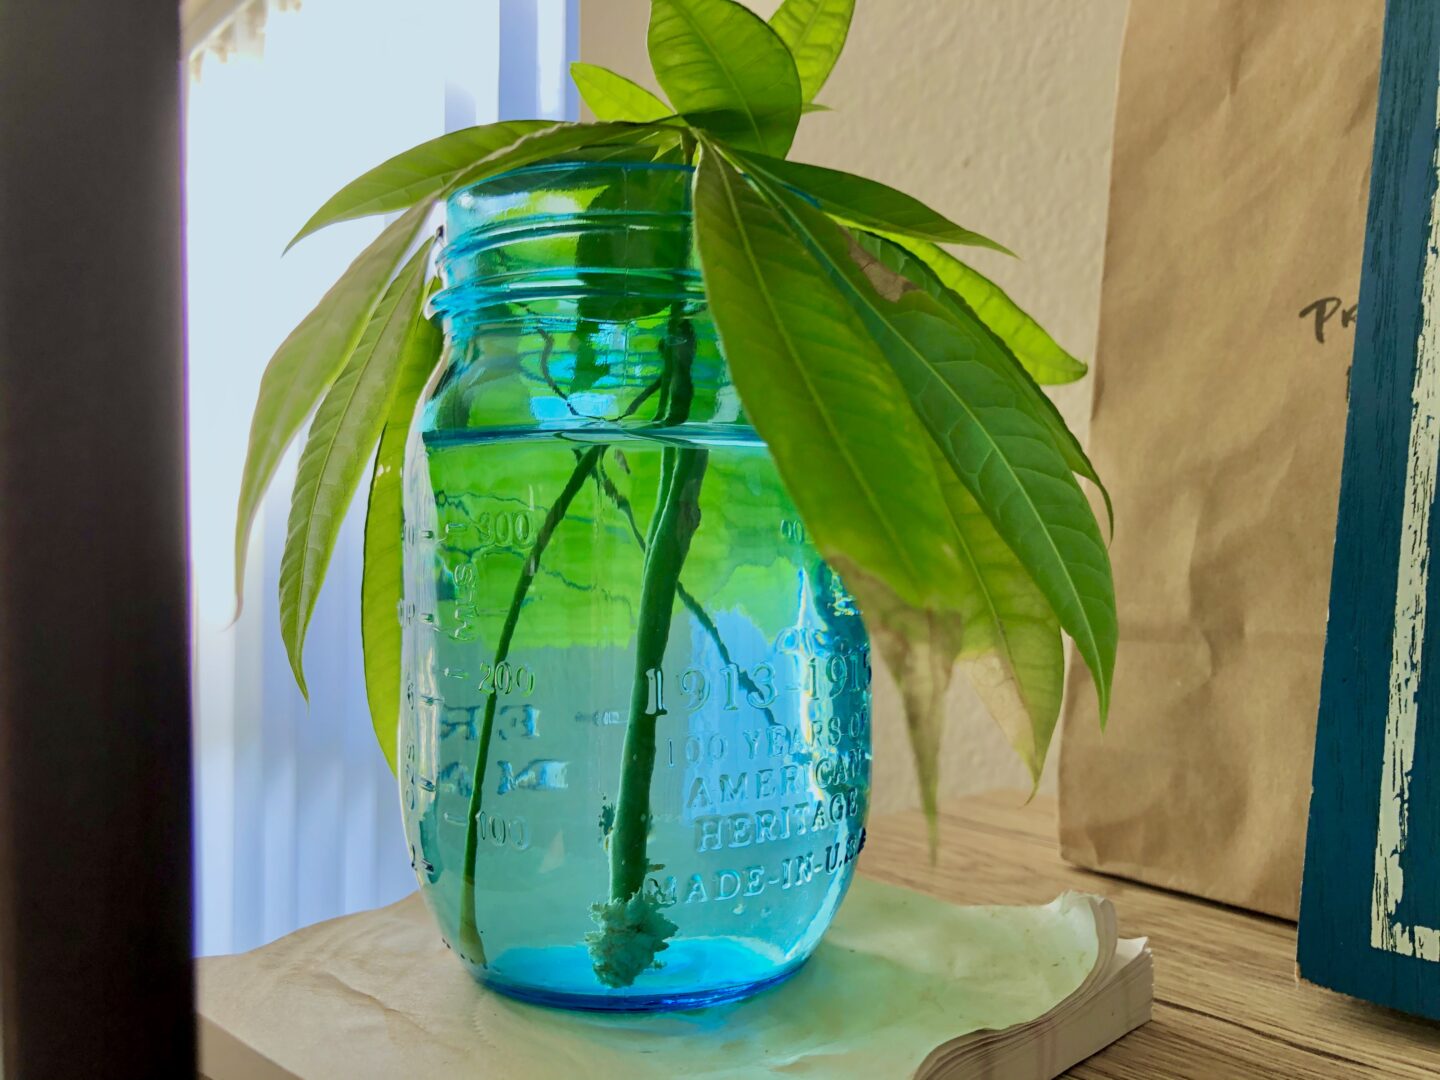
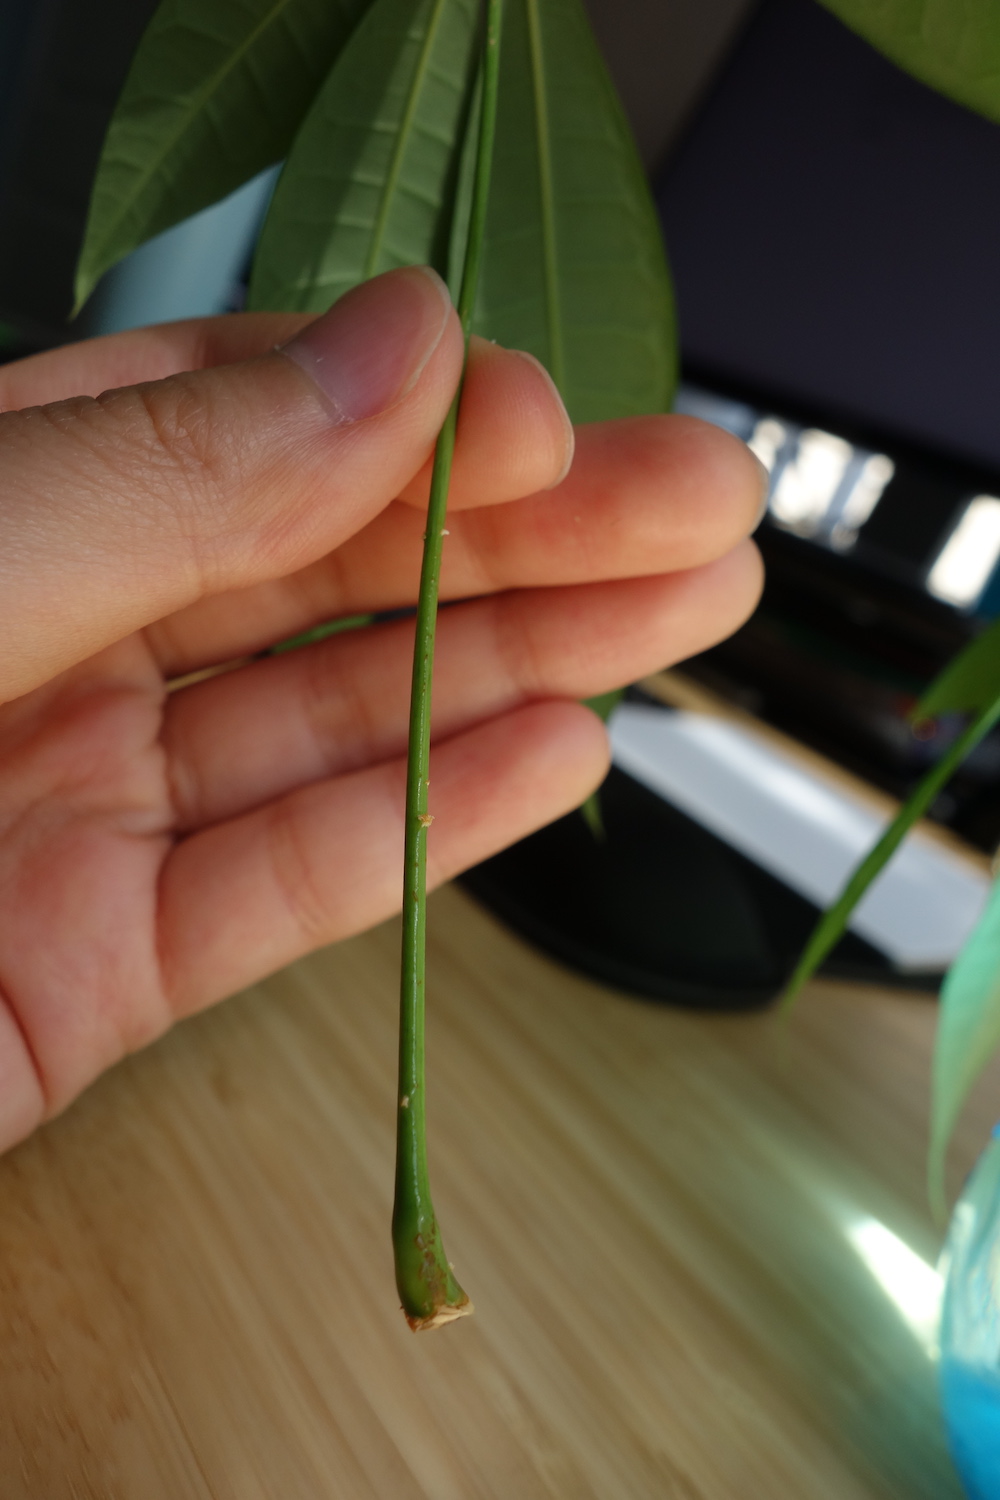
I originally cut these off around mid-April and after a month the main stem had begun to sprout white stuff. I took off 3 leaf nodes from the main stem. One wilted so I threw it out, but the other two were showing promising signs of rooting – one faster than the other.
There are a number of stems and leaf nodes to keep track of, so I’ll name them all for easier tracking:
Stem1 (main stem, which has undeveloped leaf nodes growing.)
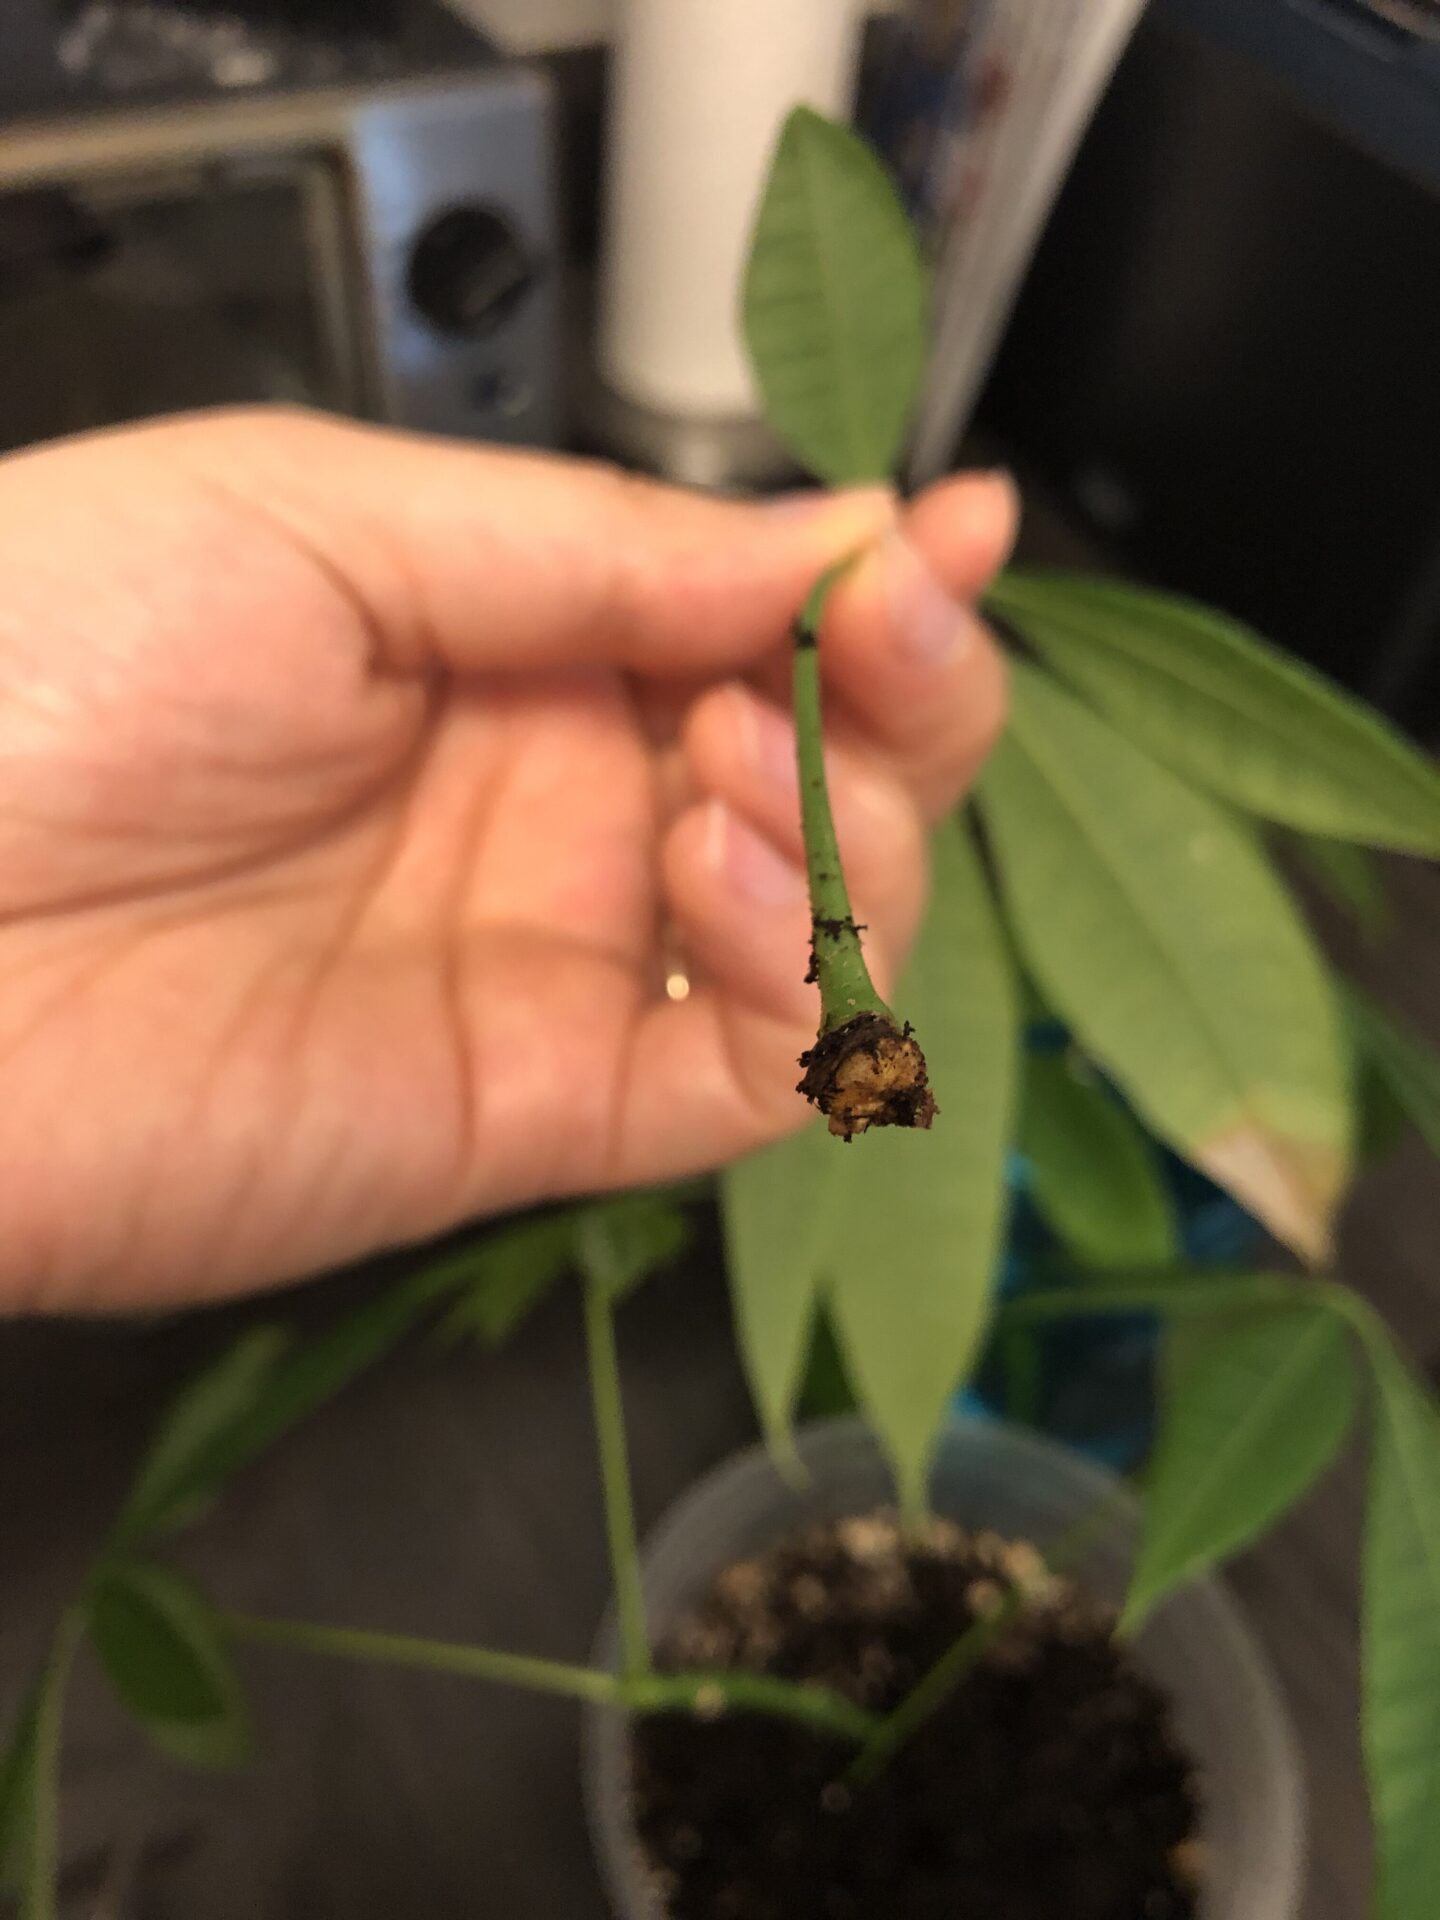
S1LnA (Stem 1 Leaf Node A, was sunburned but somehow was growing fluffy bits faster than S1LnB.)
S1LnB (Stem 1 Leaf Node B, still has healthy, strong leaves. Bottom started to brown though no fluffy bits yet.)
S1LnC (Stem 1 Leaf Node C, wilted and died so I threw it out)
After those white fluffy bits started developing, the roots actually began to grow quickly on the main stem.
22nd May

I’m not sure what the white stuff was, but it came off really easily – part of it broke off as it tapped the edge of the mason jar while I was taking the Stem1 out for these photos. That didn’t seem to affect its growth though.
27th May
The stem of the main plant where I cut Stem1 from had started to grow again:
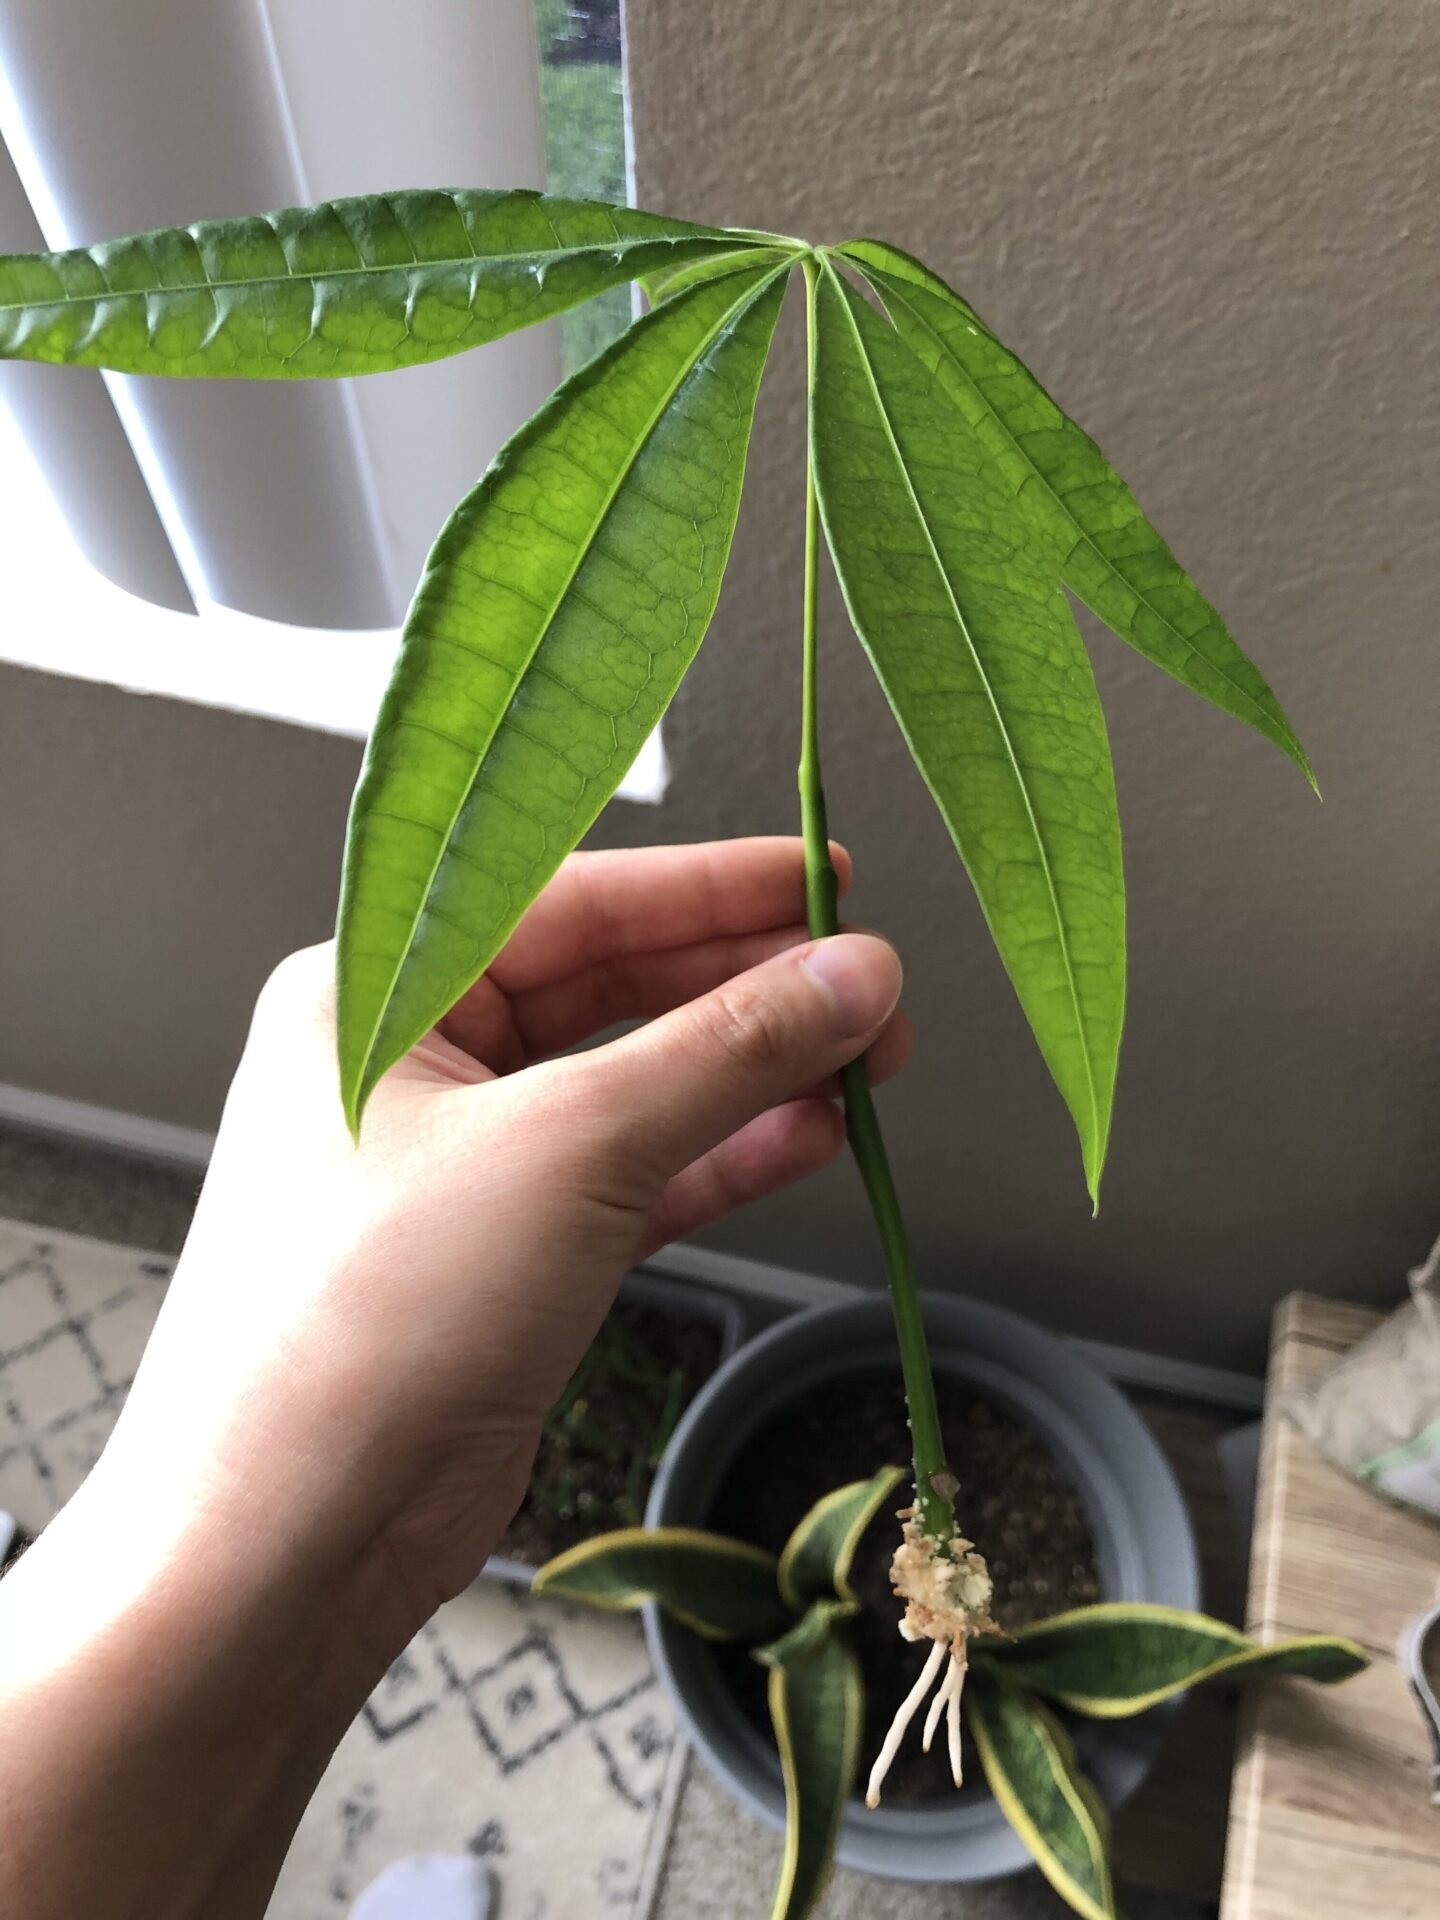
We noticed that it started growing from the end of the closest leaf node, which looked a bit weird to be honest. Since Stem1 had grown so successfully, I decided to experiment by trying to propagate another stem but cutting it closer to the leaf node this time:
We’ll call it Stem2. Stem2 also had new growth at the top plus 3 leaf nodes: we’ll call them S2LnA, S2LnB, S2LnC. As I was breaking off the leaf nodes to put into water, it turns out that the leaf node closest to the top, S2LnC, had not yet finished developing so when I broke it off I ended up tearing part of Stem2‘s skin off.
Also, since S2LnC was new growth and not a fully grown leaf node, it died pretty quickly so I had to throw it away. The final blunder caused by me not realising that S2LnC was not a fully-fledged leaf node, was that I ended up cutting Stem2 too short. I am an idiot *facepalm*.
All that is to say: if Stem2 and its nodes never root, it’s entirely my fault.
Lesson learned: if there’s new growth at the top, cut it more like 5-6 leaf nodes down, and leave all the top new growth leaf nodes attached to the stem.
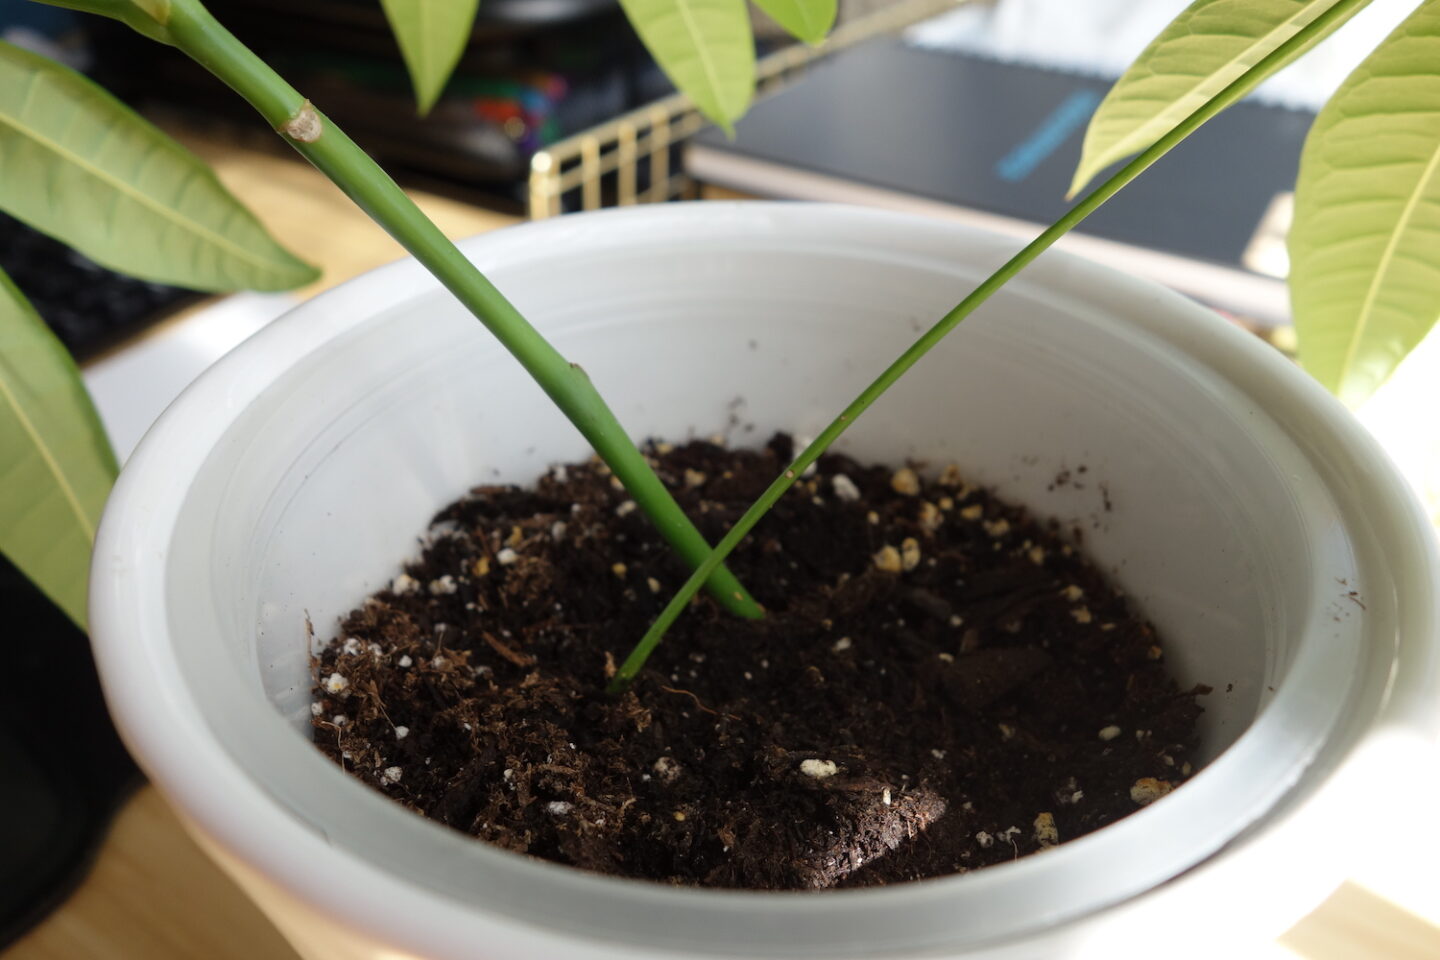
I put Stem2, S2LnA and S2LnB into the jar. By now, Stem1‘s roots had grown so long I had to pot it, and S1LnA had also grown a decent length of roots, while the S1LnB still had a little way to go. I took the Stem1 and S1LnA and planted them together.
So now we have:
- Stem1 – potted in soil with S1LnA
- S1LnA – potted in soil with Stem1
- S1LnB – still in mason jar
- S1LnC – dead & discarded :(
- Stem2 – in mason jar, slightly damaged skin
- S2LnA – in mason jar
- S2LnB – in mason jar
- S2LnC – dead & discarded :(
In all this time I only topped up the water when it started dropping below the 1 cup line.
9th June
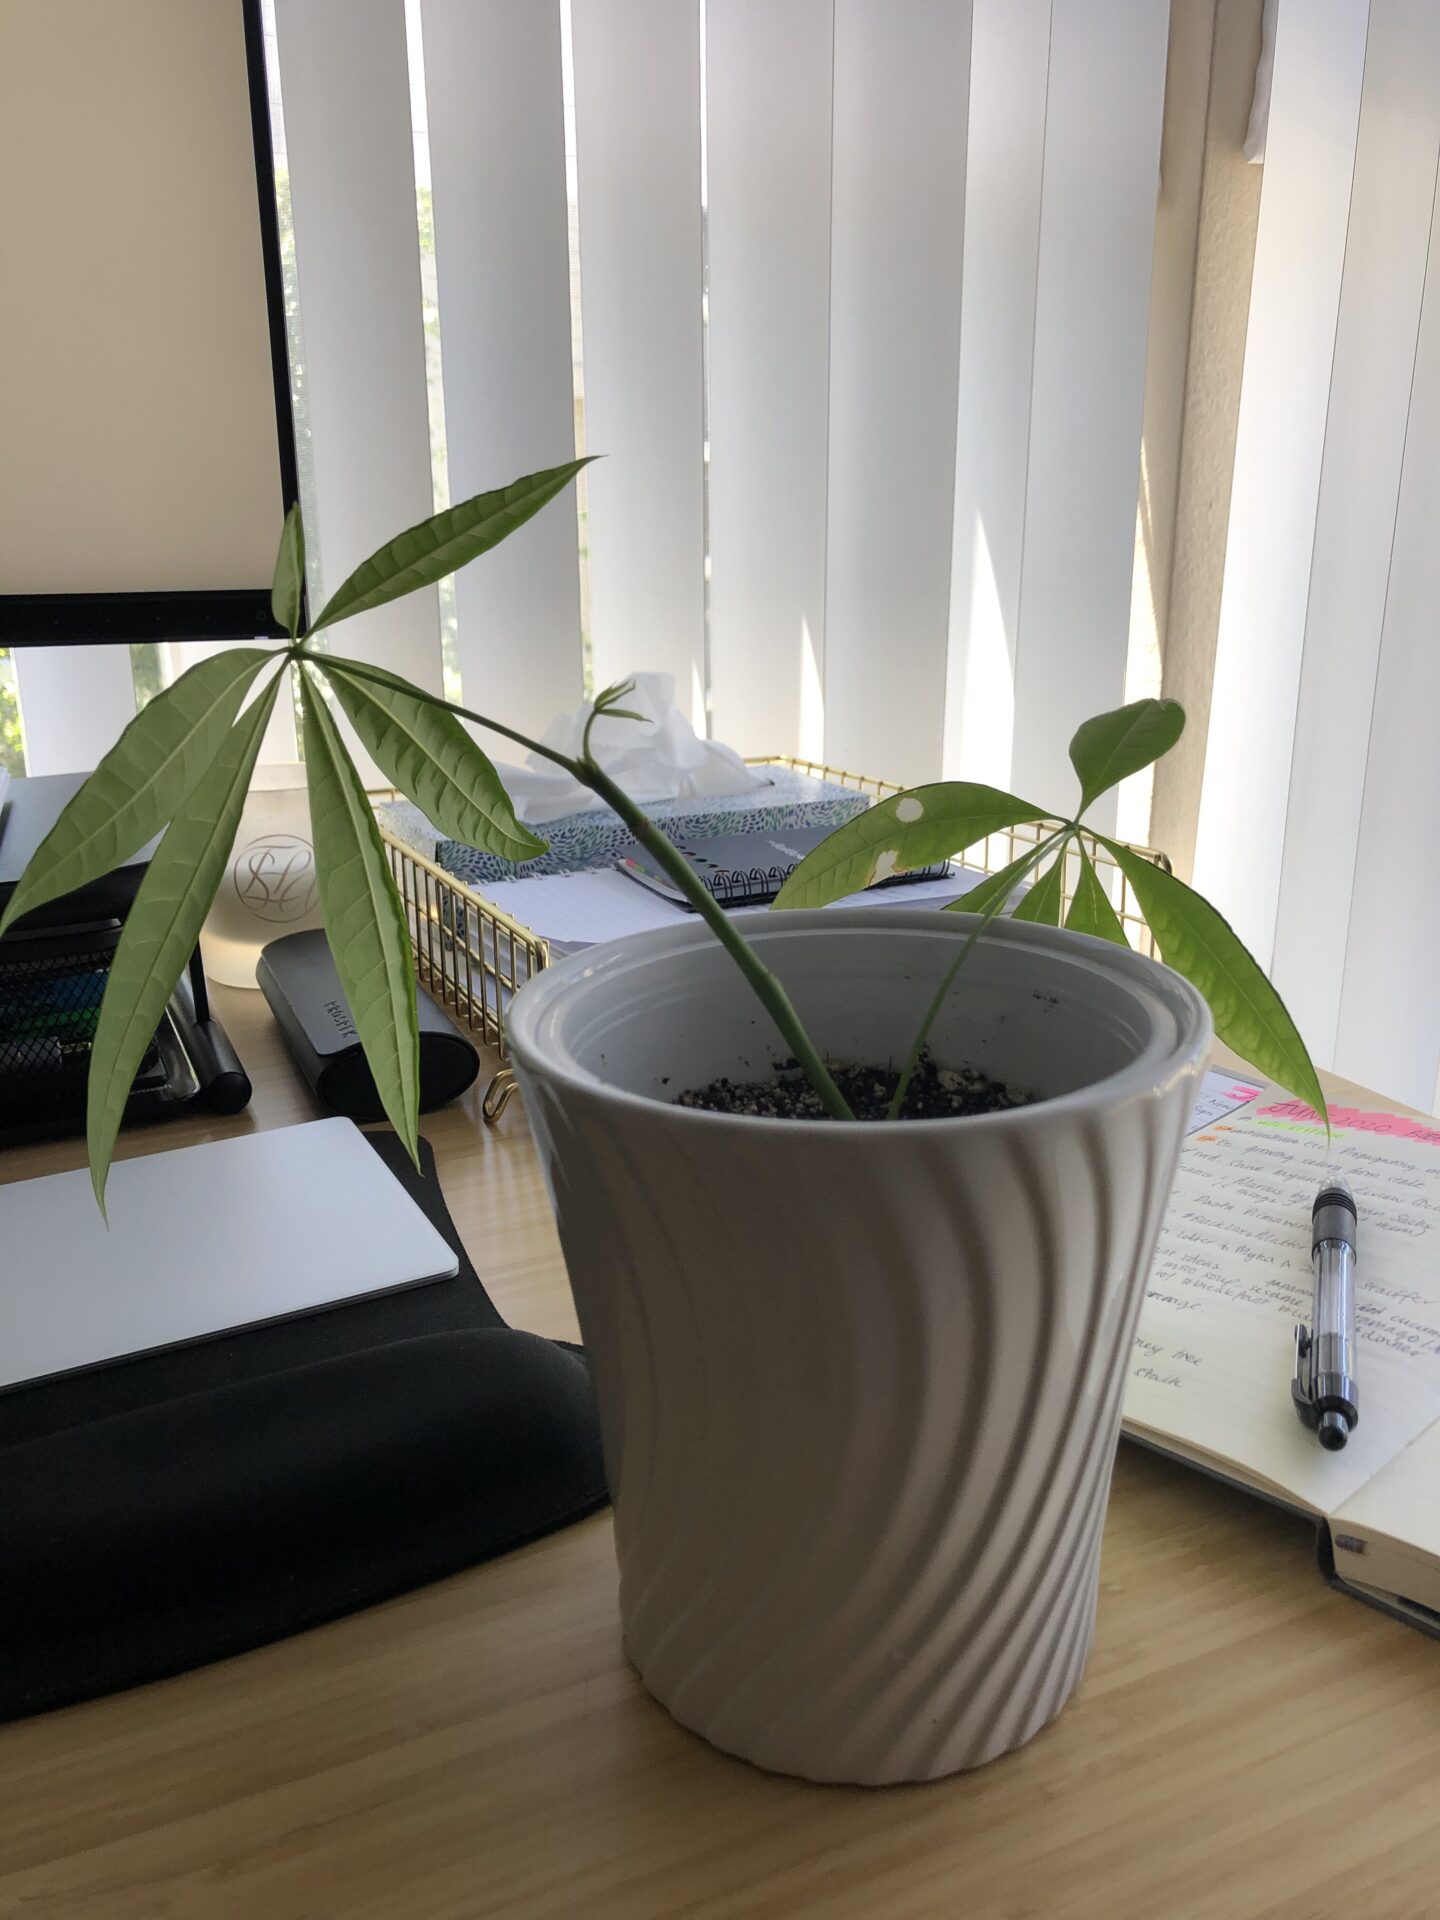
So far it looks like Stem1 is growing well, though I may have planted S1LnA a little early because its leaves are getting weak and droopy and the poor thing can’t seem to stand on its own anymore:
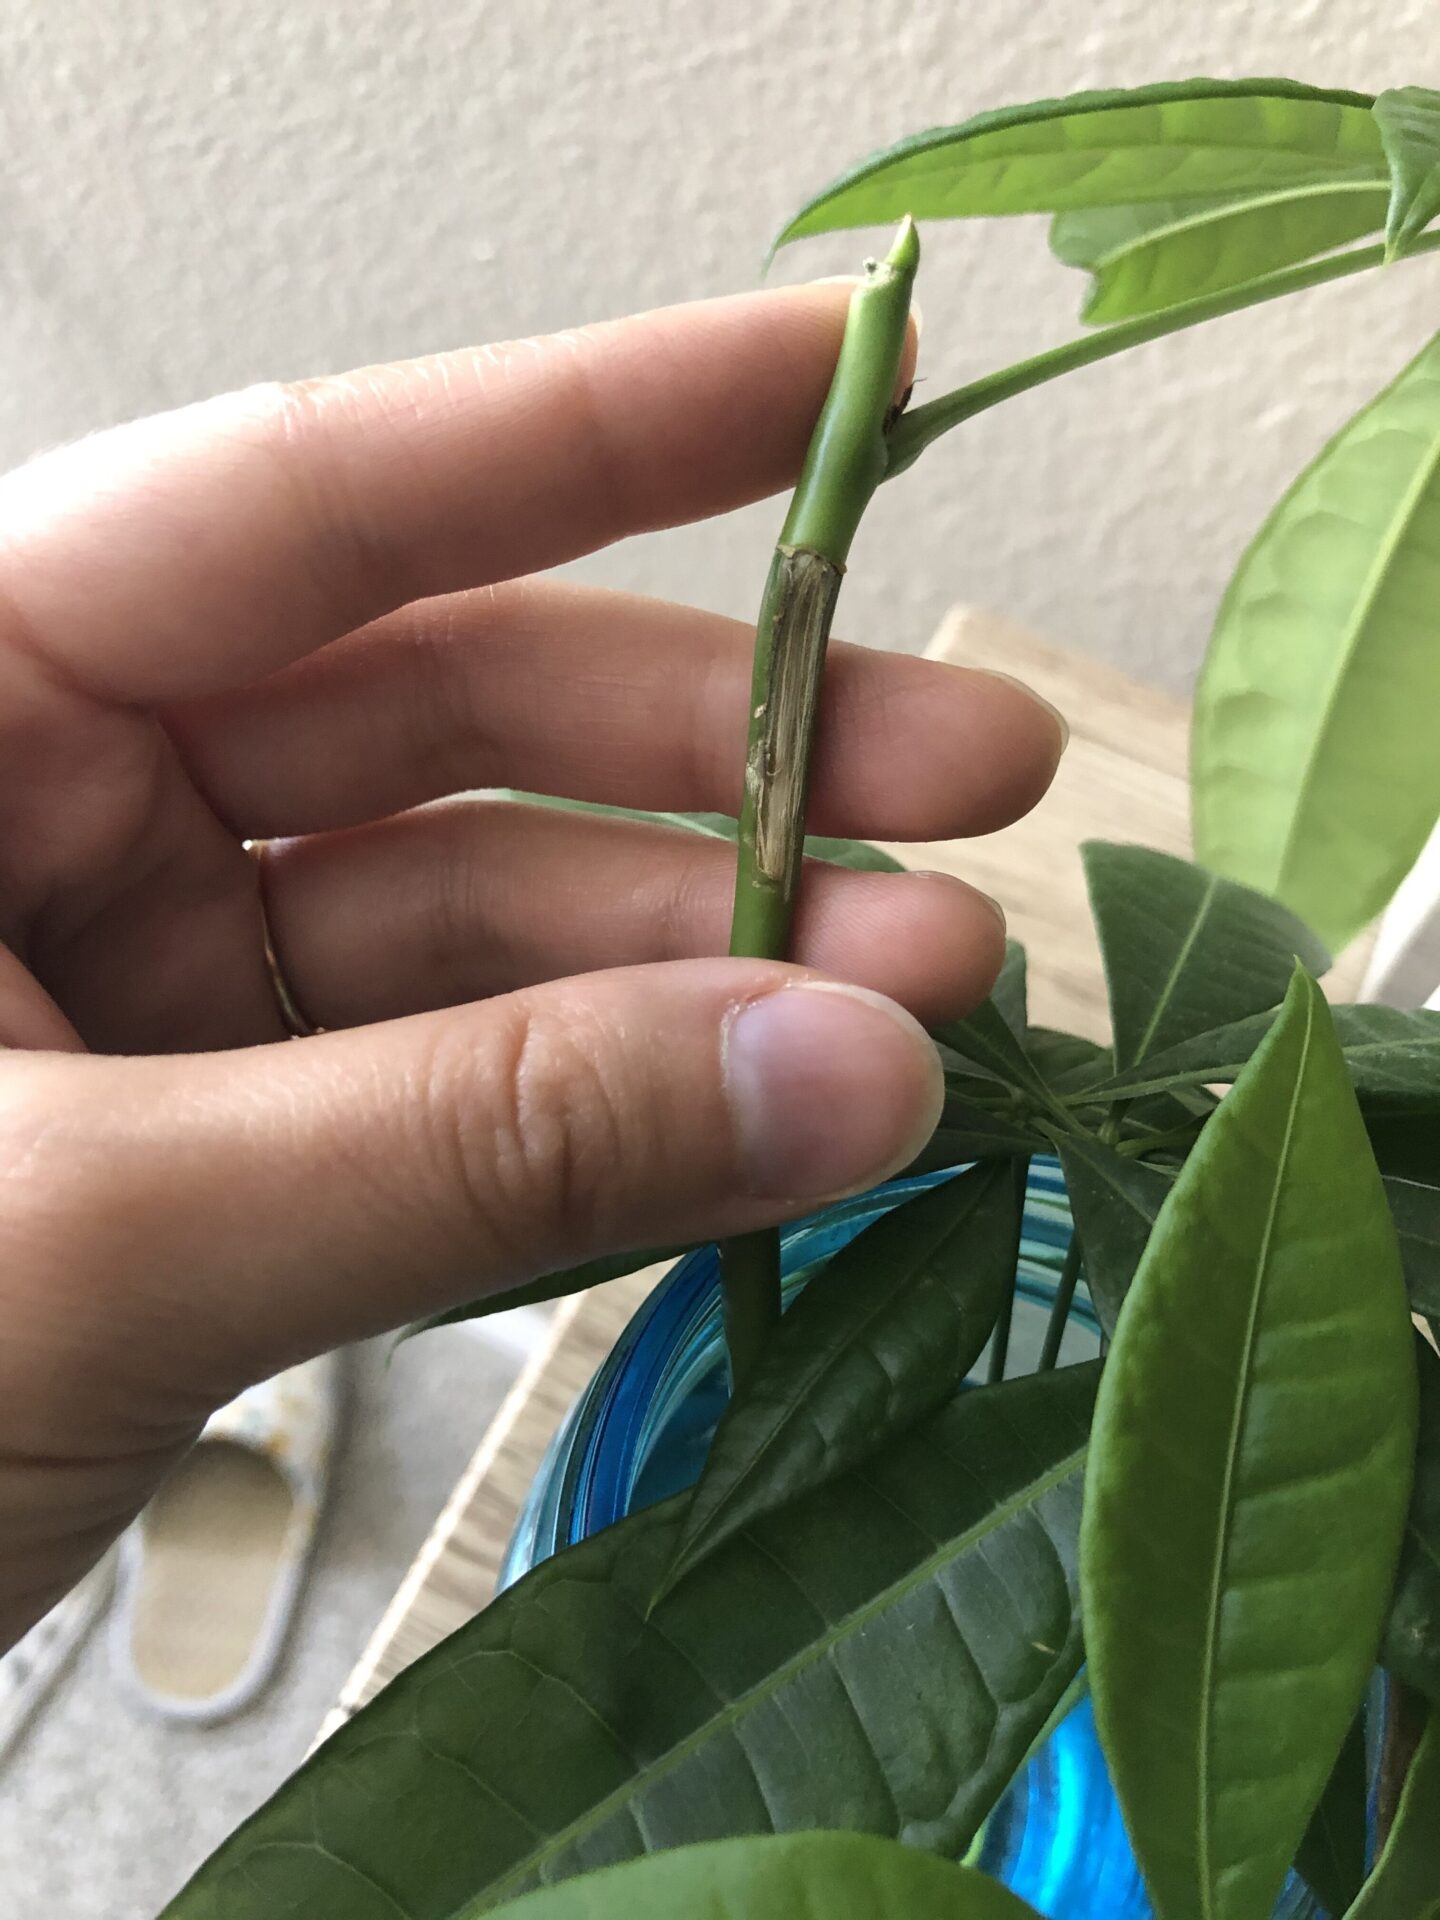
S1LnB has started to root nicely though! Stem2‘s skin has dried and calloused where it was torn, but because it had to take more time healing, it’s taking longer to start developing its roots. S2LnA and S2LnB are showing signs of browning at the bottom, meaning it’s on the first step to developing a roots system, yay.

I’ll wait until the roots have grown to about 5 inches long and then plant it with its brothers.
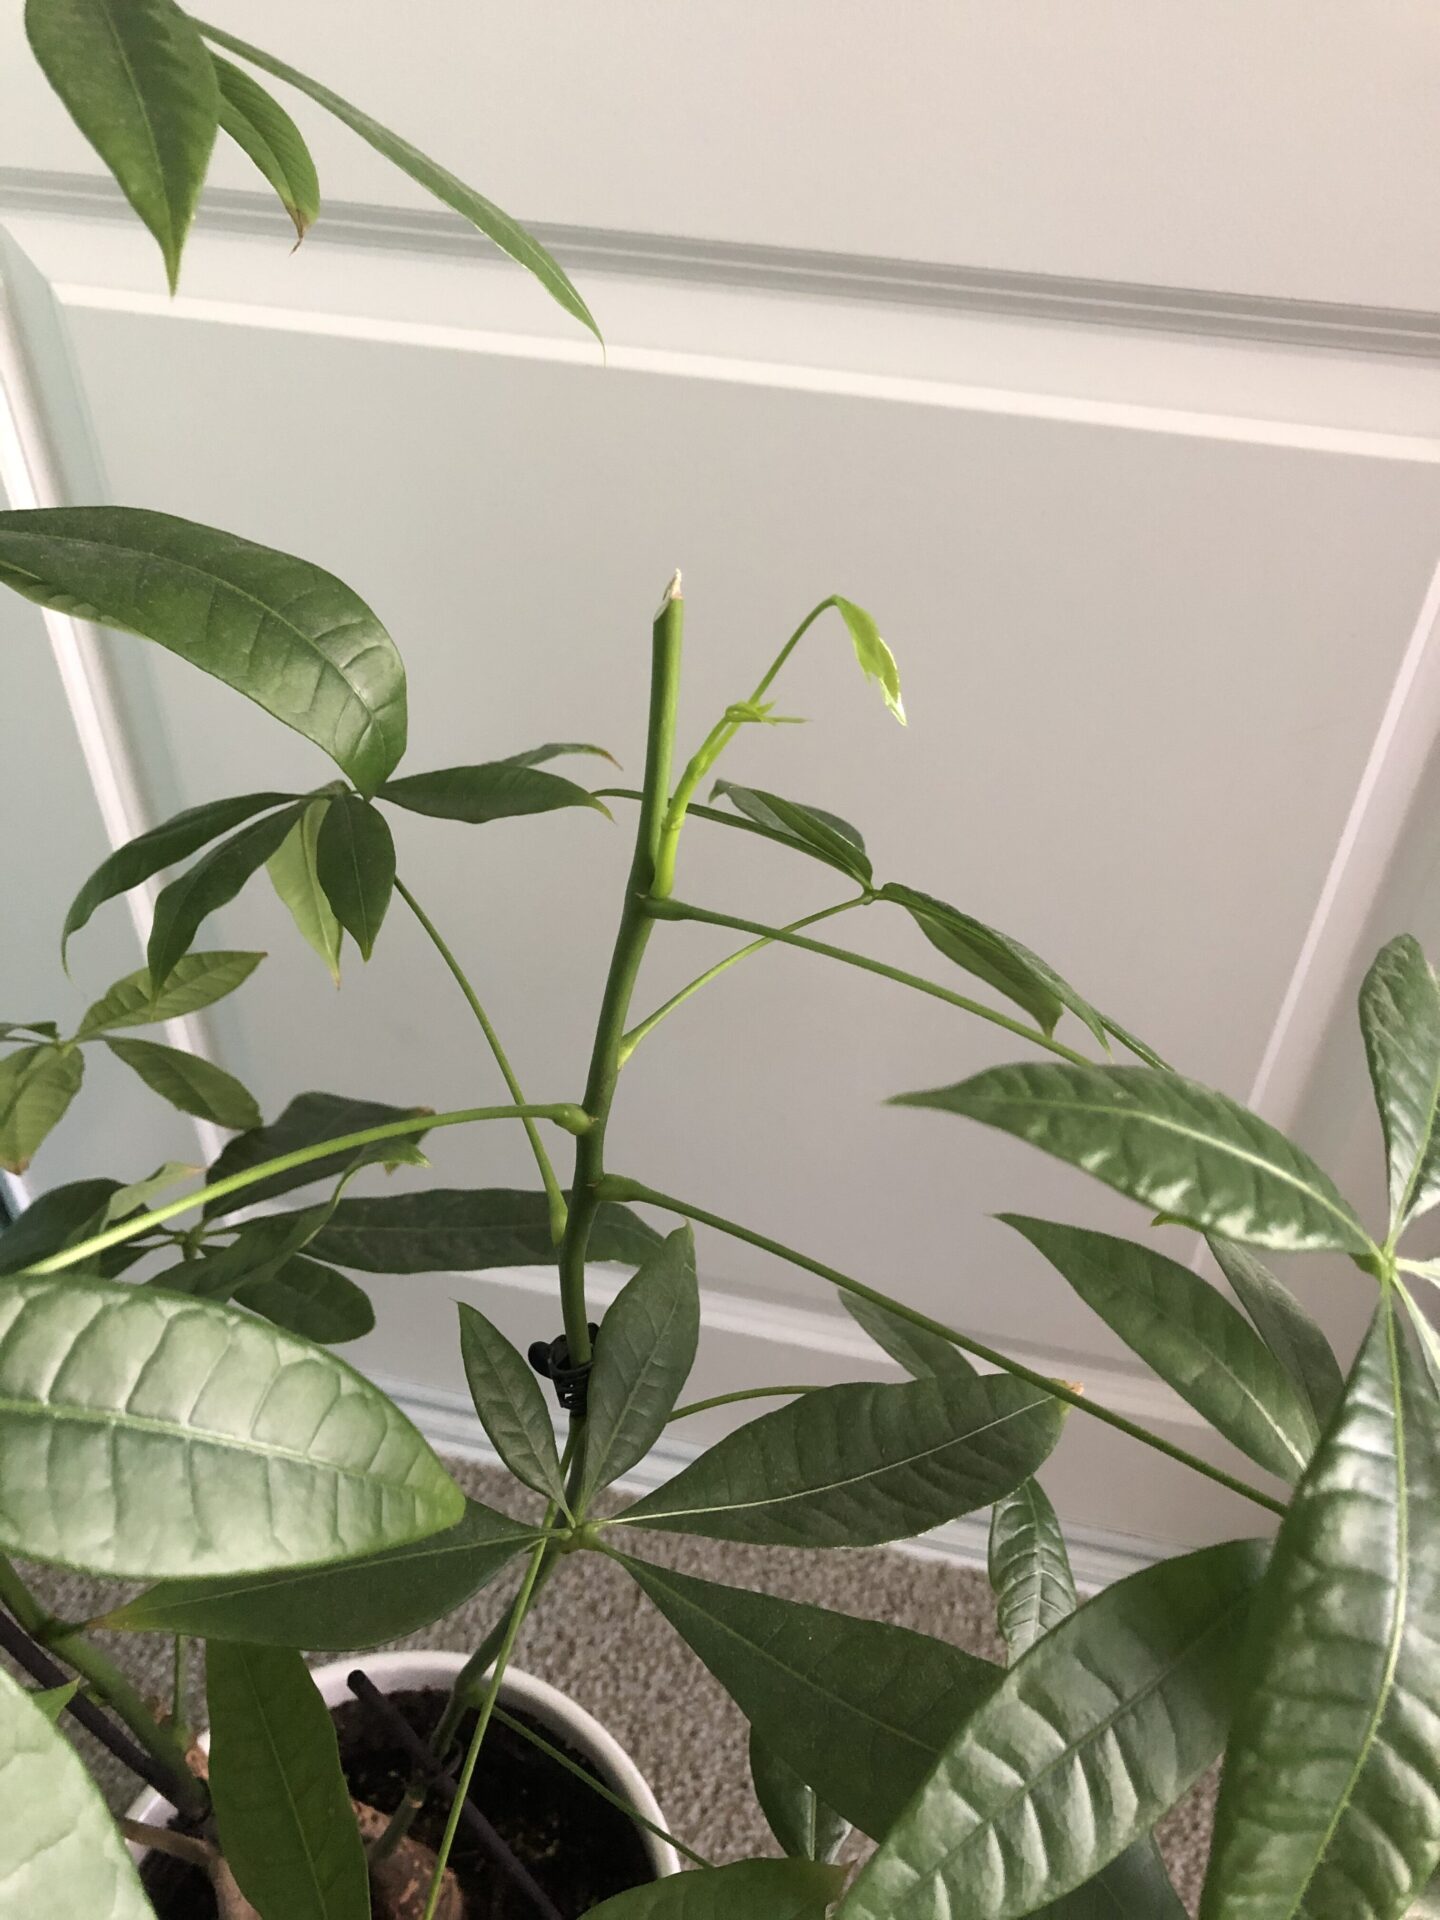
Finally, probably the biggest lesson learned so far is that cutting the stem closer to the leaf node of the mother plant actually allows new growth to happen faster. You can see new growth starting to sprout on Stem2’s Mother Stem (MS2) already, and it’s only been 2 weeks:
It took 4-5 weeks for Stem1’s Mother Stem (MS1) to do the same. Since then, it’s growing fairly well, though the initial leaves grew out misshapen:
I don’t have full confidence that this plant is going to survive though, to be honest. I’ve had gnats flying around lately and… ugh. They’ve basically infected quite a few of my plants. But this money tree has been hardy thus far. Hopefully it stays okay, or at least I’ll be able to get a few more little money trees from it :D
I’d love to be able to create a braided money tree myself one day!
18th June
Hi friends! Just a week and a half later and there’s been some major developments here already. Bear with me because this one’s a long one. First thing’s first, an update on Stem1 and S1LnA:
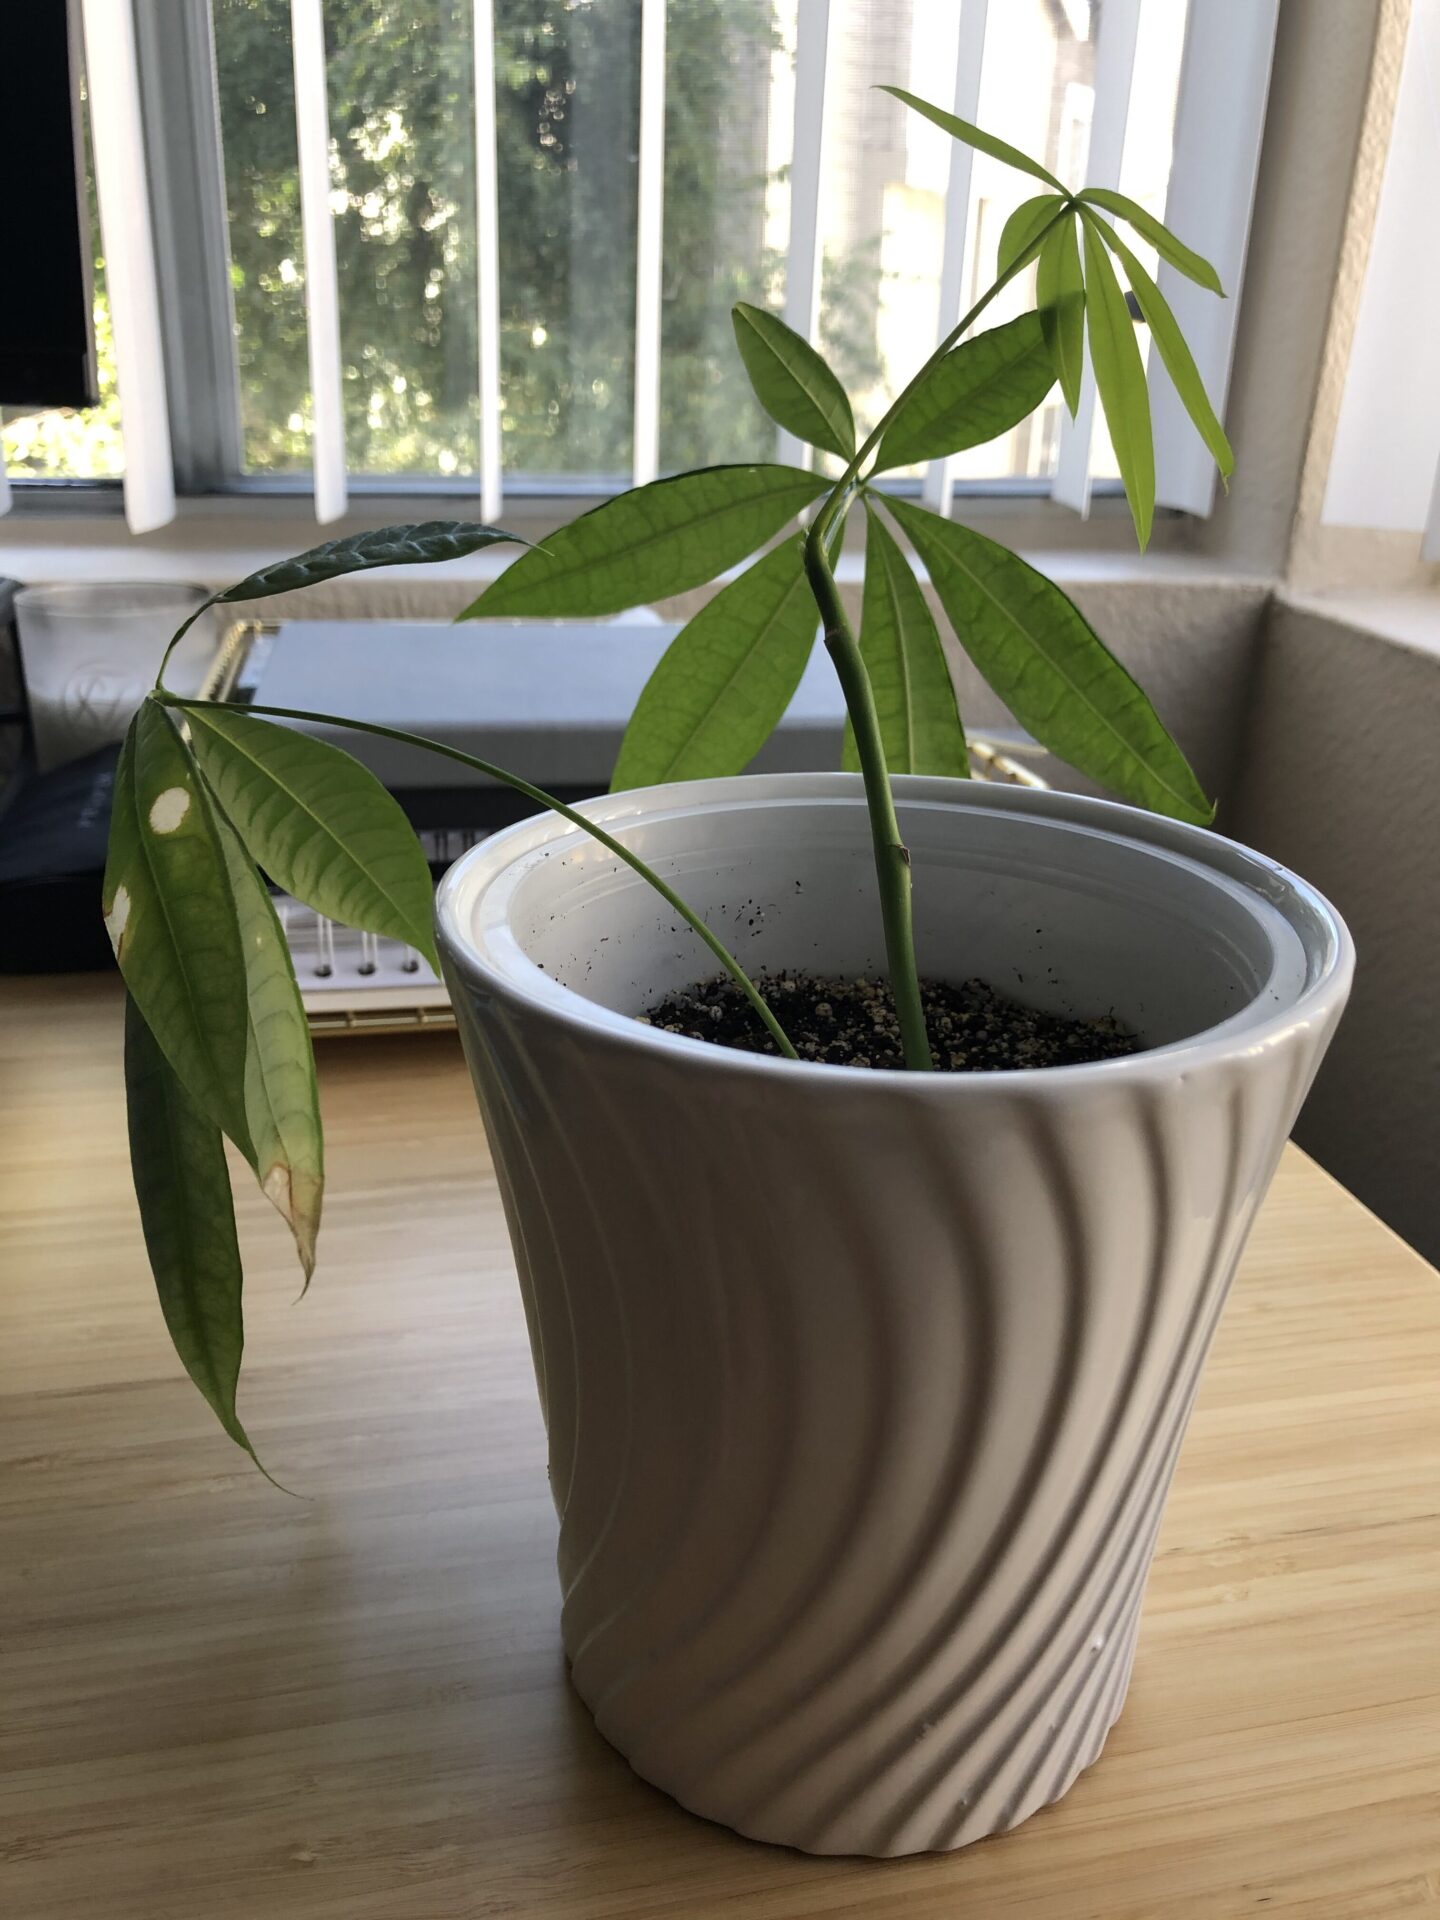
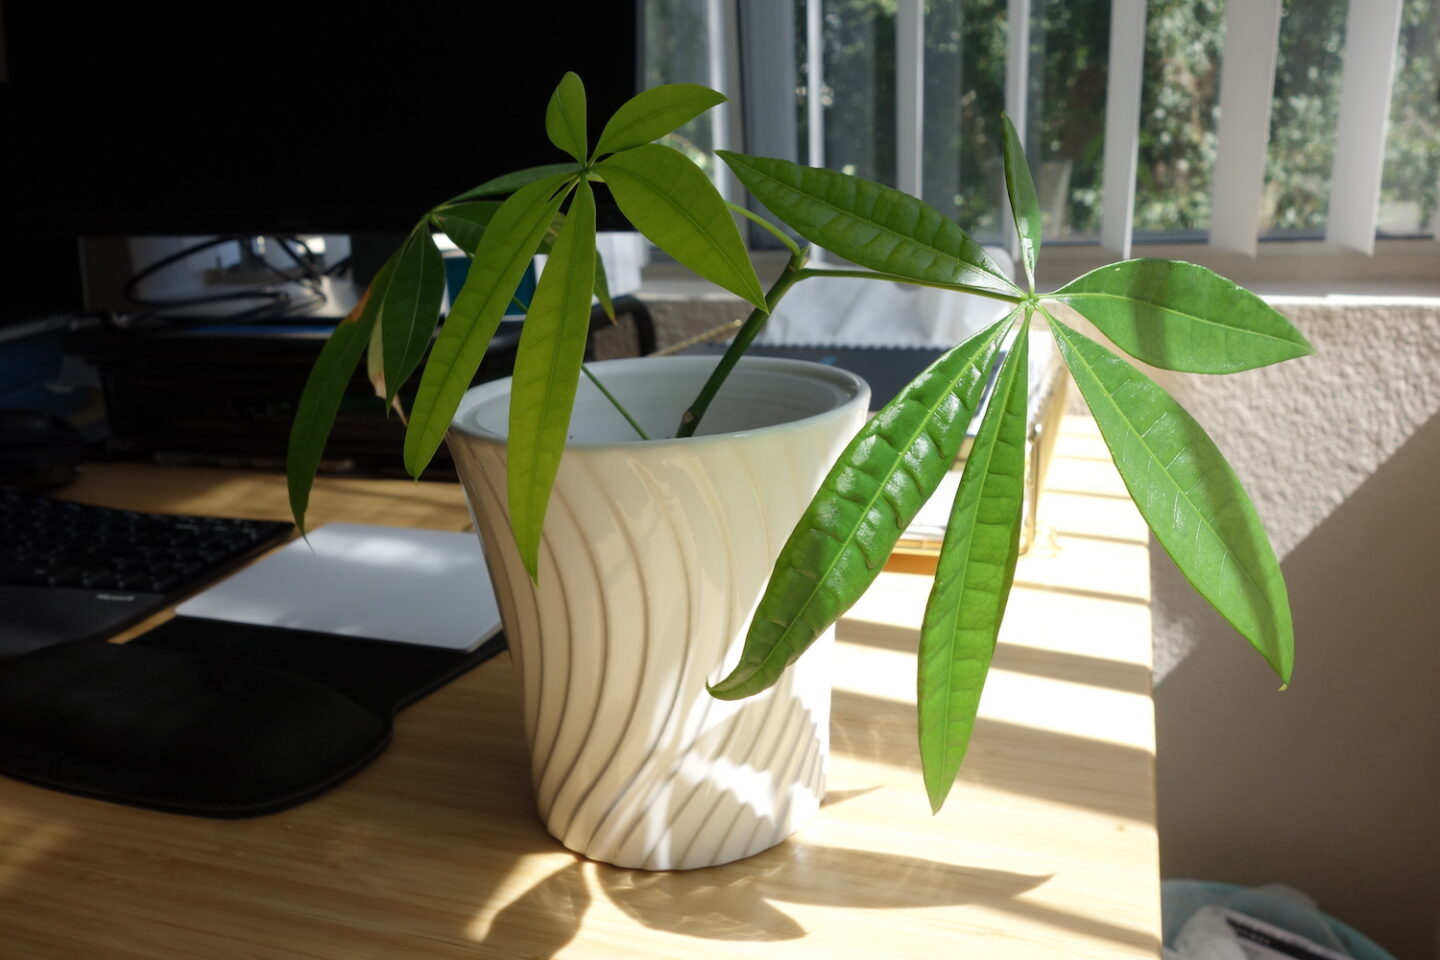
Stem1 is really growing well! It’s looking strong and healthy, and you can see the new leaves growing out nicely. S1LnA, on the other hand, looks to be barely hanging in there, but it does seem to be hanging in there nonetheless.
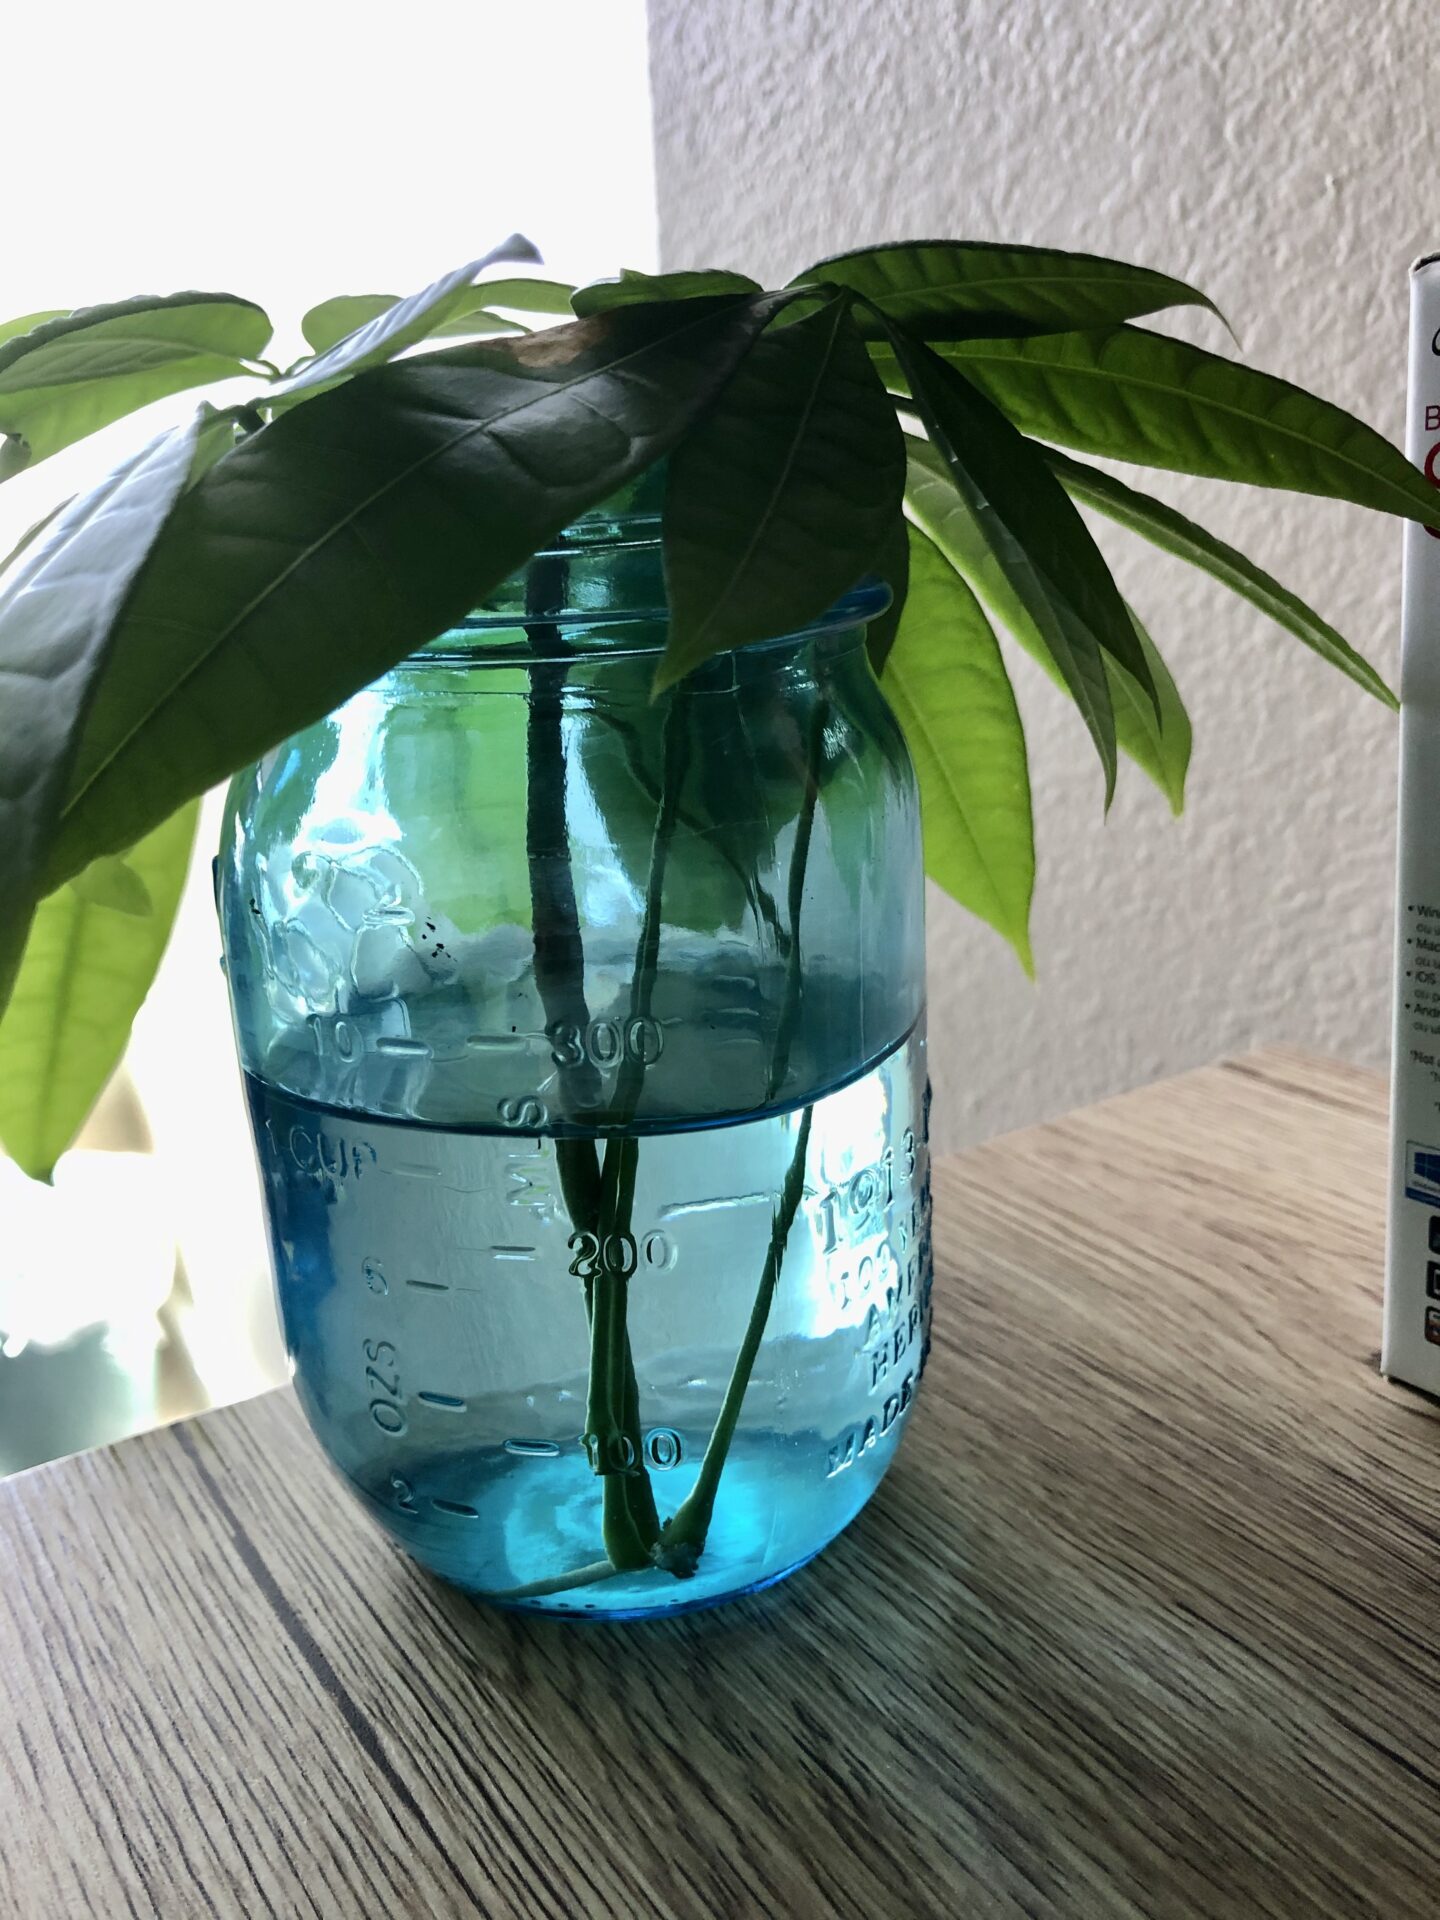
In the mason jar, S1LnB‘s roots have grown so much that I couldn’t keep it in water anymore, so I decided to plant it with Stem1 and S1LnA.
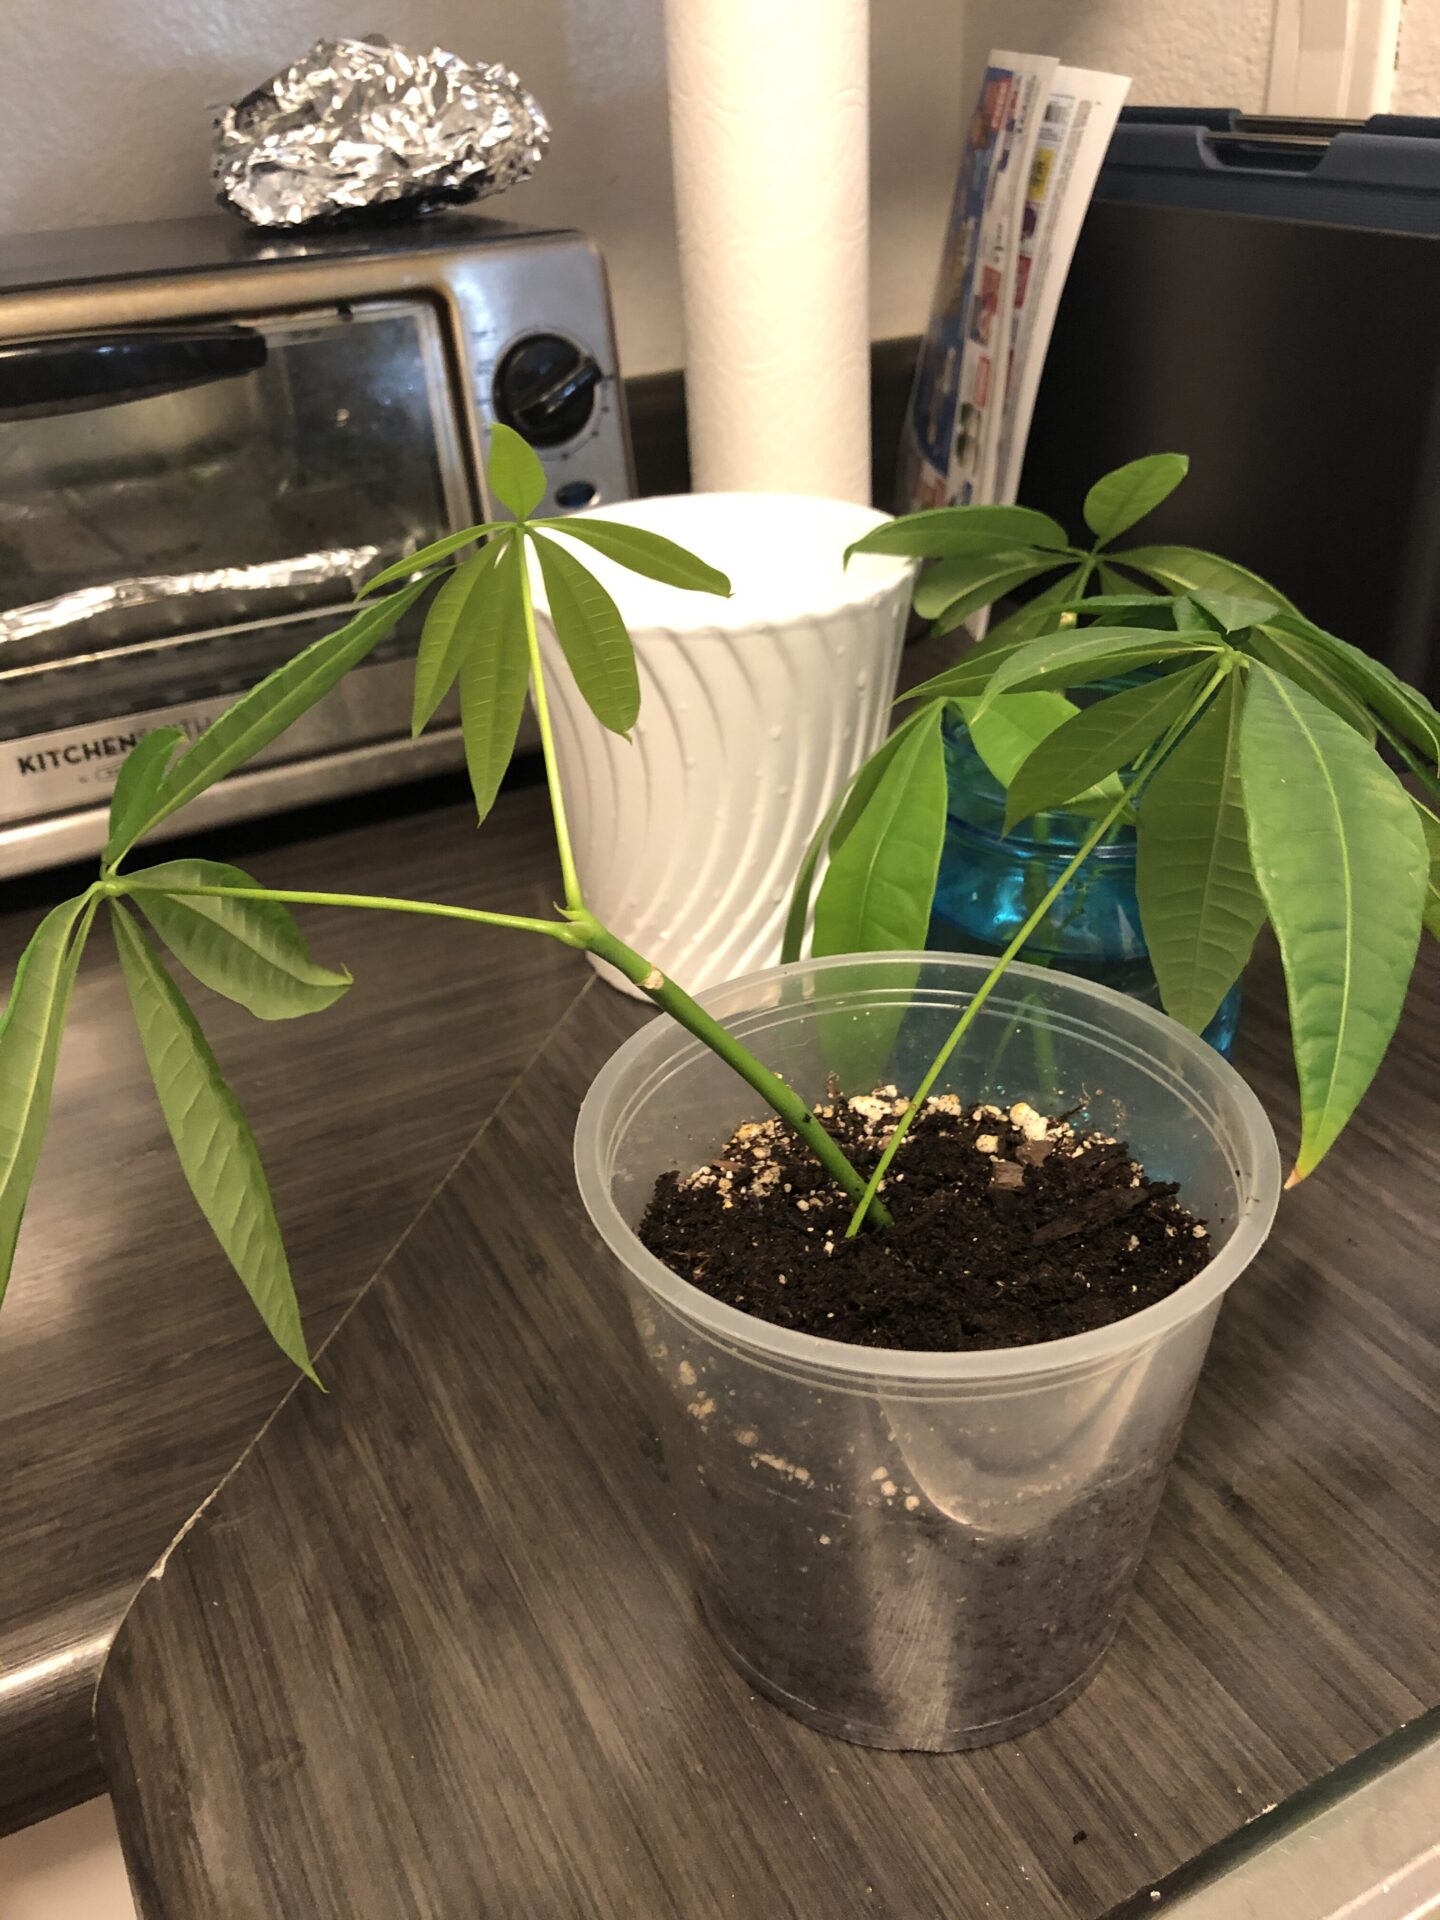
above: Stem1 and S1LnB planted together.
It was at this point that I realised that what I previously feared about planting S1LnA too soon was true: its roots had almost completely fallen off:
It does look like it is still trying to grow new roots and cling on for dear life, so I put it back in the soil to see if it can grow back its roots.
Stem1 and S1LnB look great though. Poor S1LnA… As I write this, I’m wondering if I should try taking it out of the soil and putting it back in the mason jar of water instead. I considered this while I was re-planting it, but now that I’m thinking about it more, I decide to take it out of the soil and put it back in water. We’ll see how it goes.
Neither Stem2 nor its leaf nodes have grown roots yet but Stem2 looks like it’s on its way. I anticipate it’ll be another month or so before these are ready to be planted, if they grow roots at all.
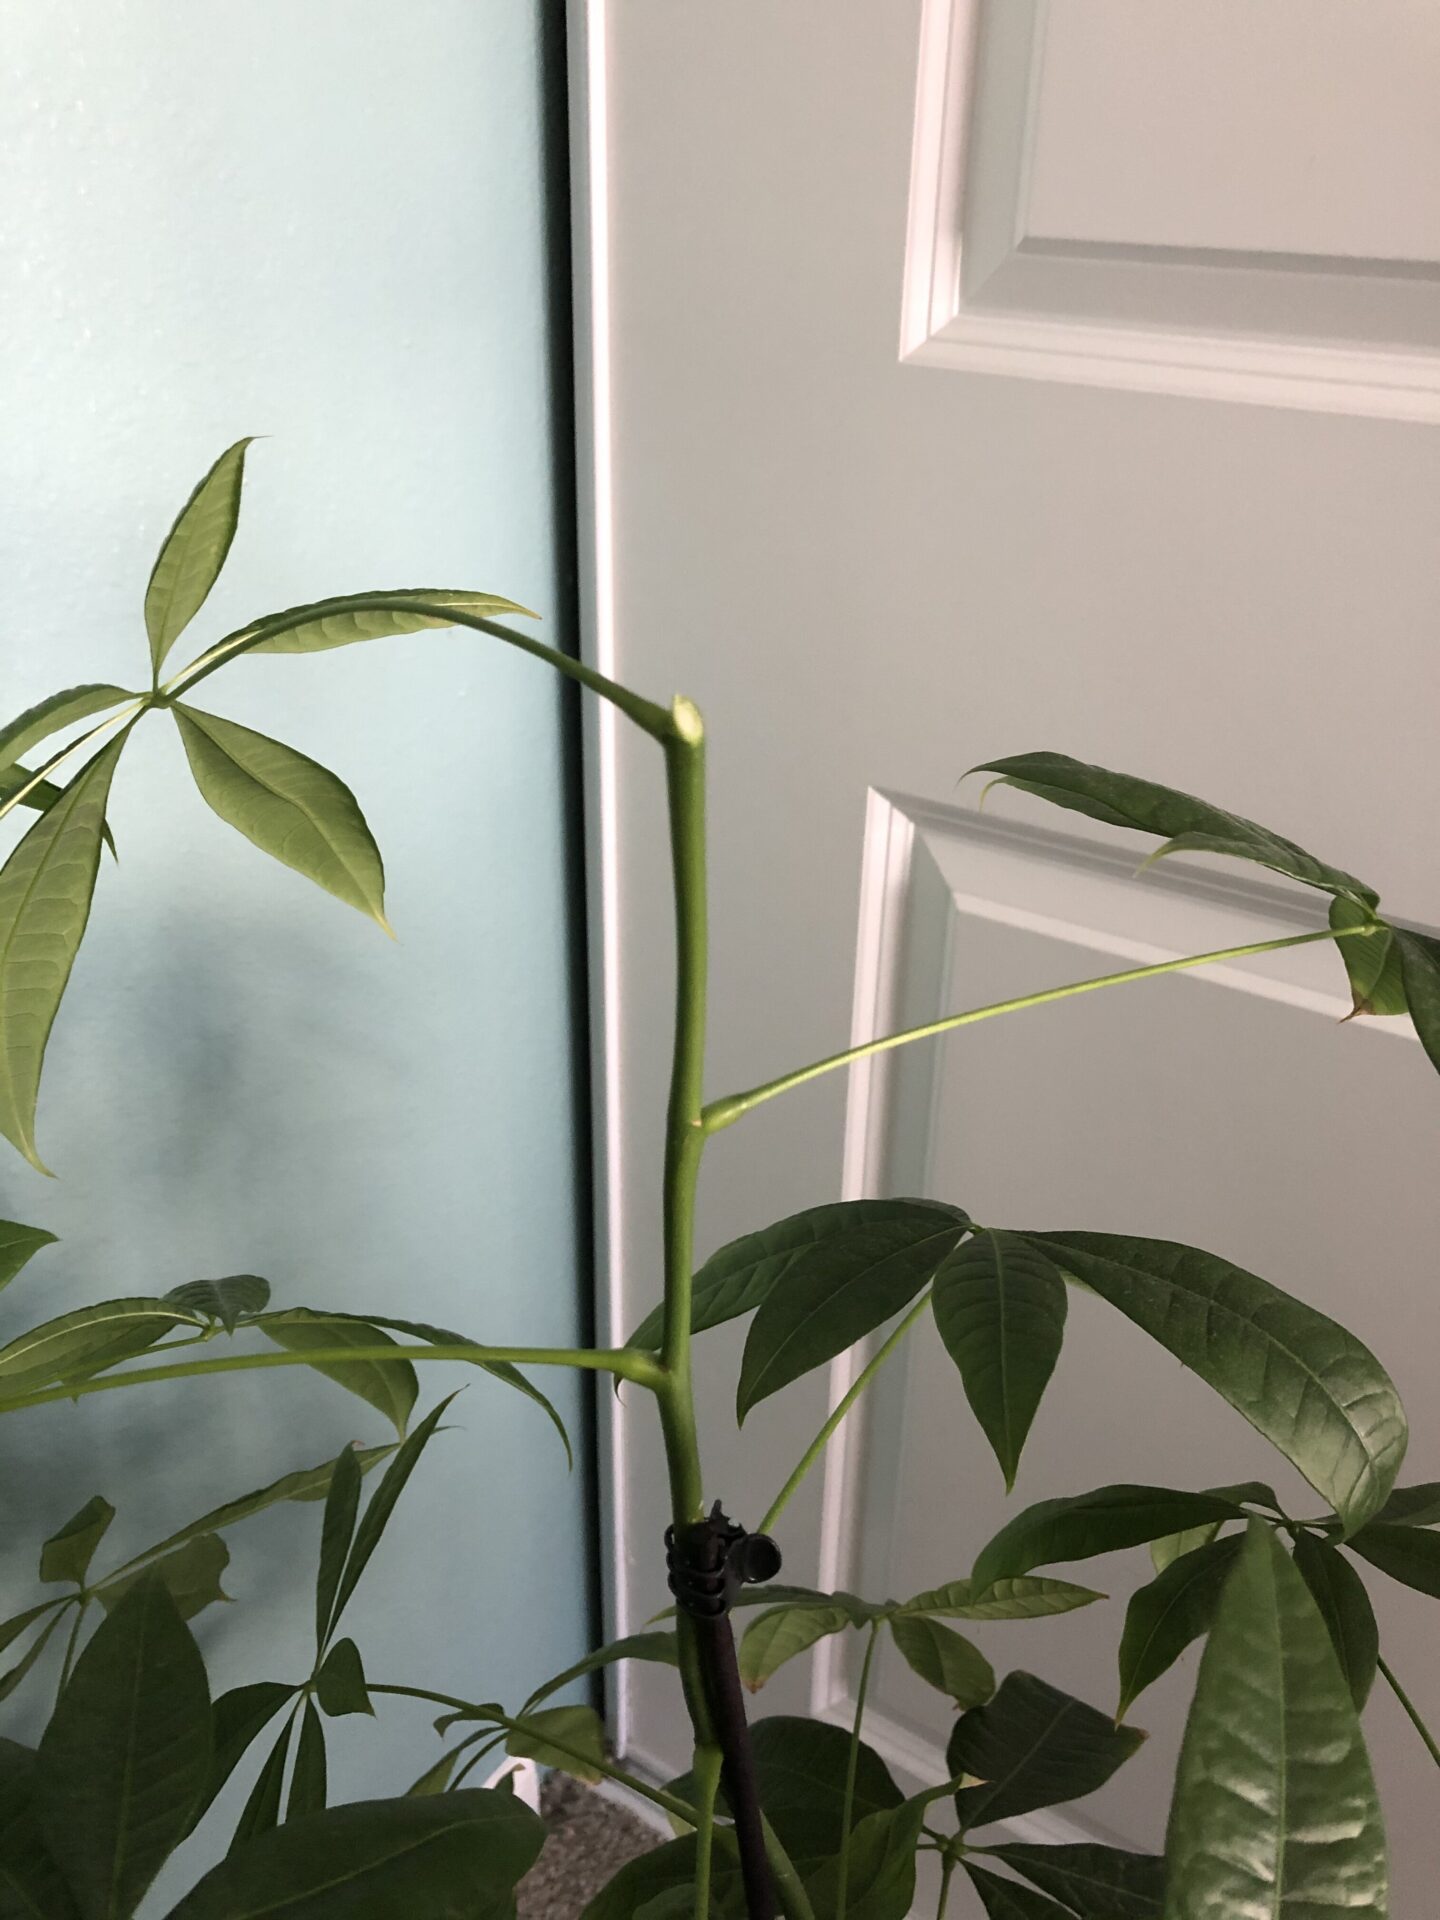
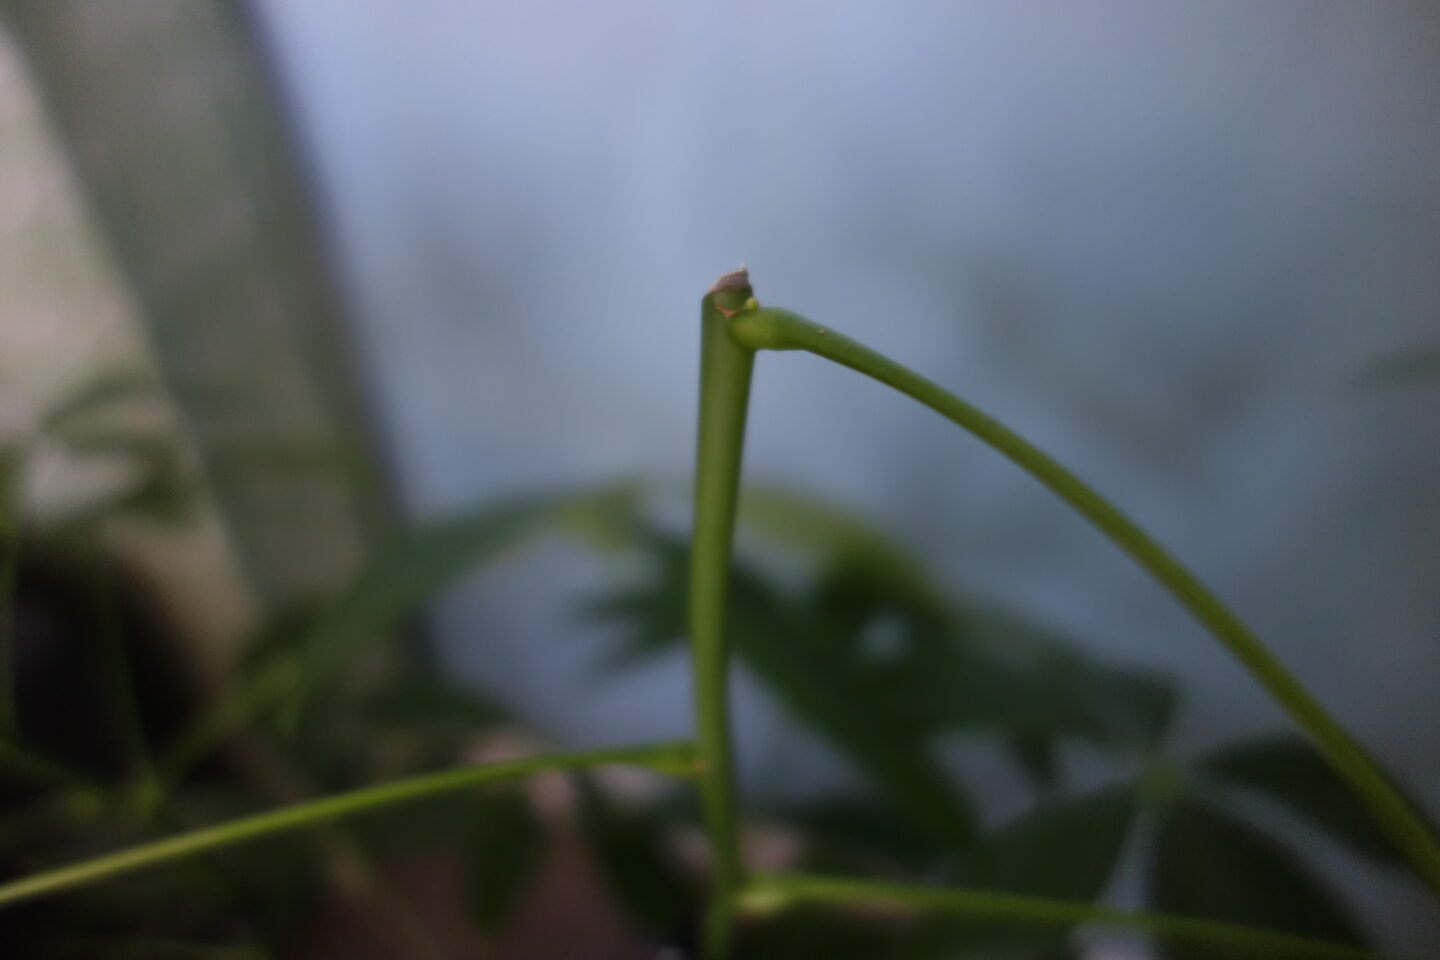
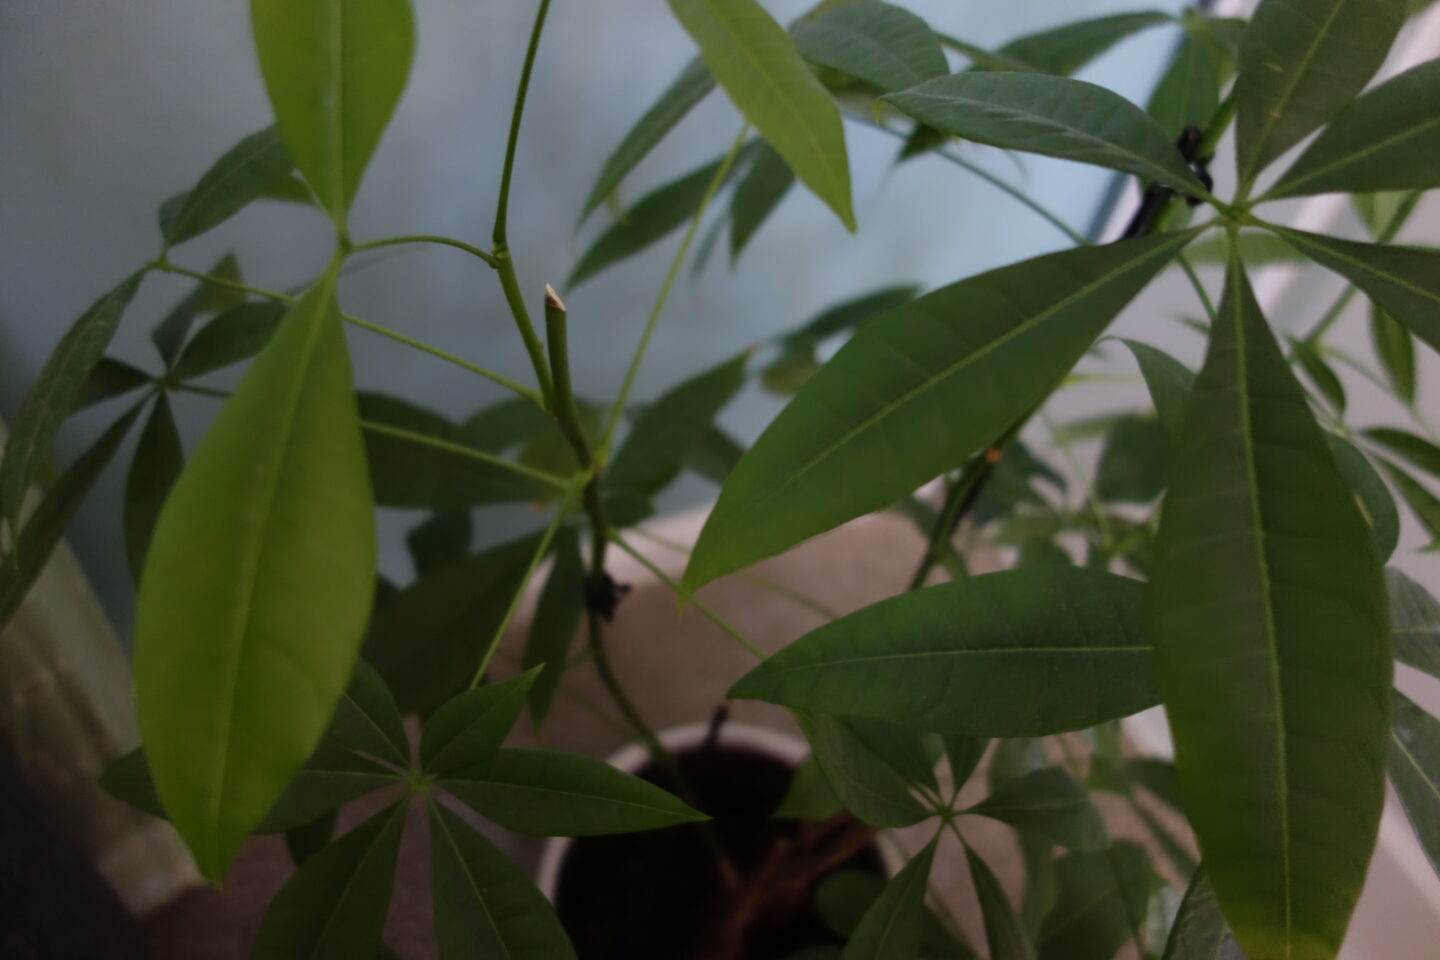
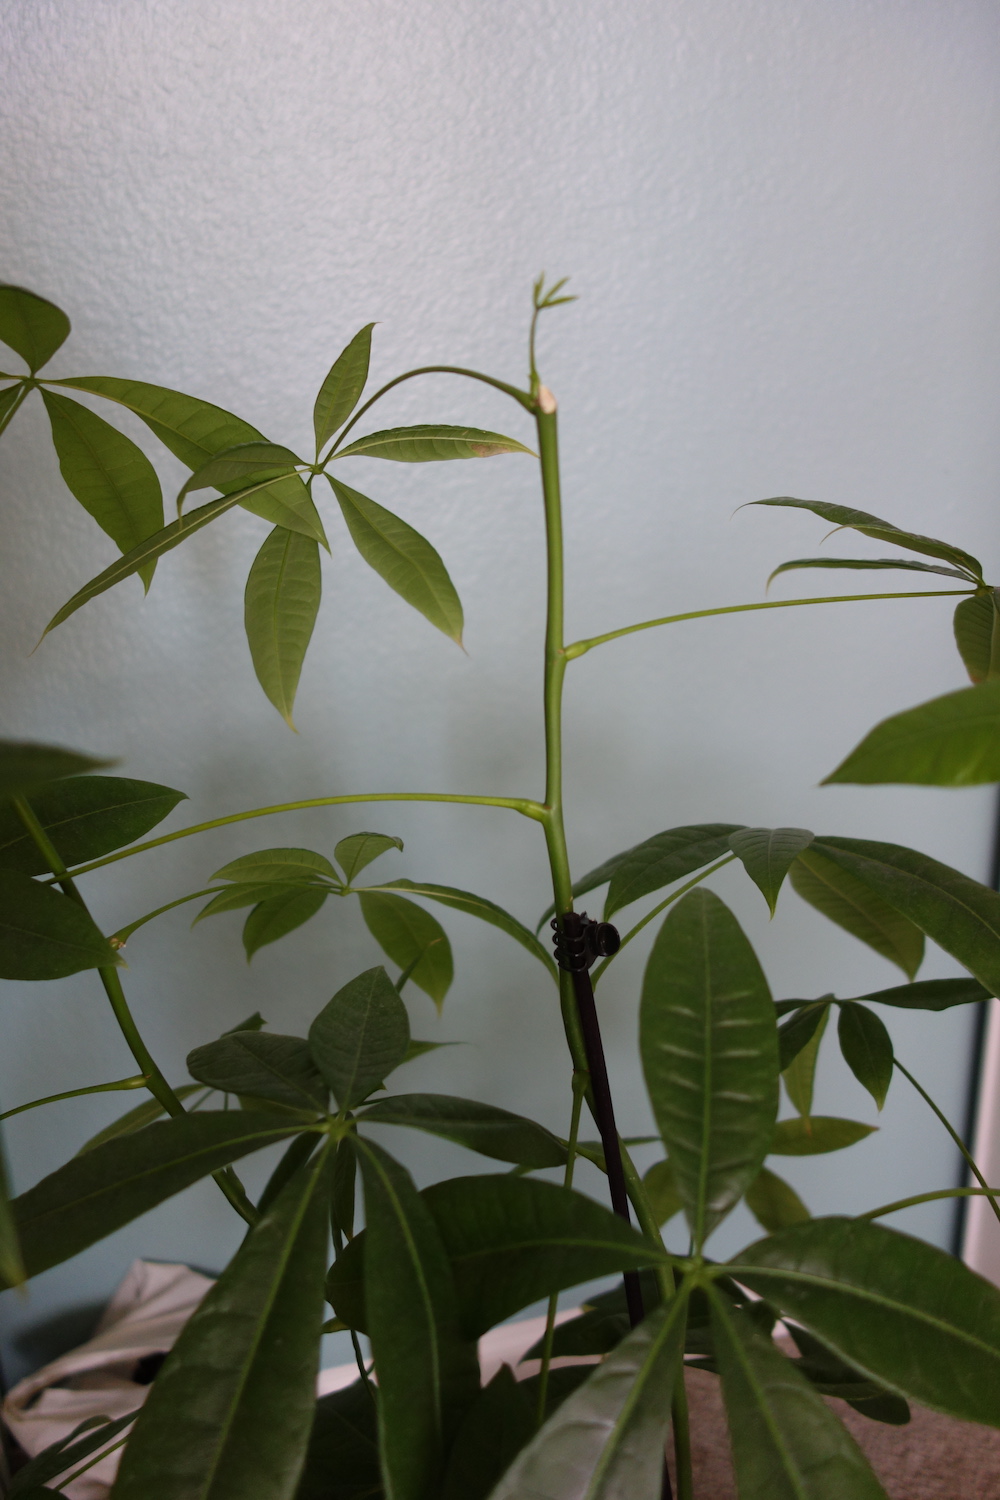
Onto my mother plant update! You can see MS2‘s new growth poking out even farther, and MS1 is growing well as before:
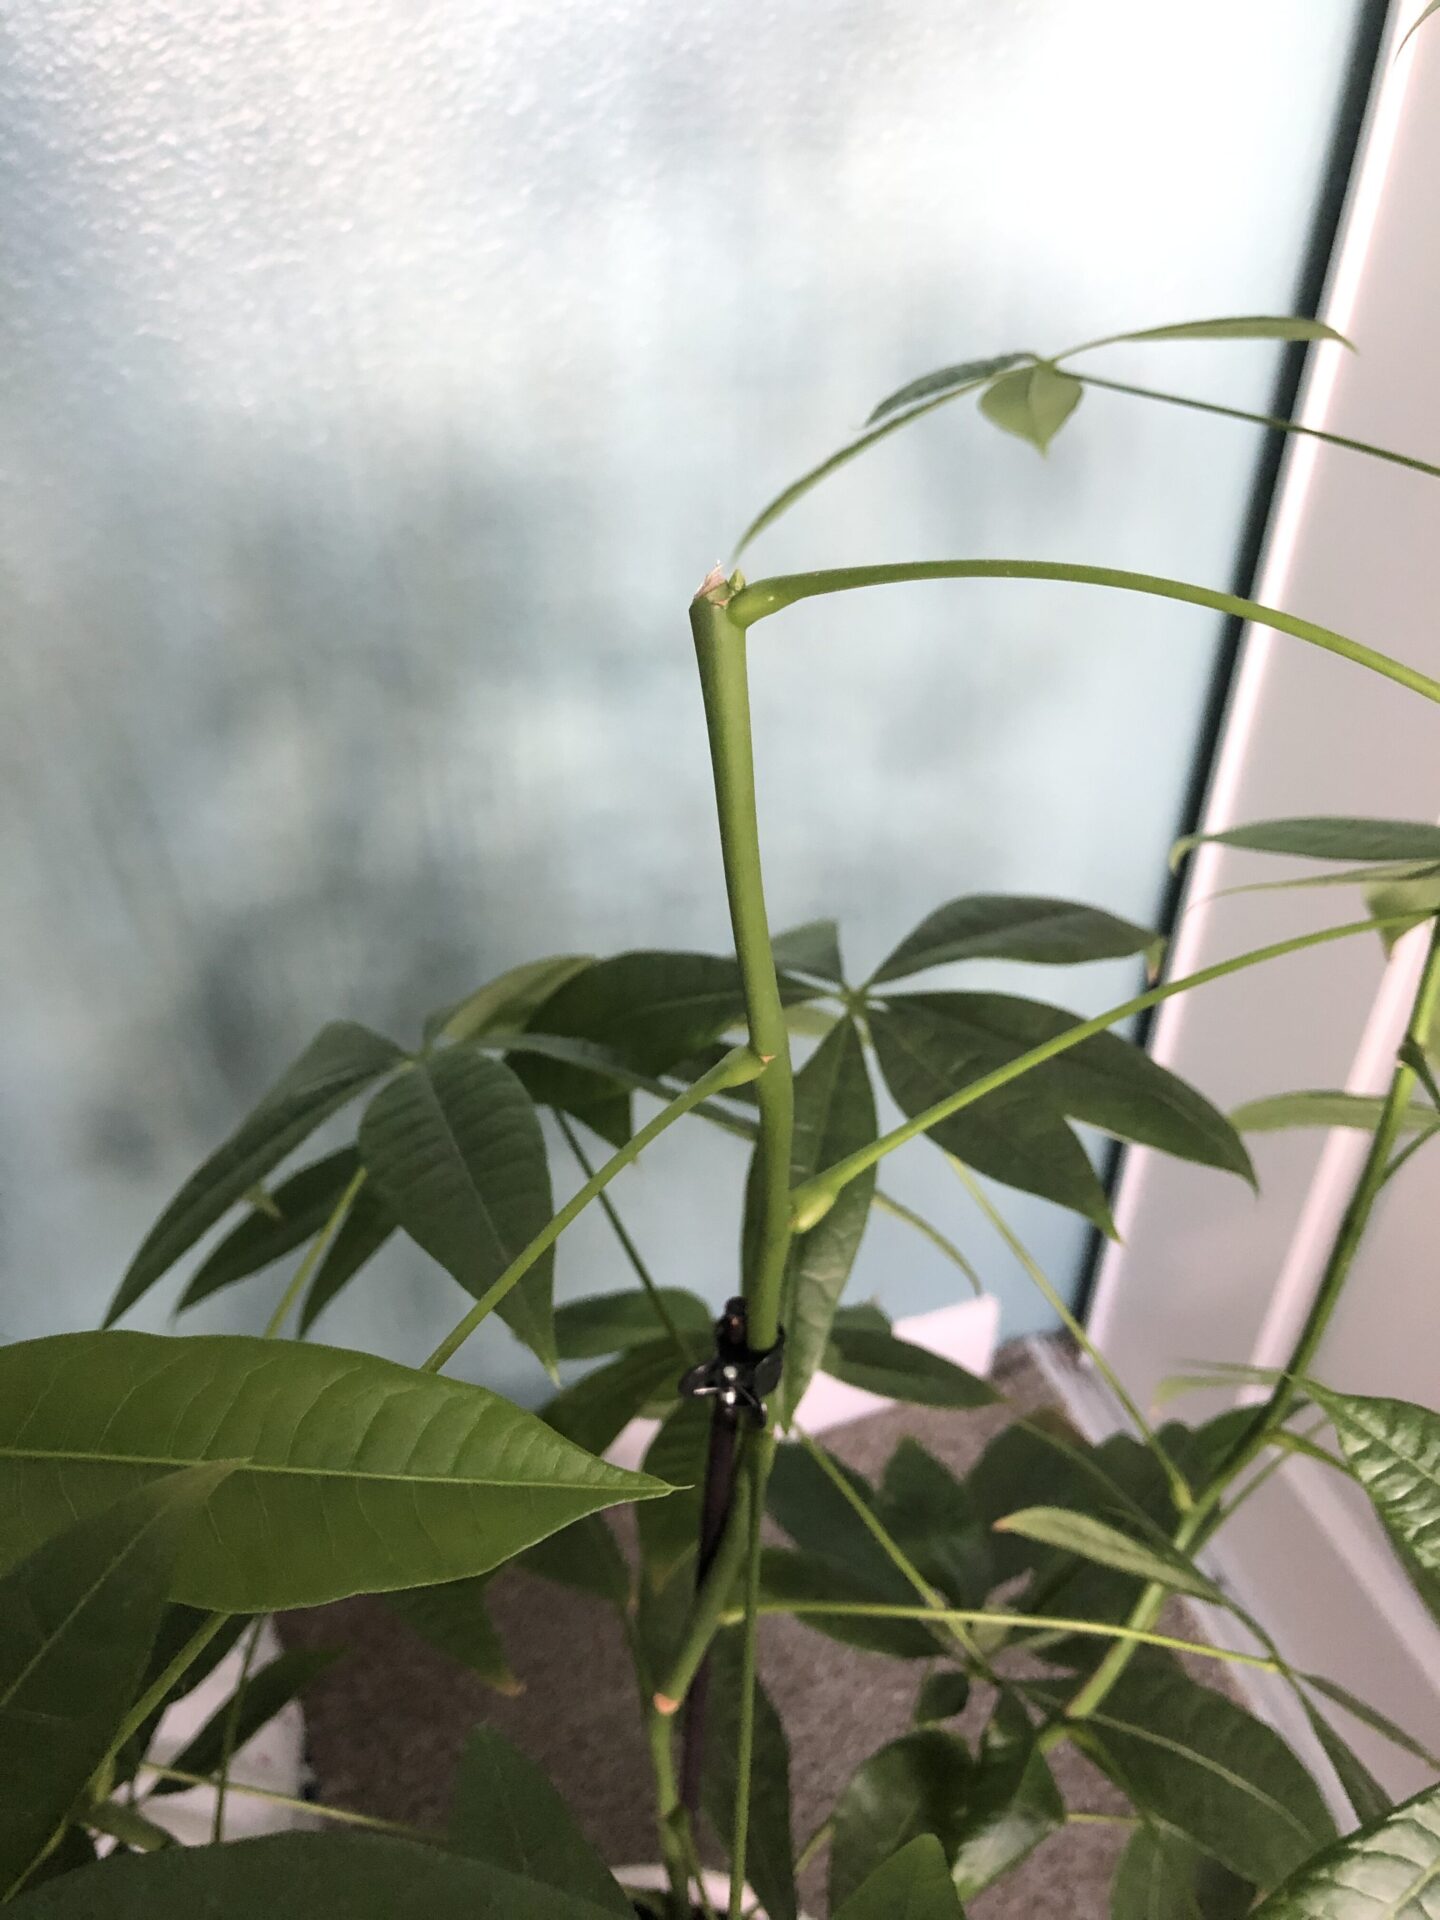

The best part, in my opinion, though, is that the pruning has provoked new stem growth at the bottom of the plant on all 3 trunks, so I’m hoping mother plant will start looking fuller moving forward.
I’ve loosely tied Trunks 1 & 2 together (from Stems 1 and 2) – they’re actually the outermost trunks – to try and encourage the new stems to grow out between the gaps, but we’ll see how it goes.
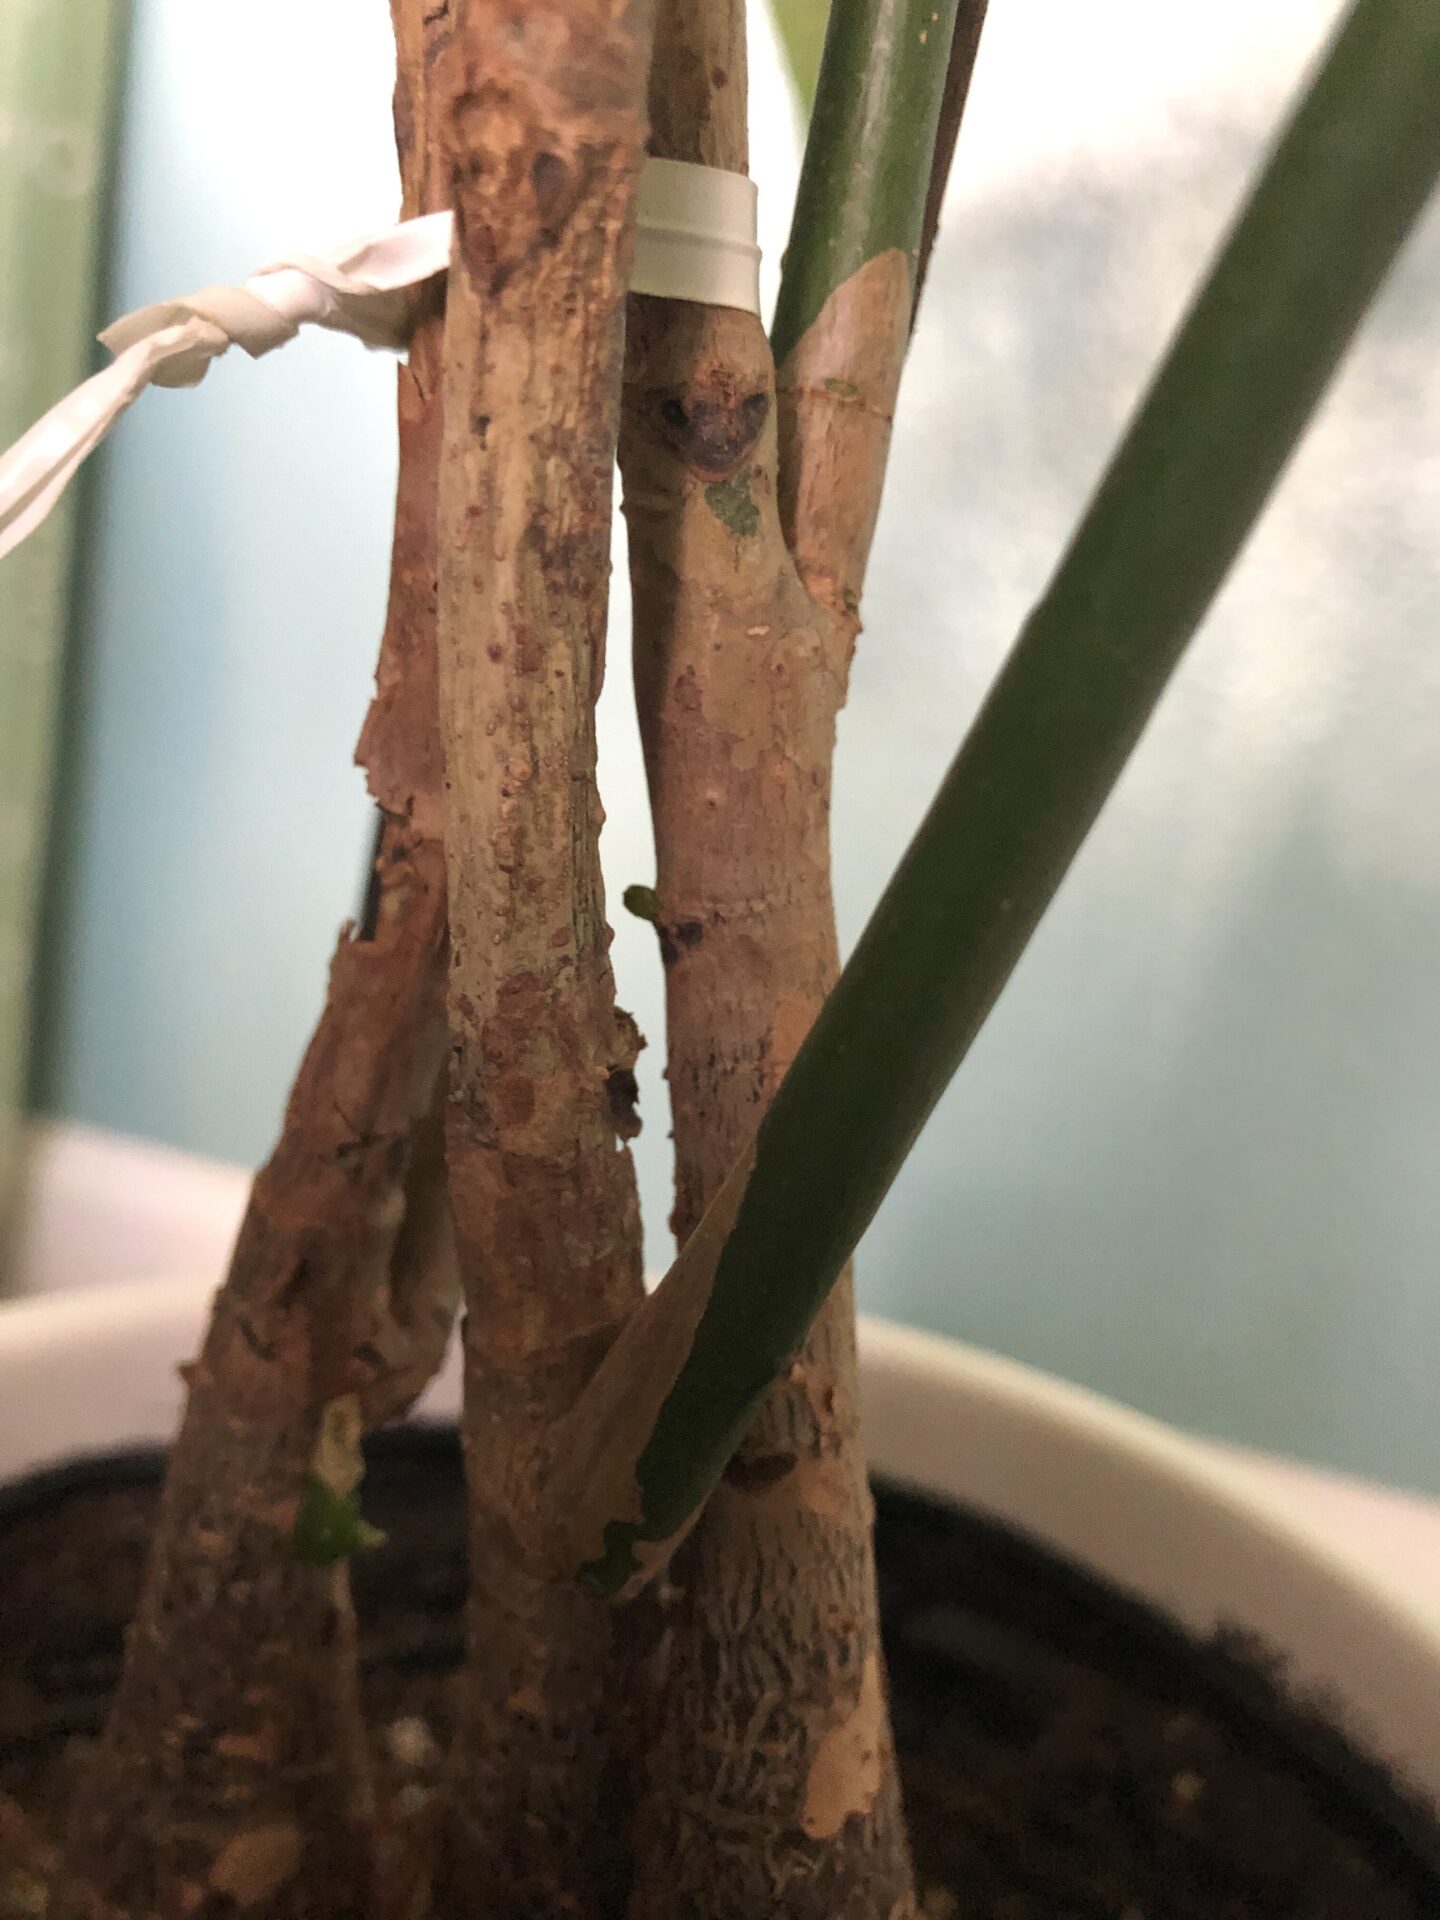


Can you spot the new growth on the centre trunk above? I’m going to call it Trunk 3 (T3). It’s the only one that I haven’t cut off a stem from to propagate yet, but I’m sure it’ll get its turn eventually :)
2nd July
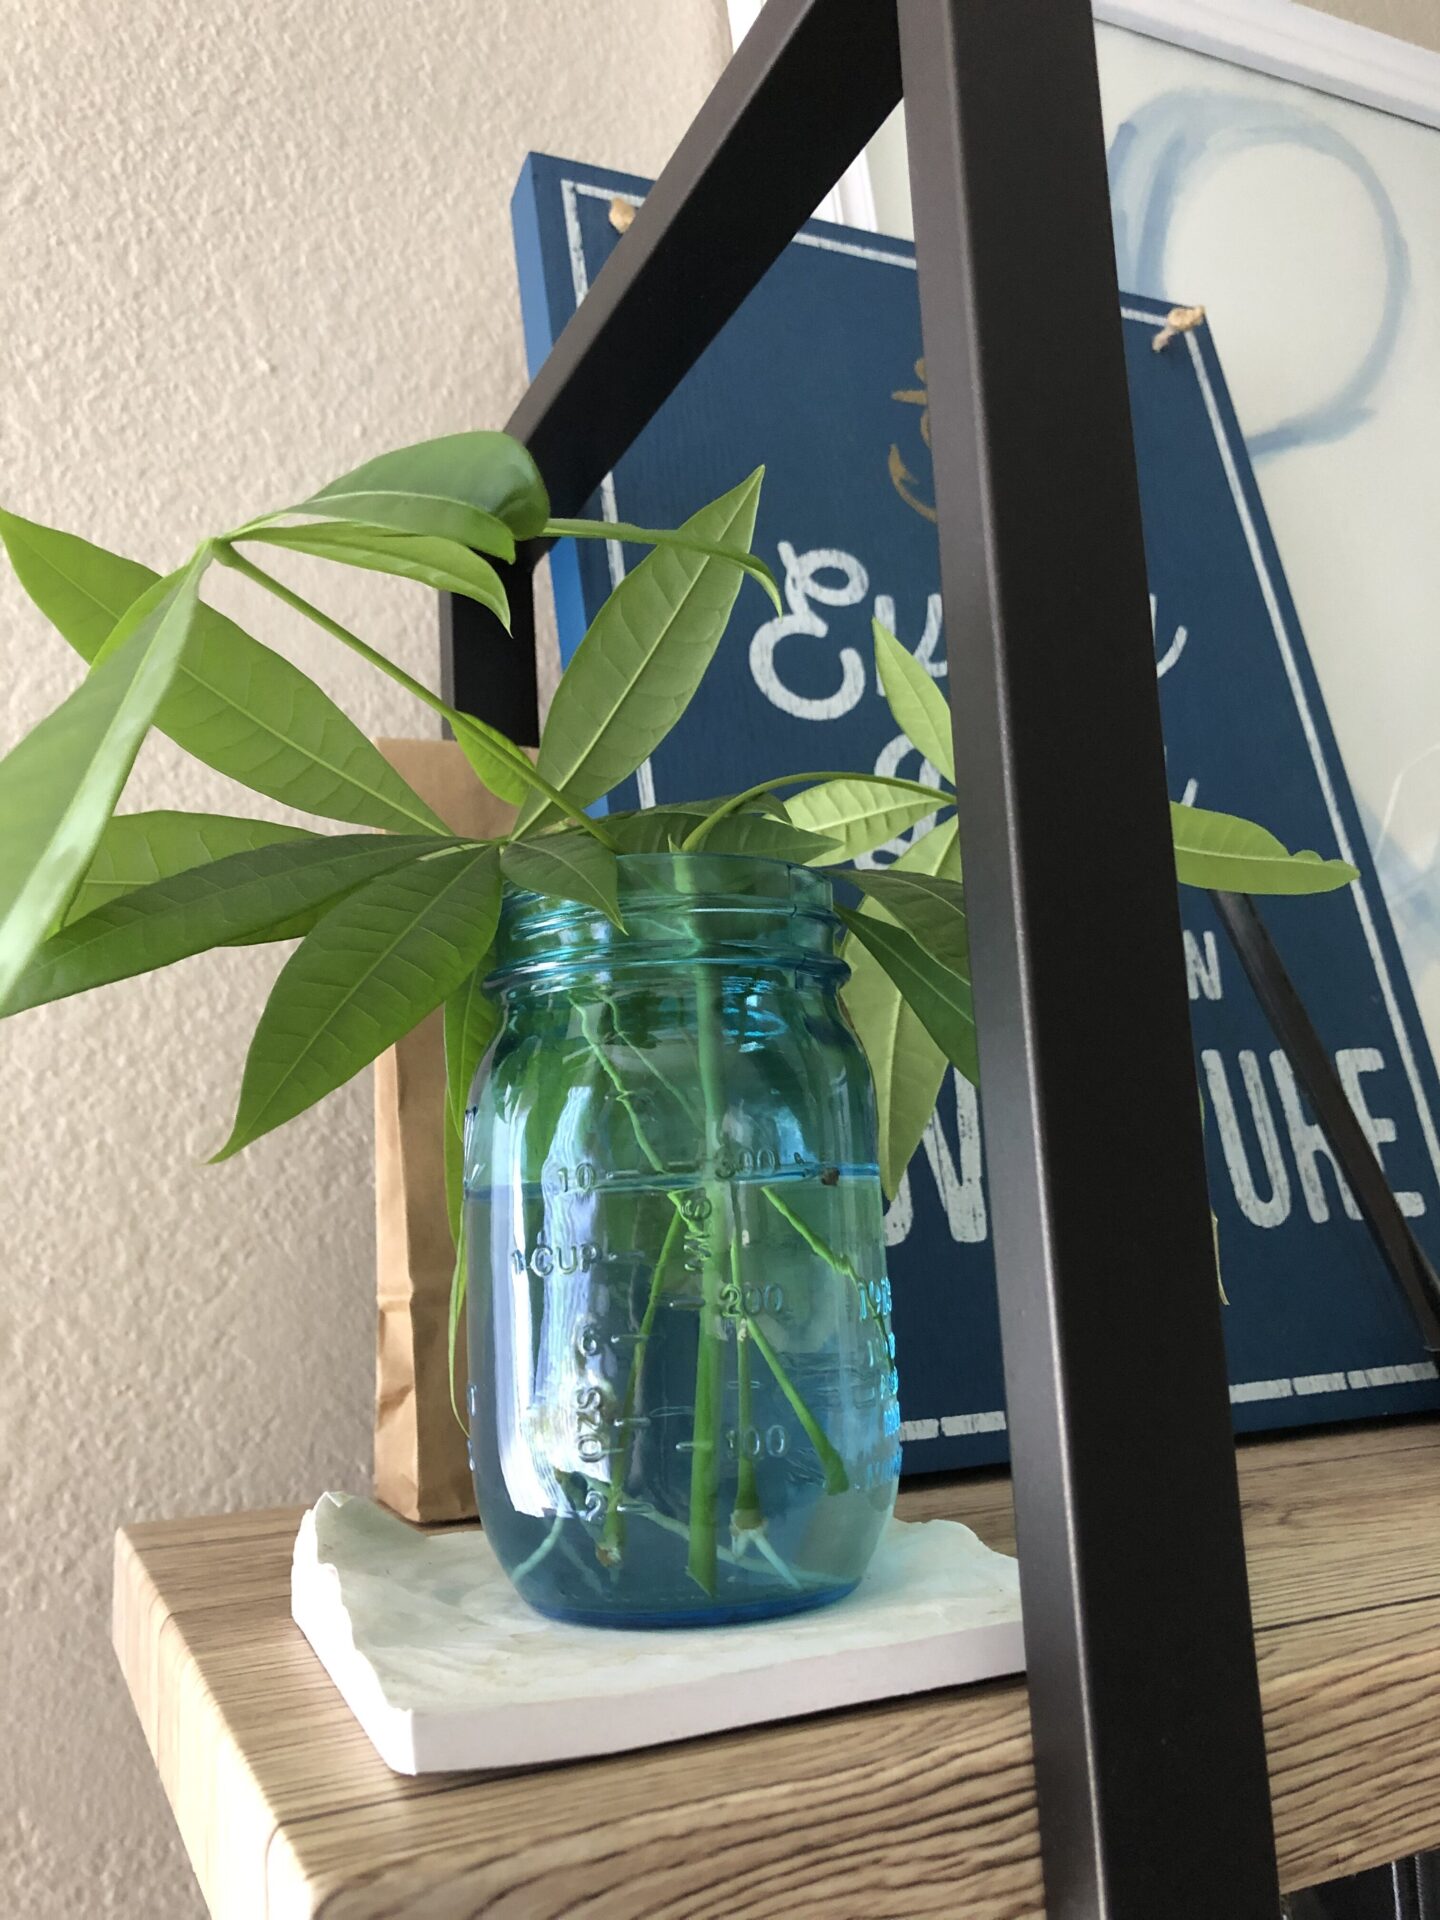
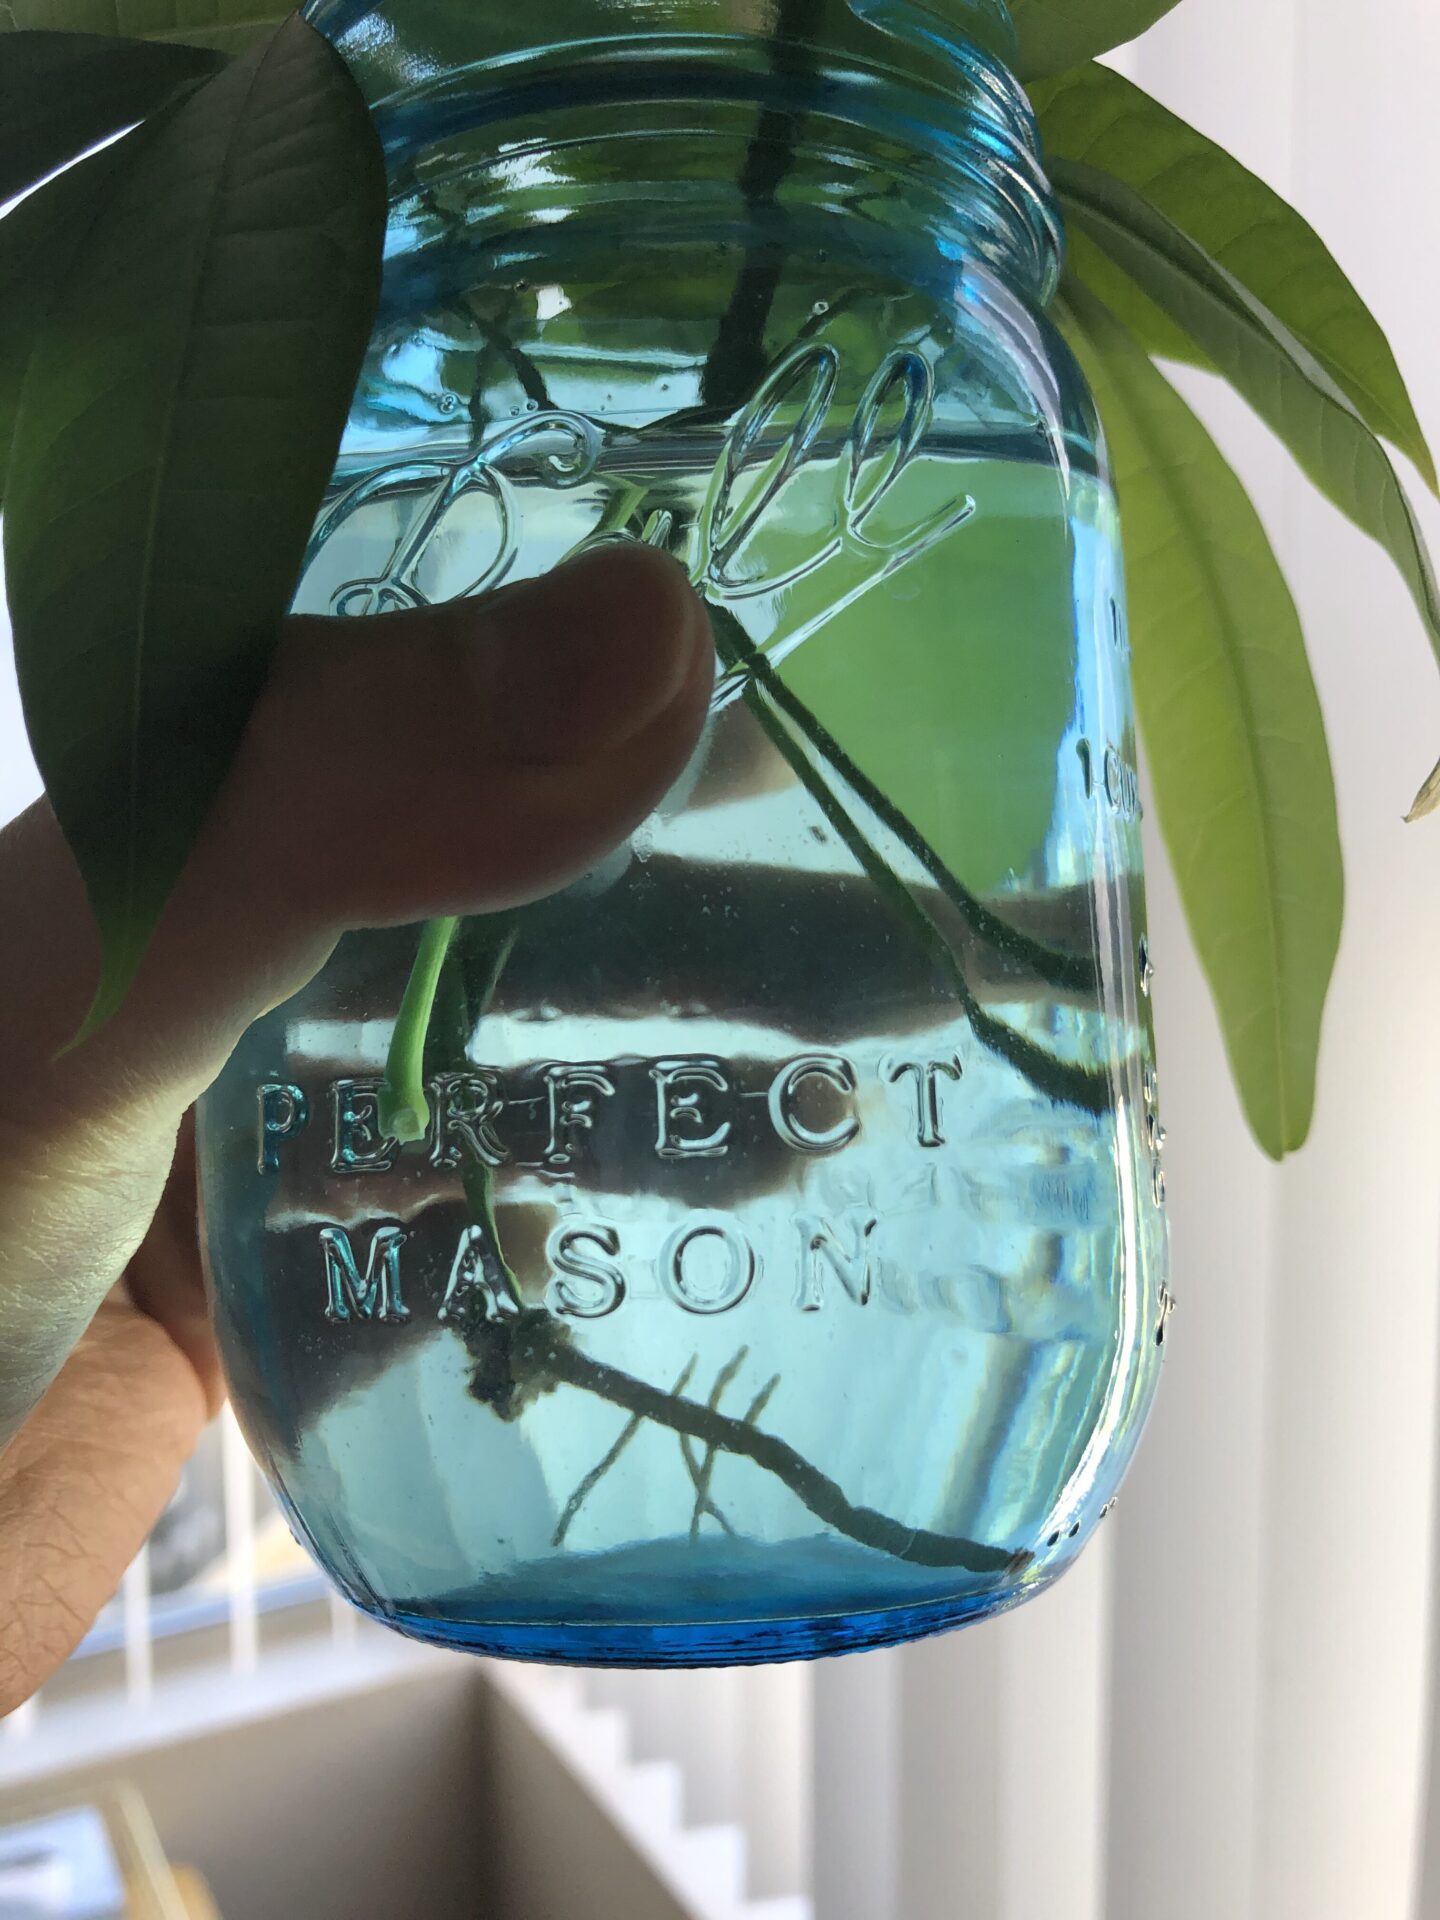
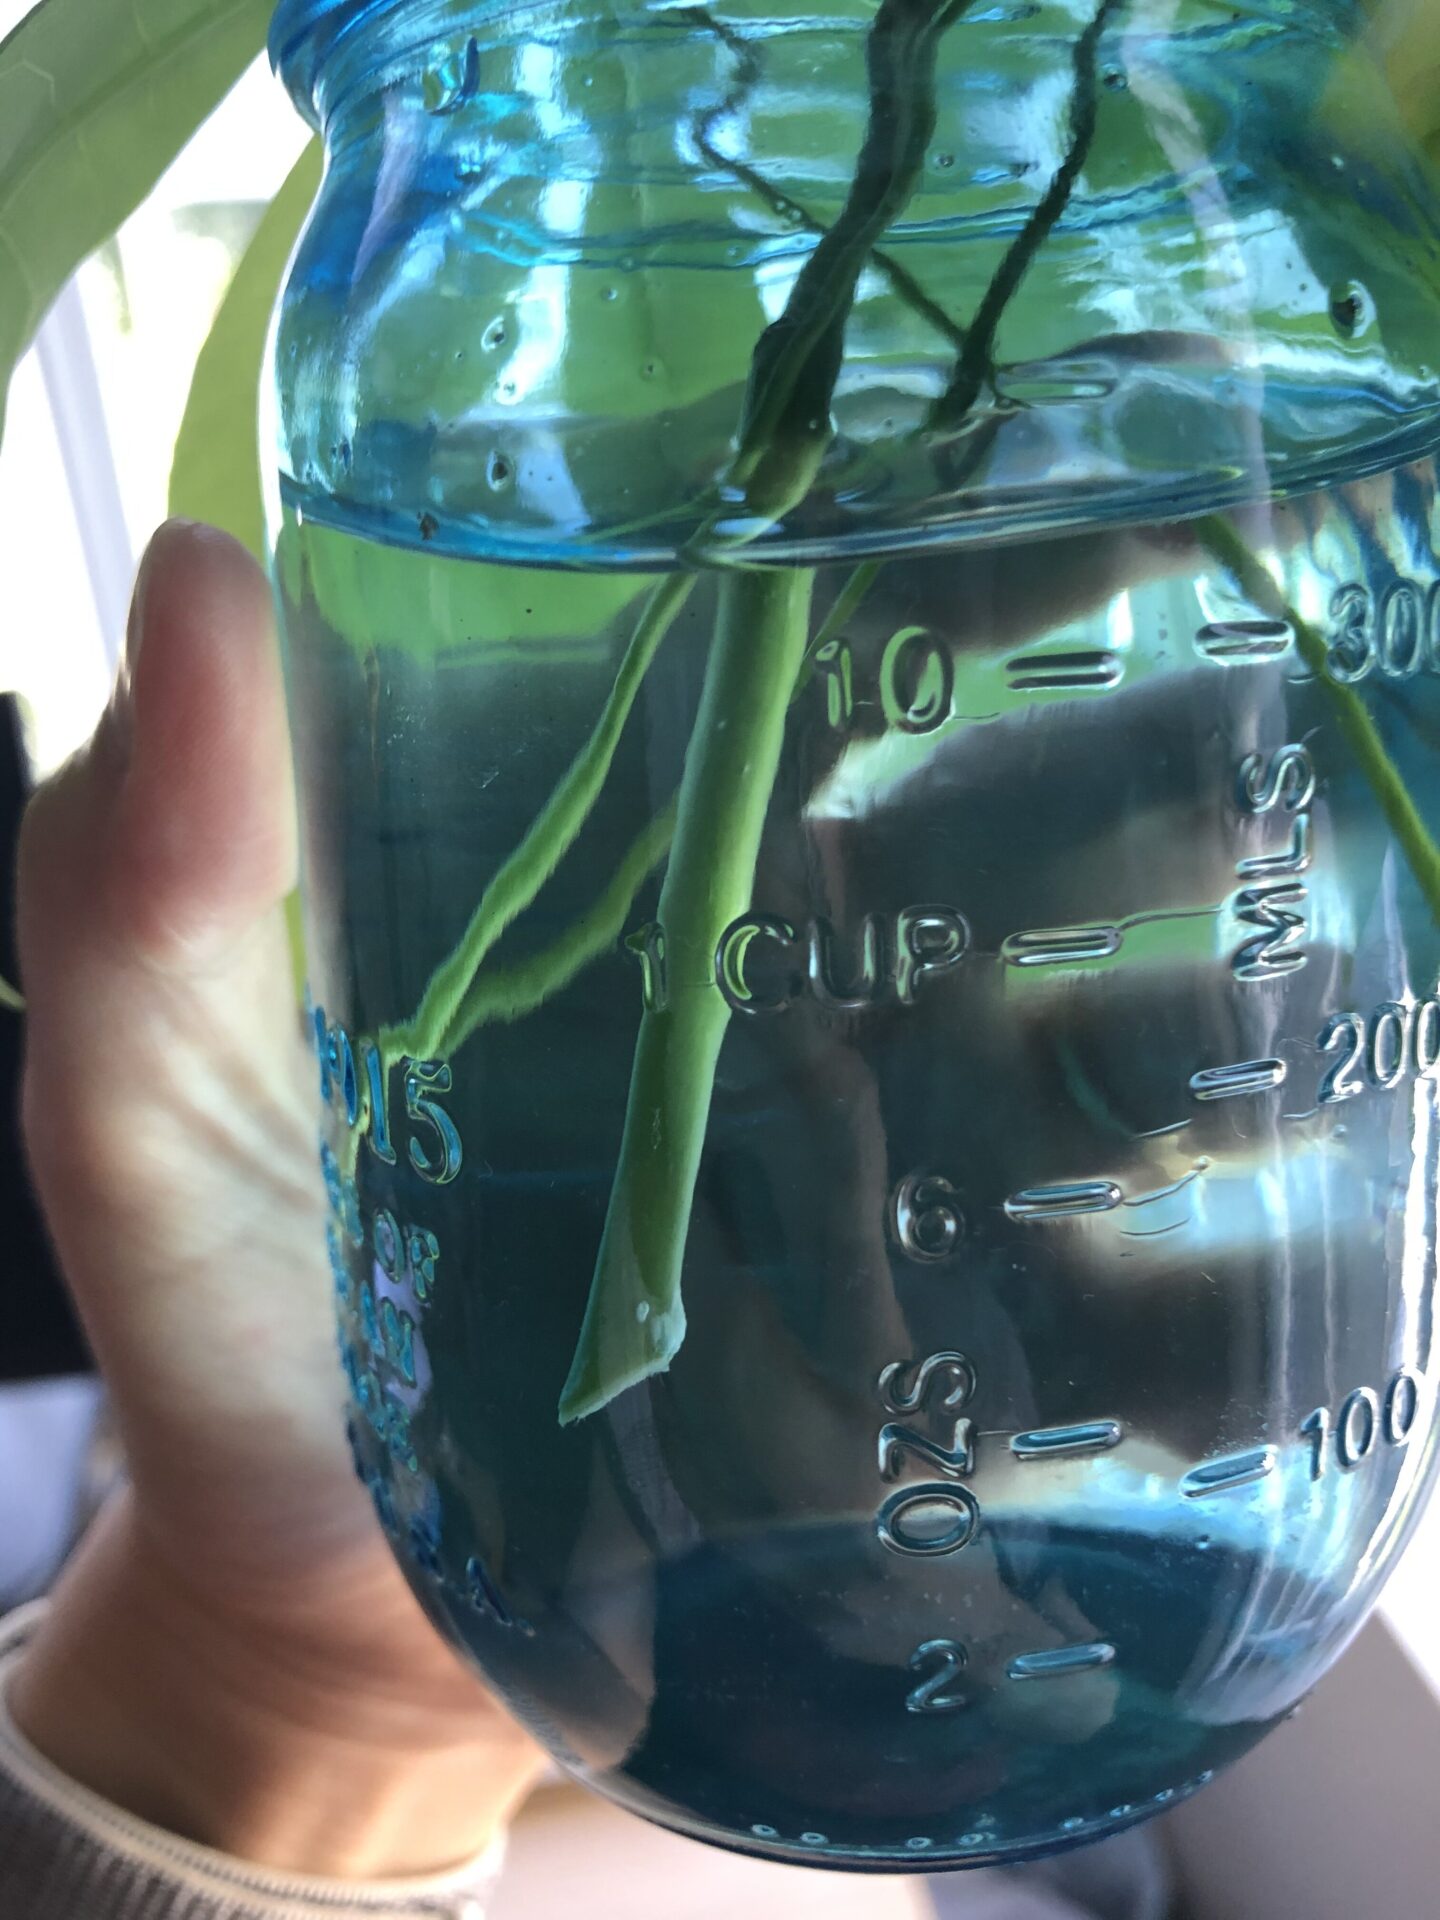
Exciting update today, there’s quite a bit so bear with me. First thing’s first: an update on everyone in the jar:
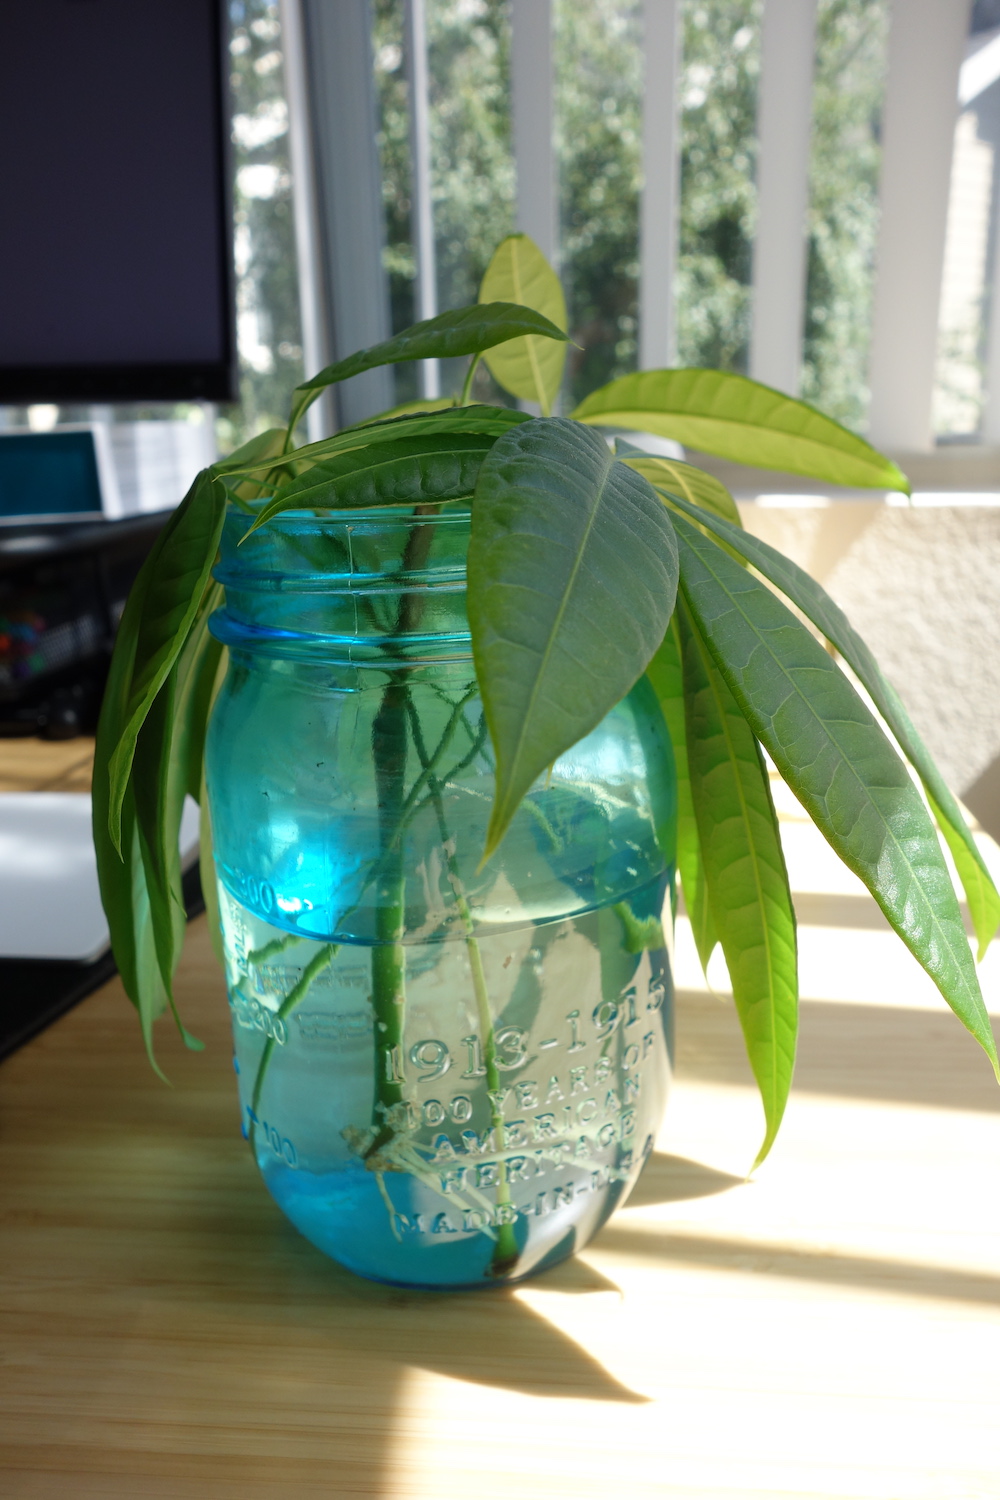
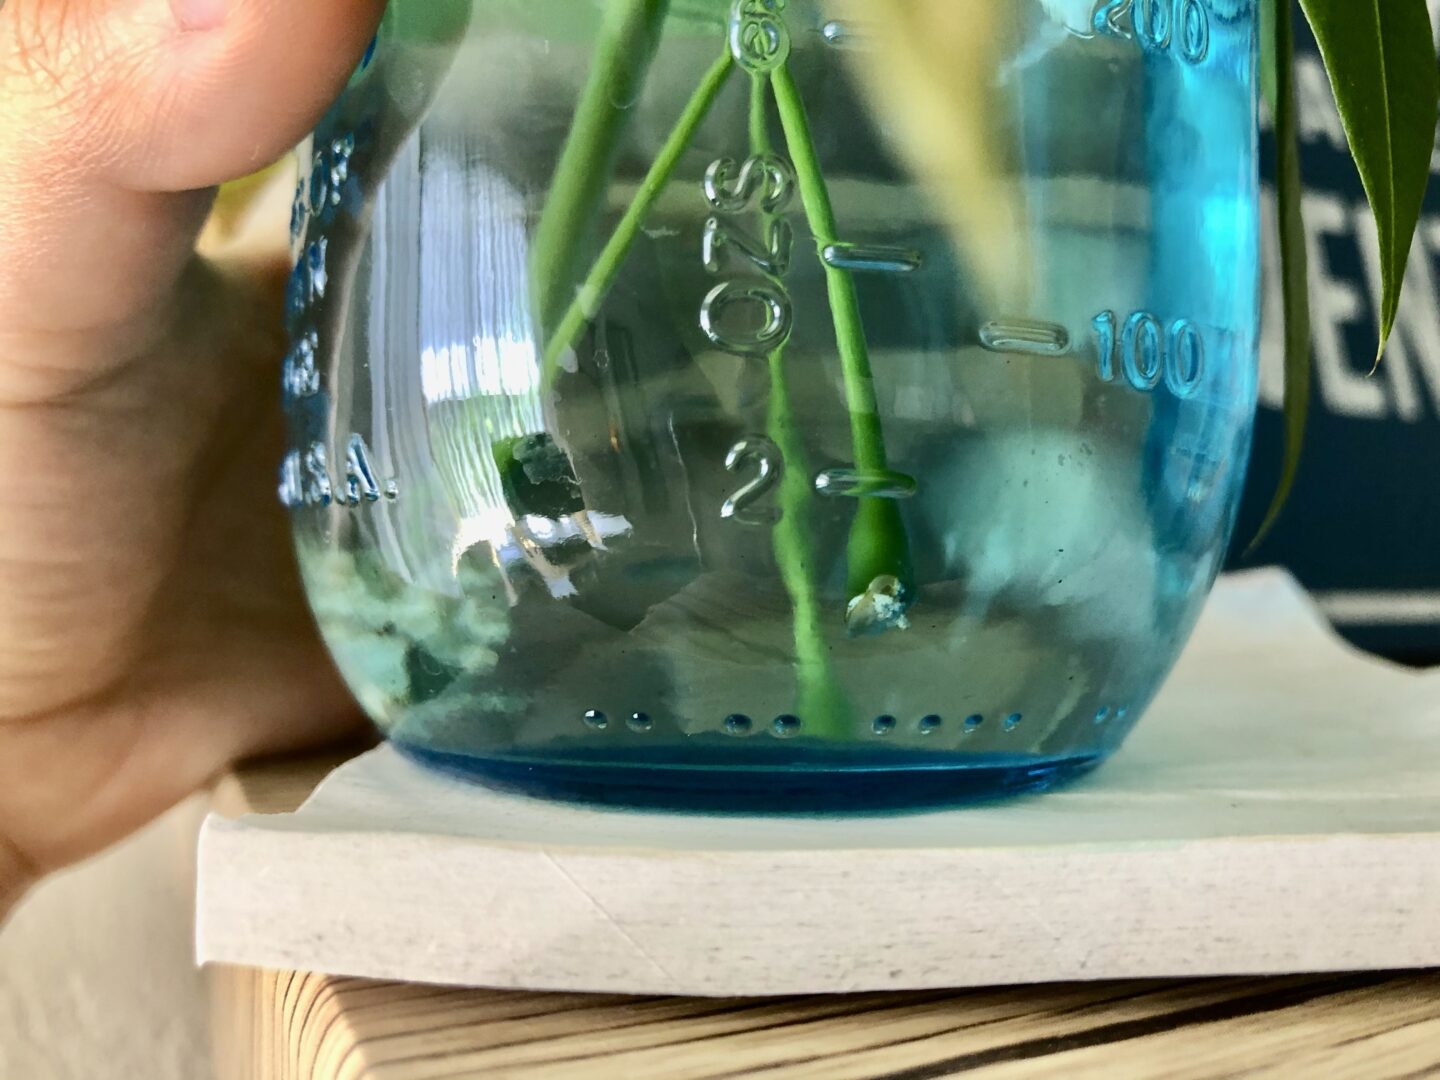
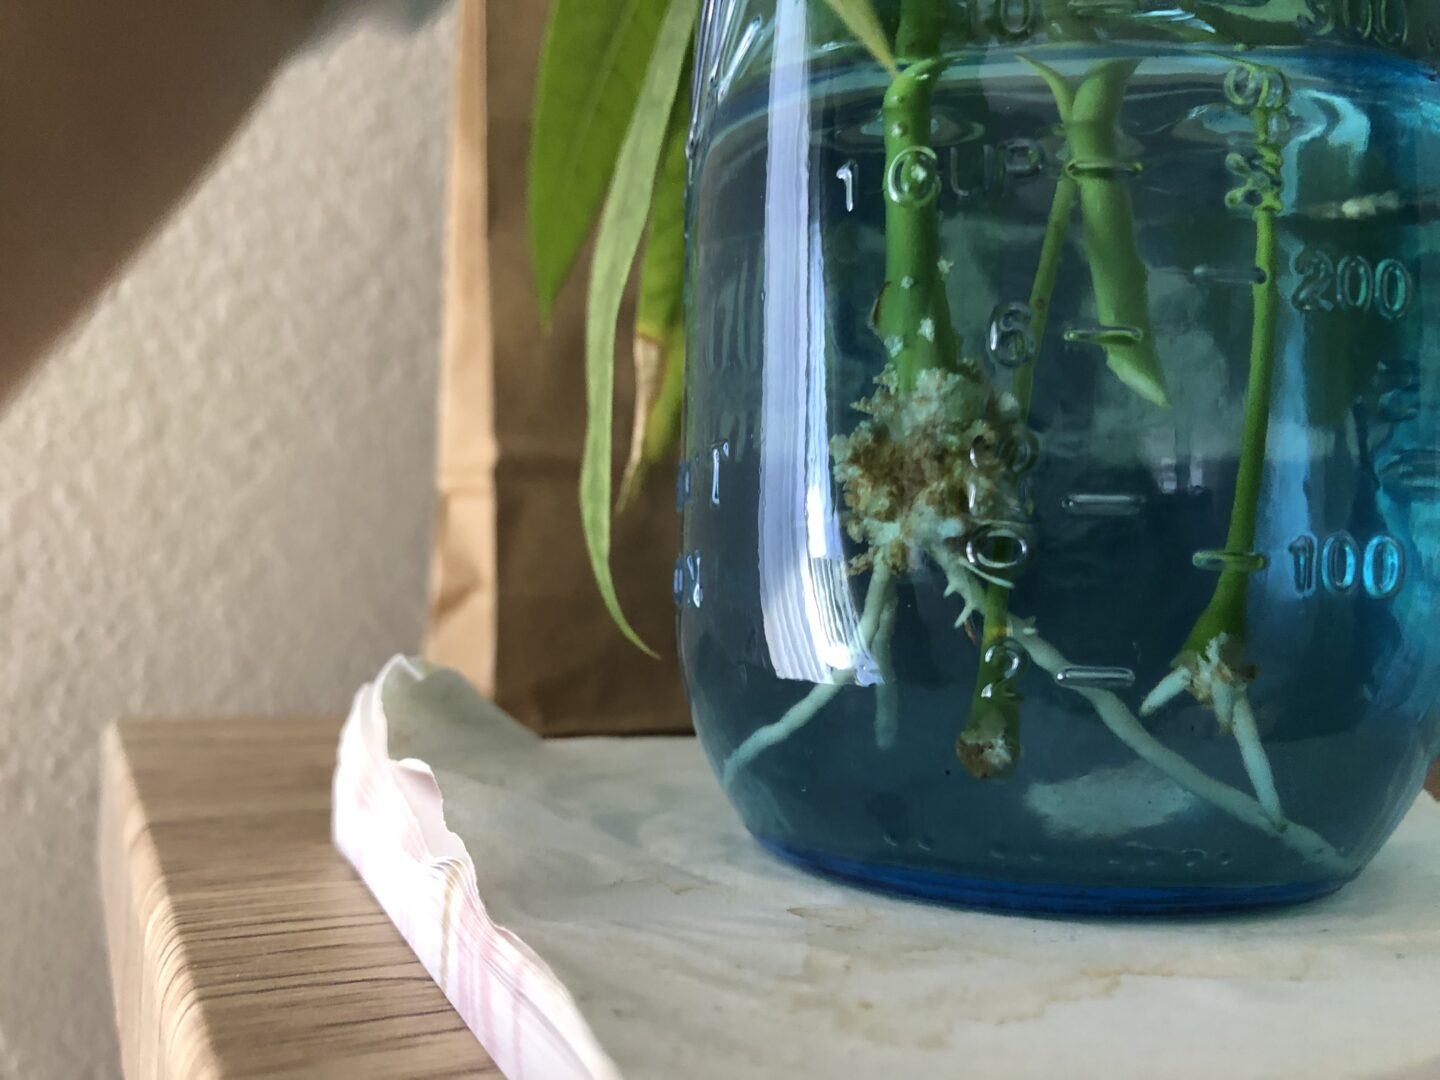
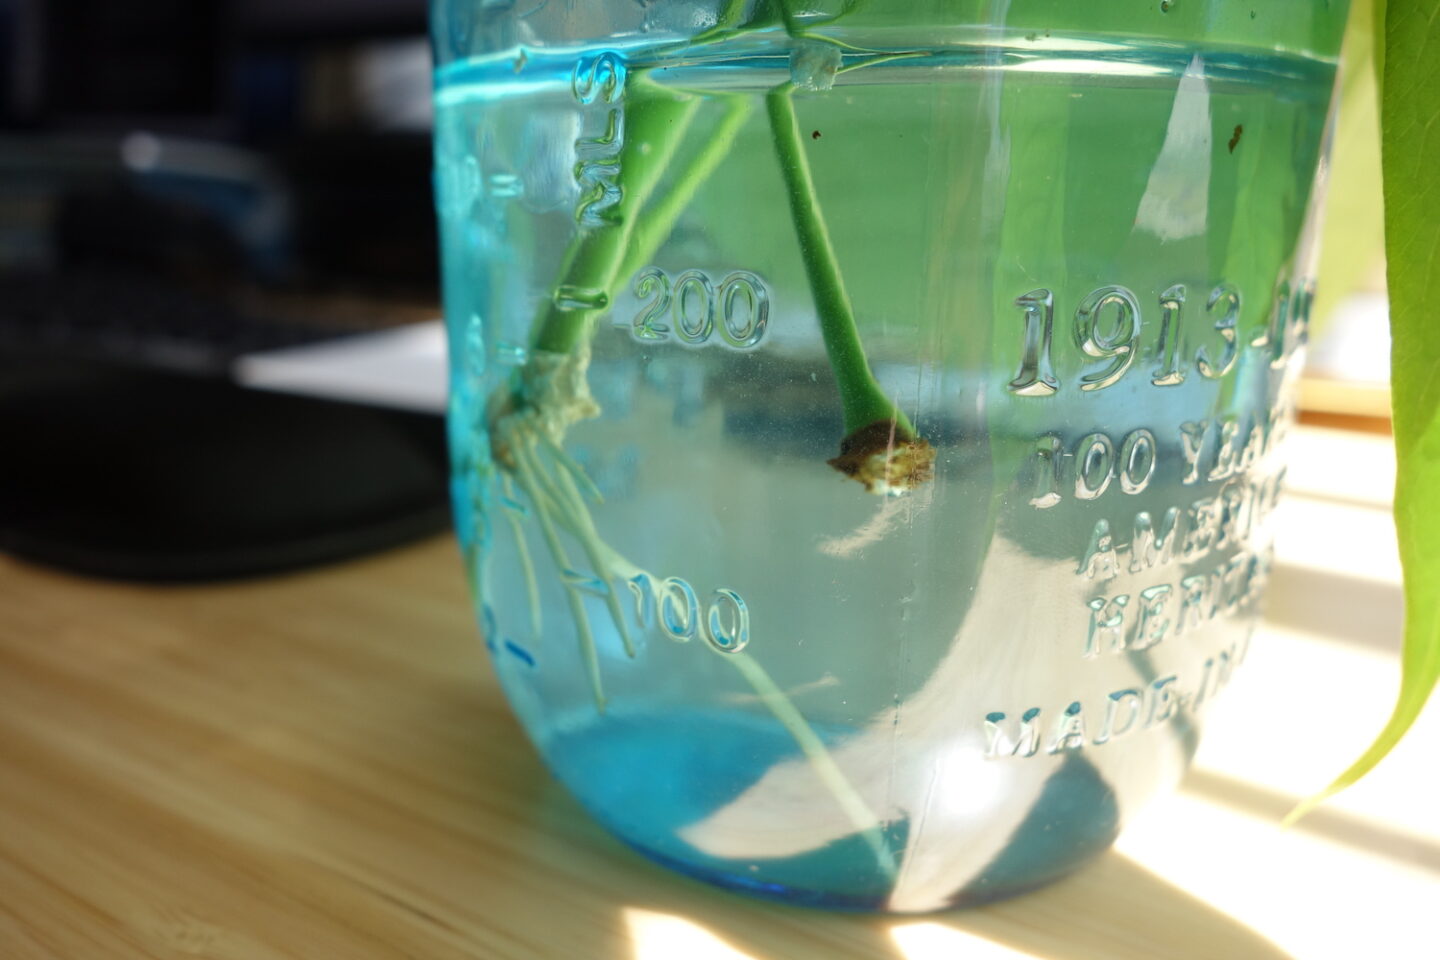
I’m astonished at how quickly Stem2 grew roots and how long the roots have already grown! Literally 2 weeks ago there was barely anything there. Now it looks like this with one of the roots extending almost the entire diameter of the jar, and at the top, it’s started to sprout two new leaf nodes:
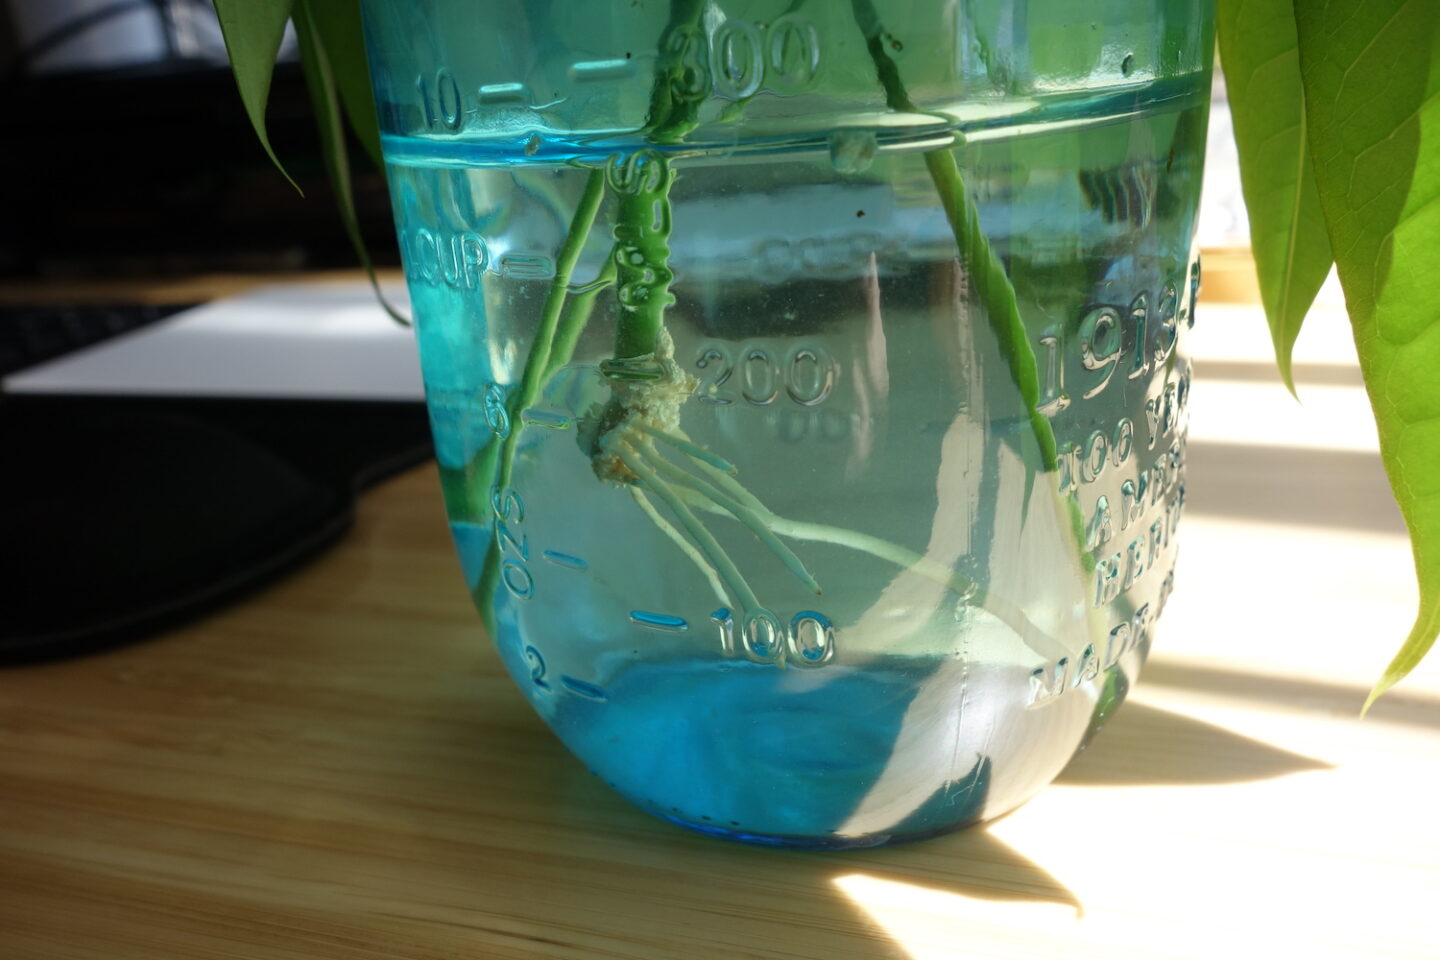

I may have to plant this one soon as well! I’ll let it grow out a little more first, but it won’t be long now I reckon. Wow, good for Stem2, for I really thought I’d accidentally killed it.
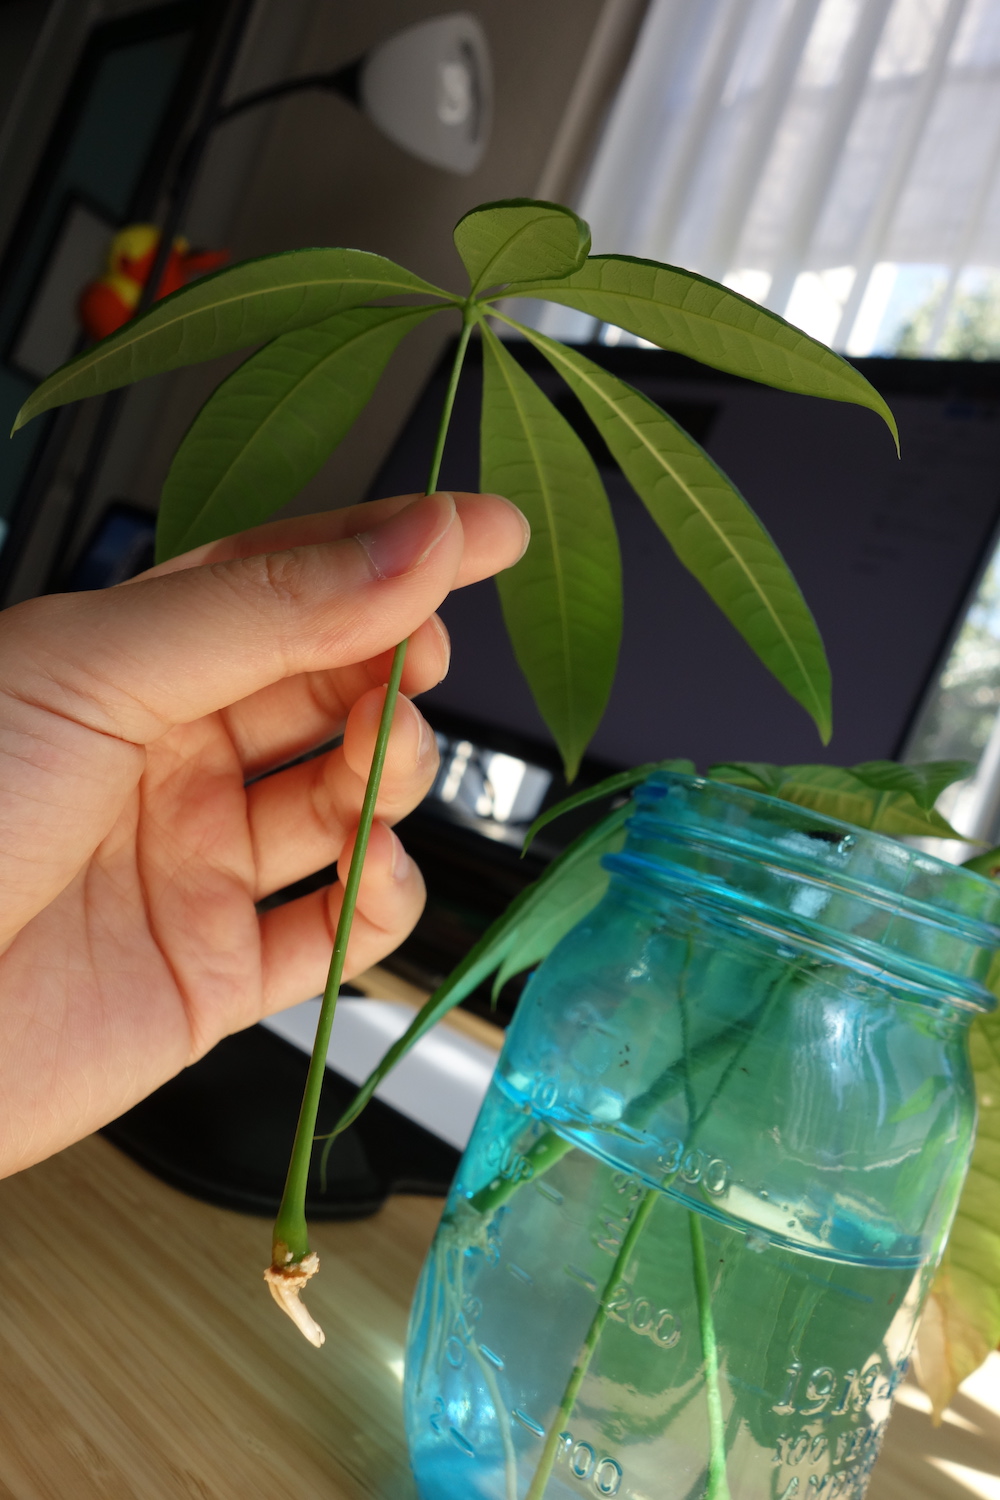
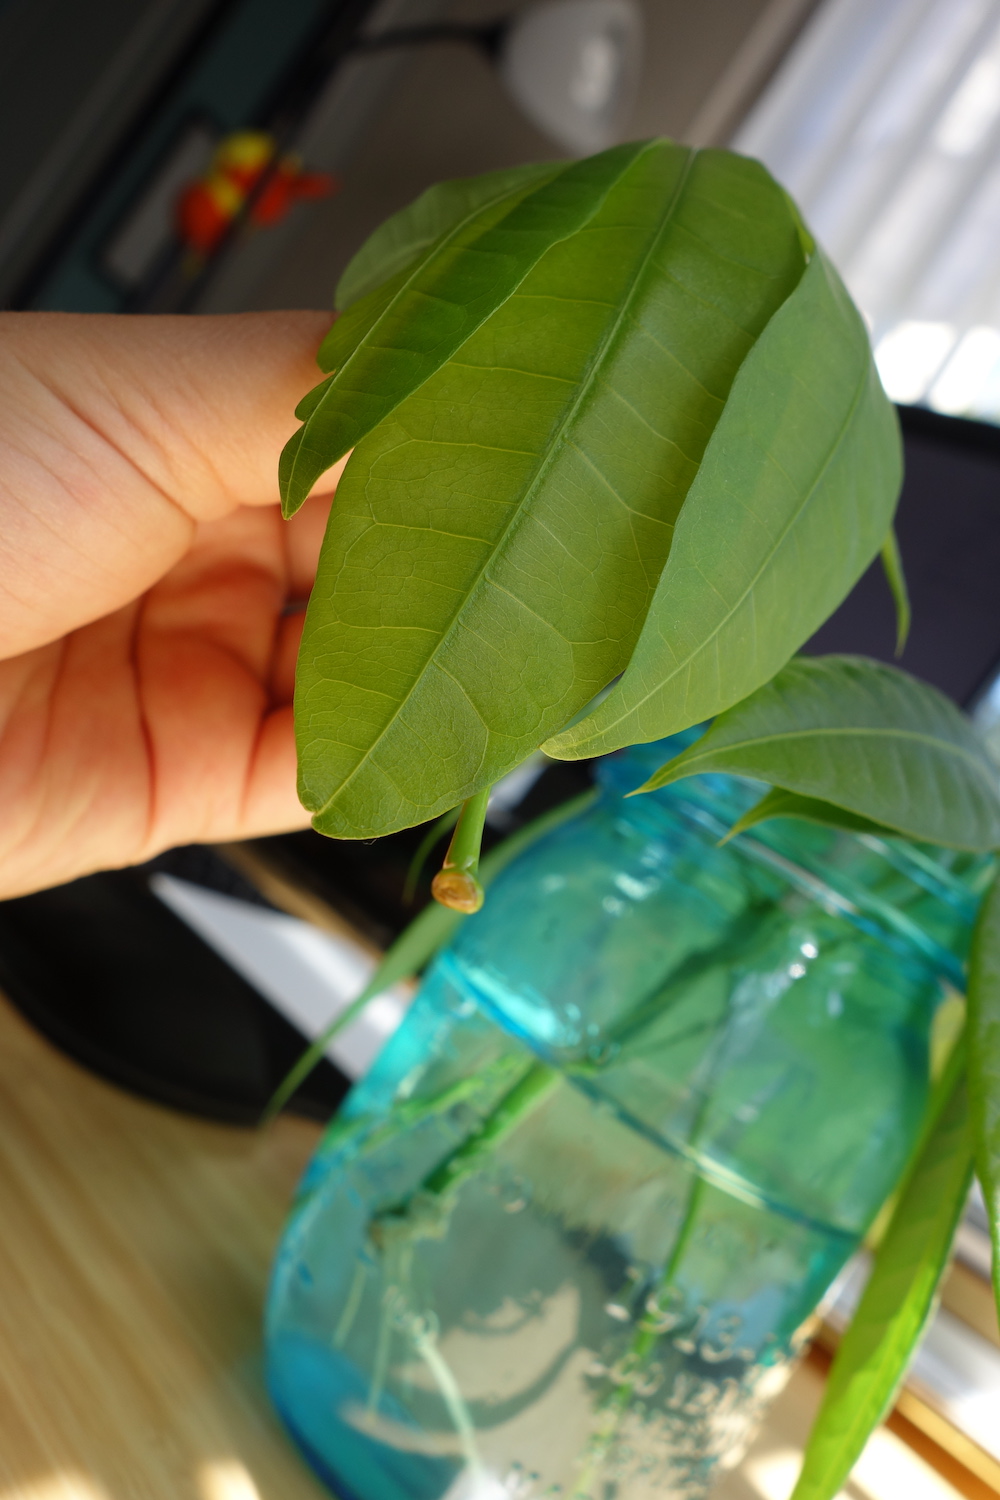
Below, S2LnA (left) has also grown little buck-teeth roots hehe, it’s so cute! S2LnB (right), however hasn’t really started growing visible roots yet, but if you look on its stem, you can start to see the little white bits forming, which is usually where roots start to come out:
It was today that I realised I apparently can’t count. There’s another leaf node that I’d taken from Stem2…
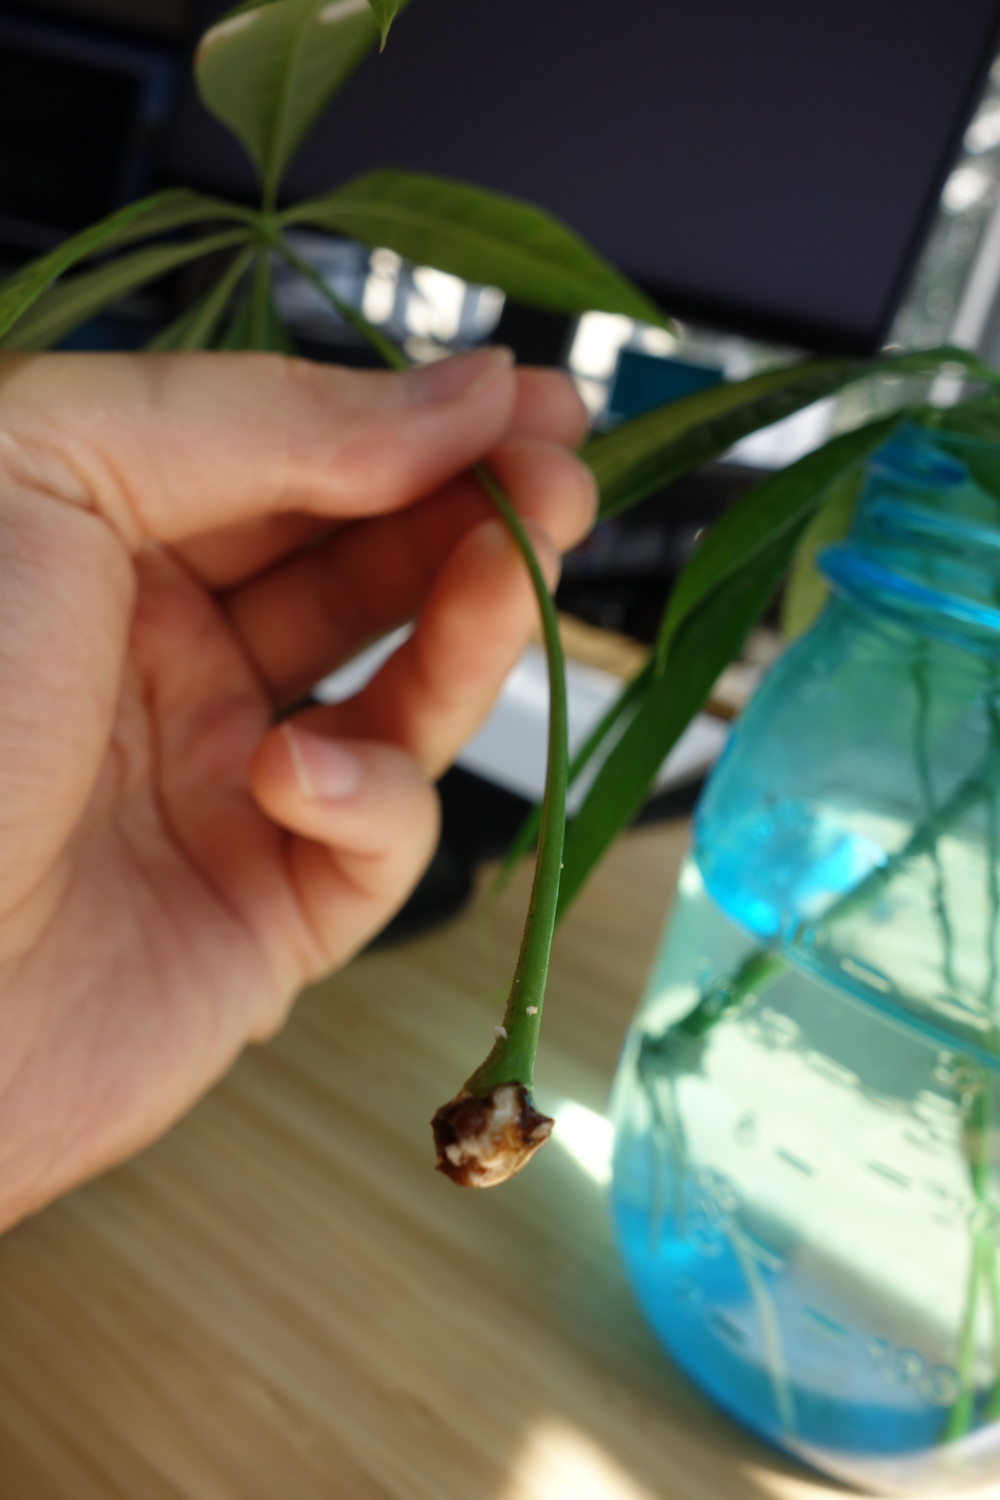
This one can be called S2LnD. This one did not root at all and has more or less wilted. I’m guessing it’s because it was probably just too weak to begin with, meaning this was probably the second closest leaf node to the top of the stem and also wasn’t fully developed when I broke it off. Lesson learned: do not pull off the top 2 leaf nodes because they are probably underdeveloped. Meanwhile, to this one I can only say: “Goodbye, dear leaf node. You have taught me well.”
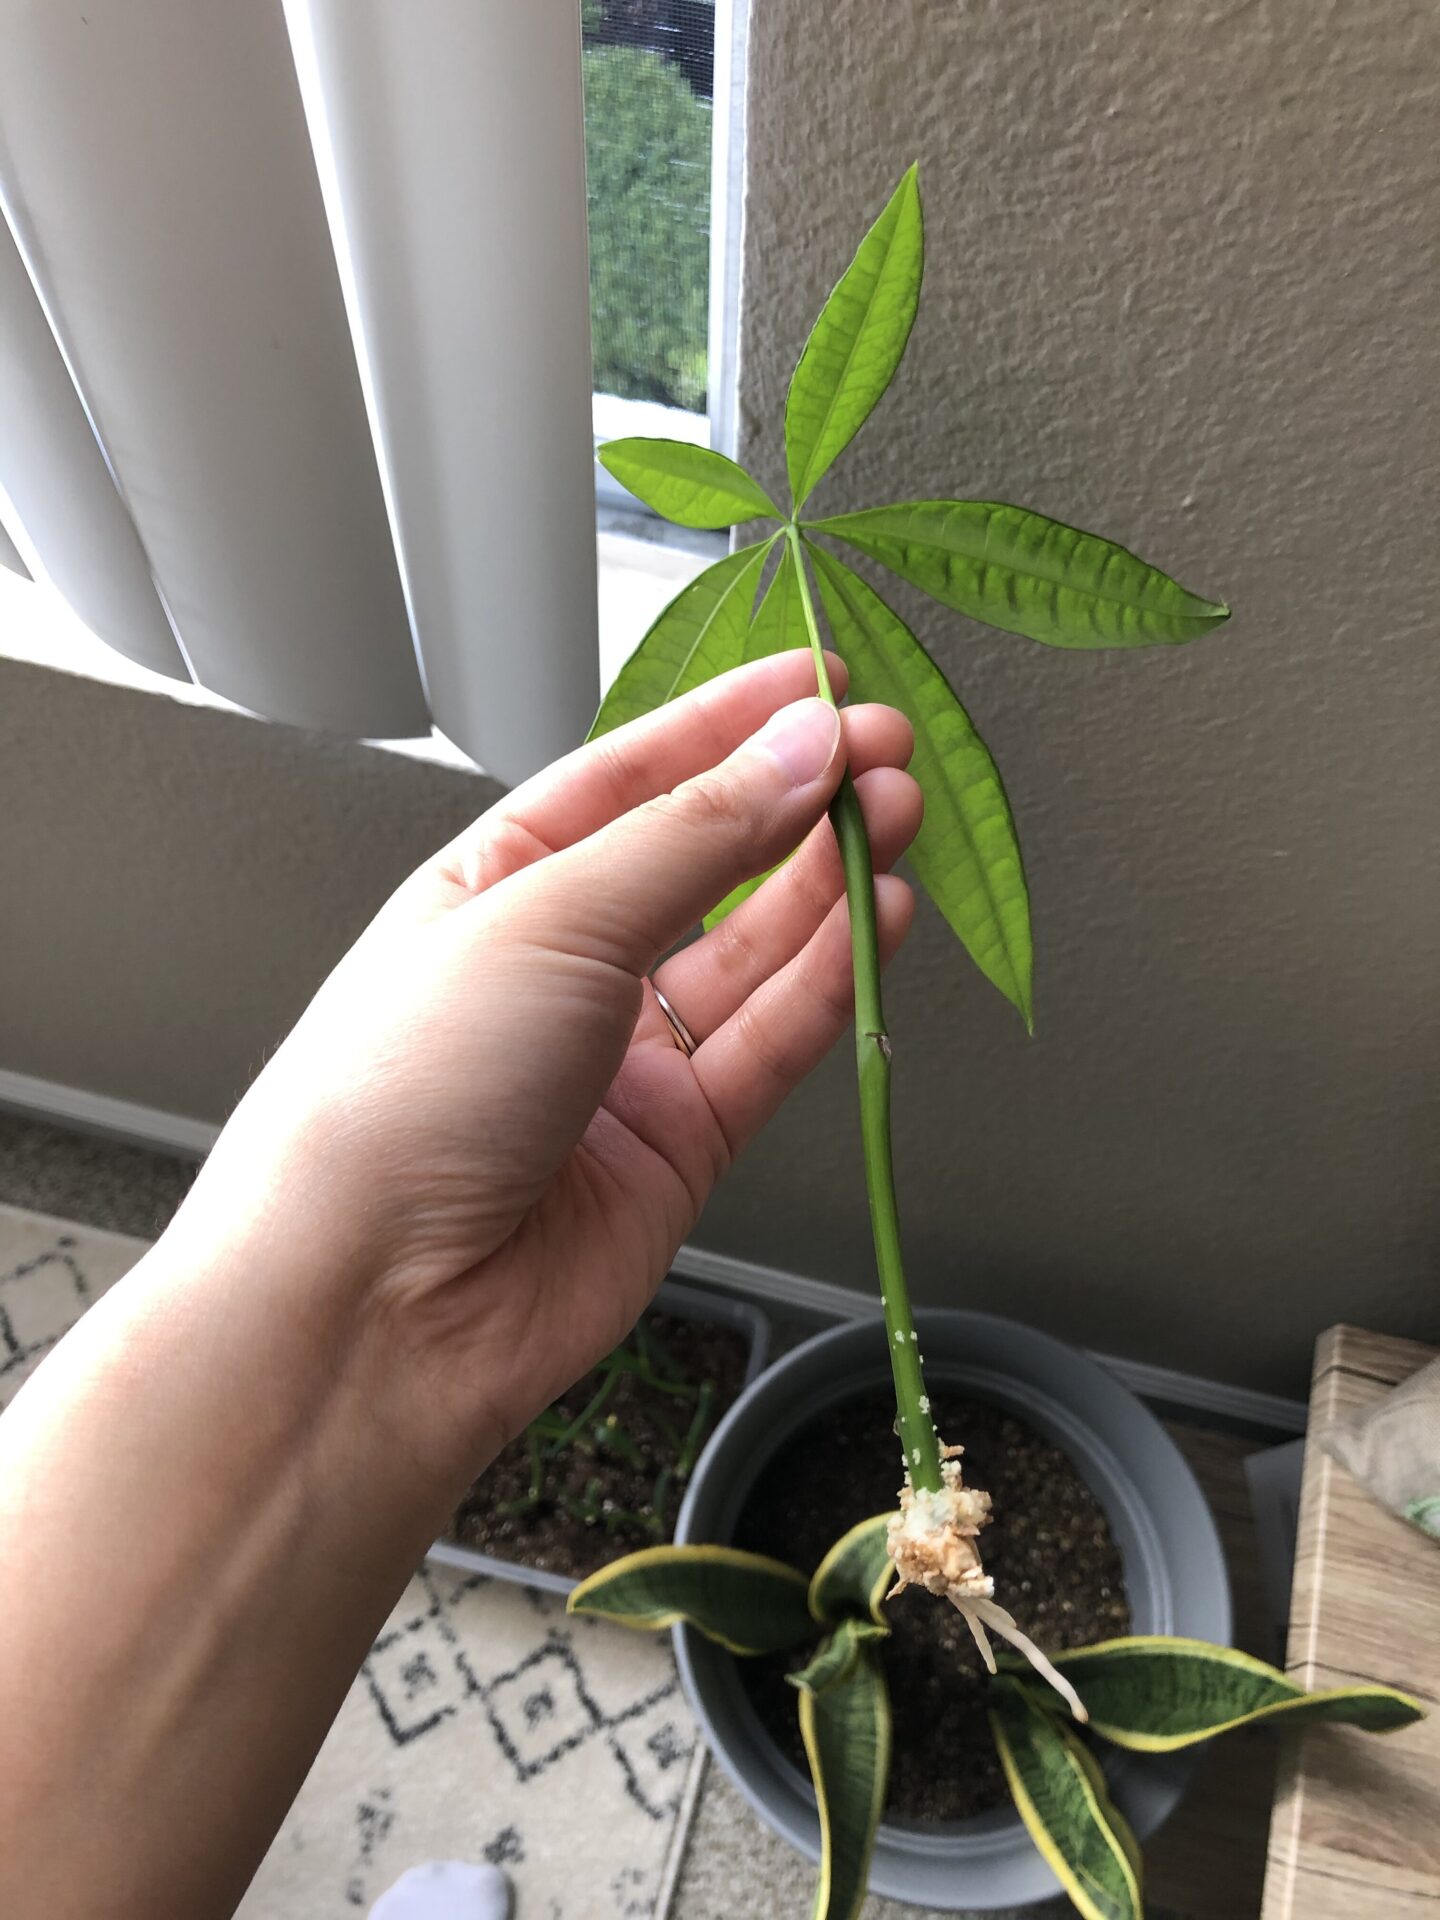
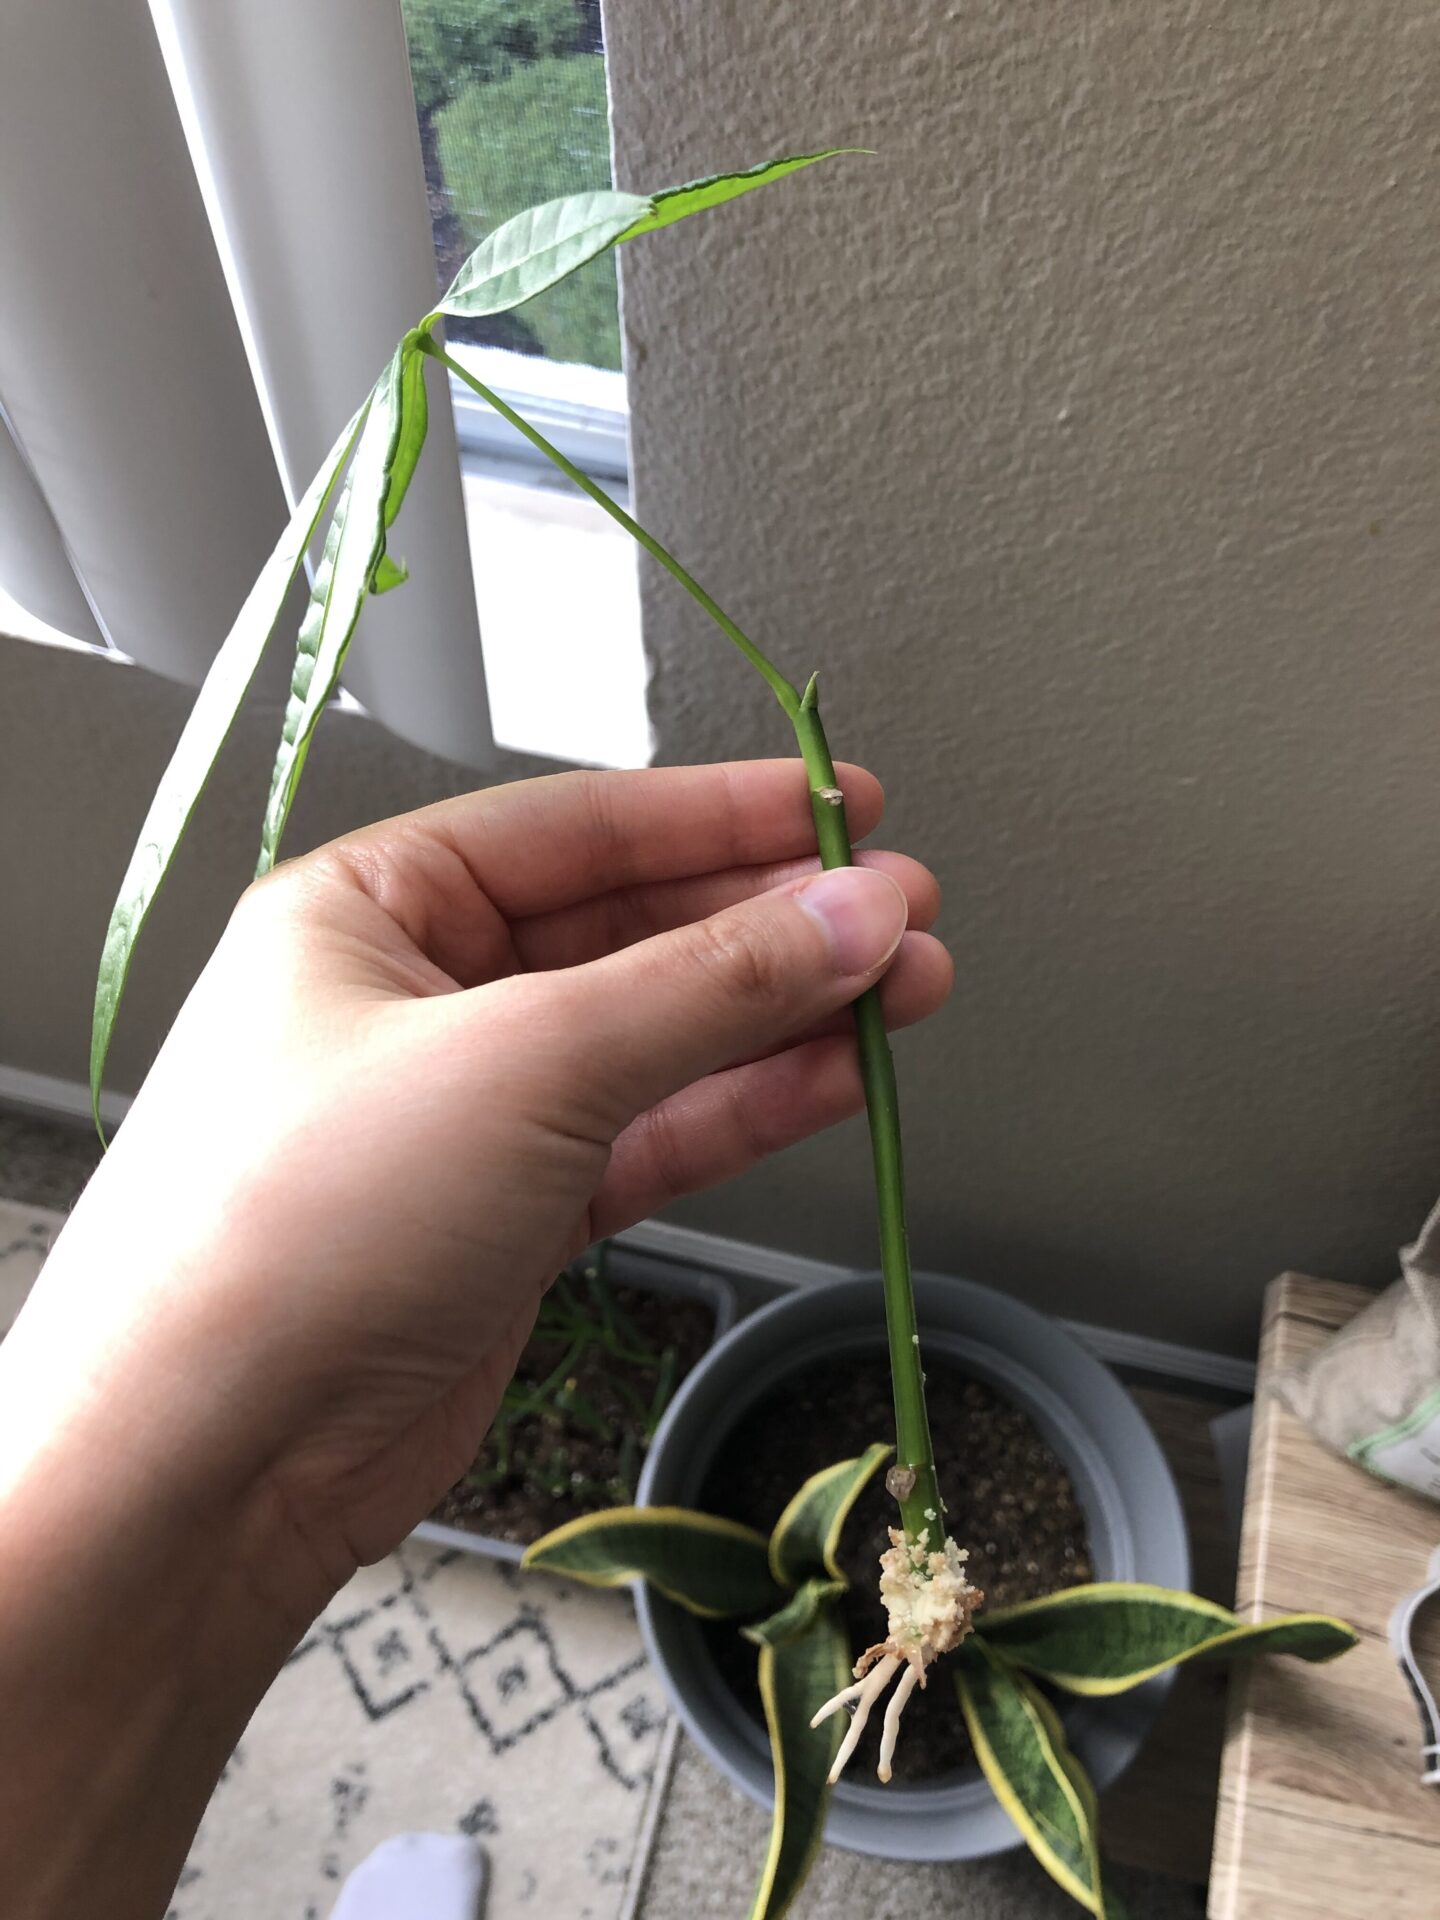
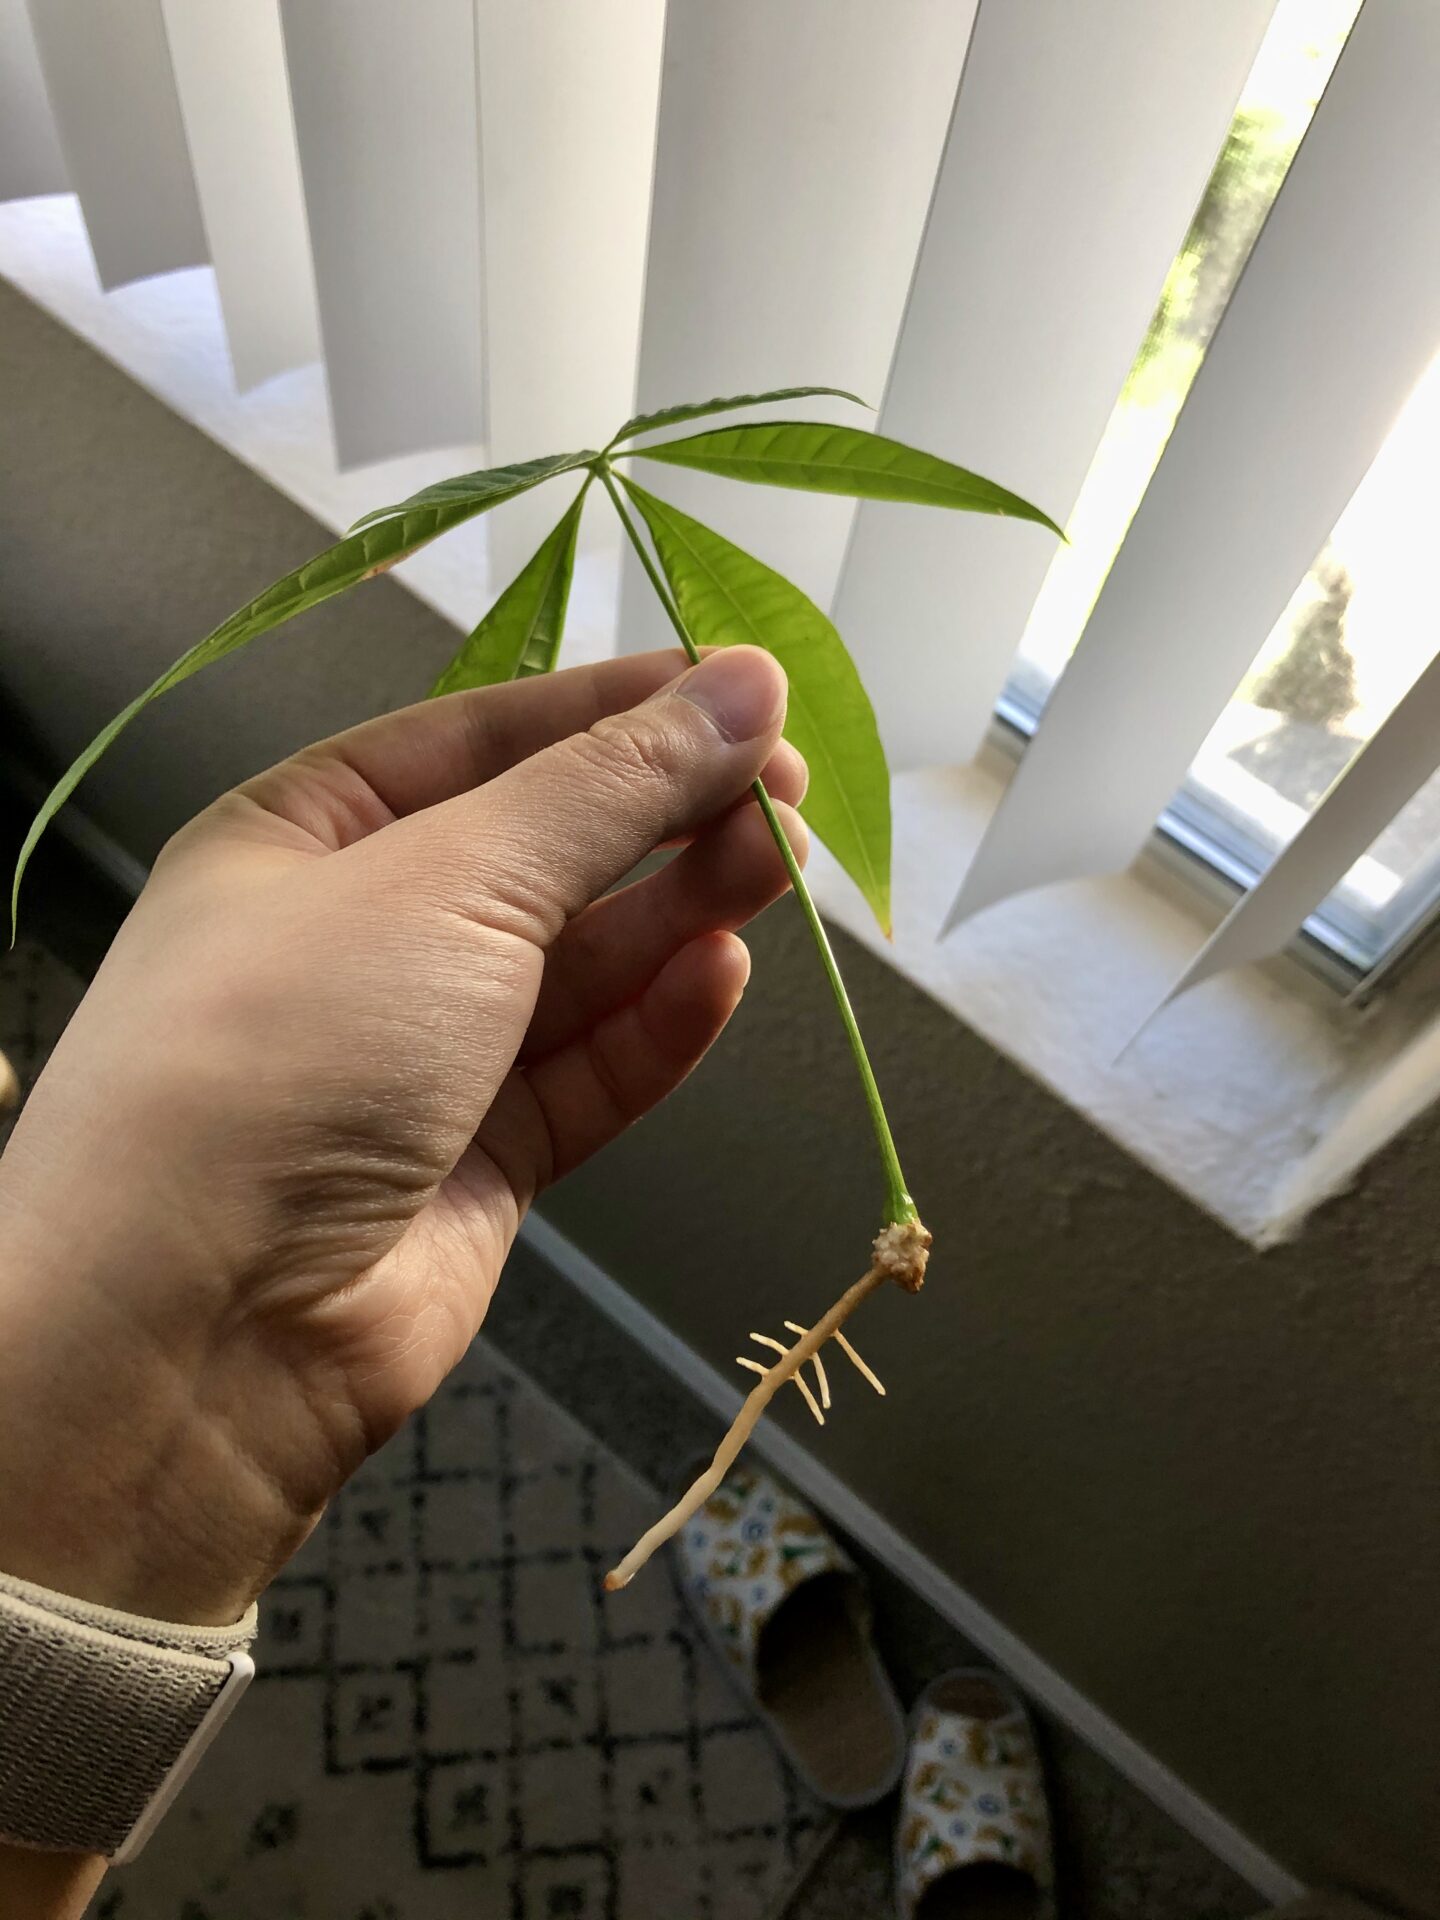
In terms of S1LnA, to my surprise and delight, it looks like it’s starting to grow roots again:
That familiar white fluff is back and it’s appearing up the stem as well. It’s about now that I realise I may have planted Stem1 and S1LnB too shallowly because you can see white dots along the stem where it looks like roots should have grown out:

They seem to be doing okay though; their lower roots are strong enough to support them and they look to be growing well as far as I can tell. I do wonder if I had left them in water for longer, would roots have appeared higher up on the stem as well? But I worry that, by then, the lower roots would have grown too long and the cutting would die from lack of nutrients.
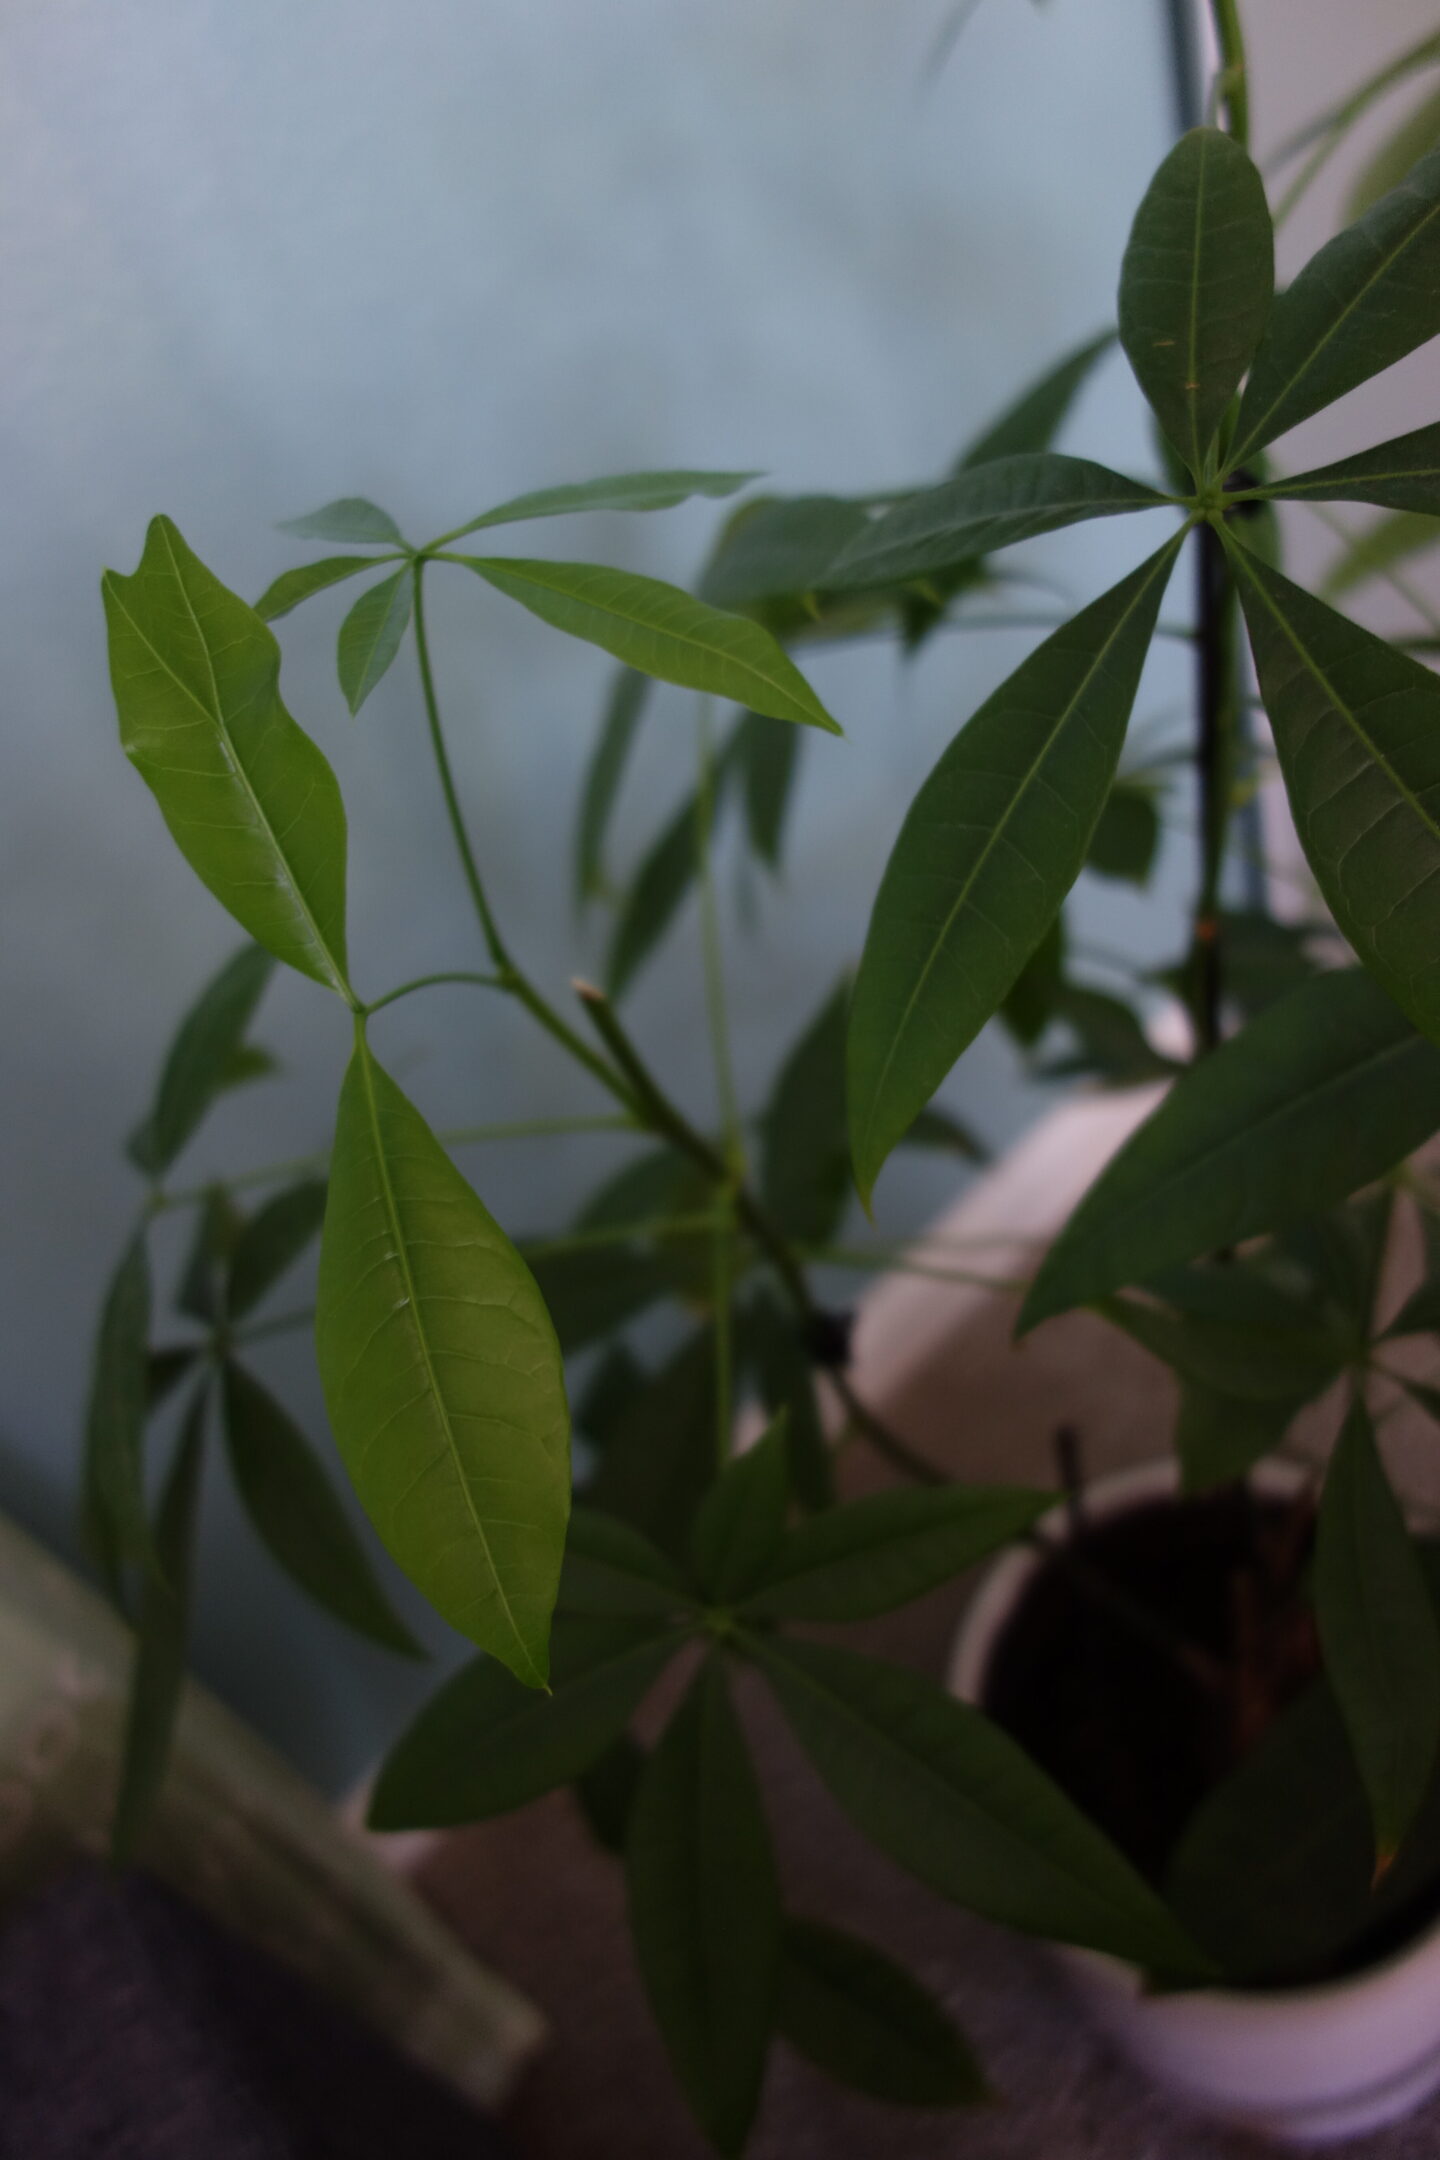
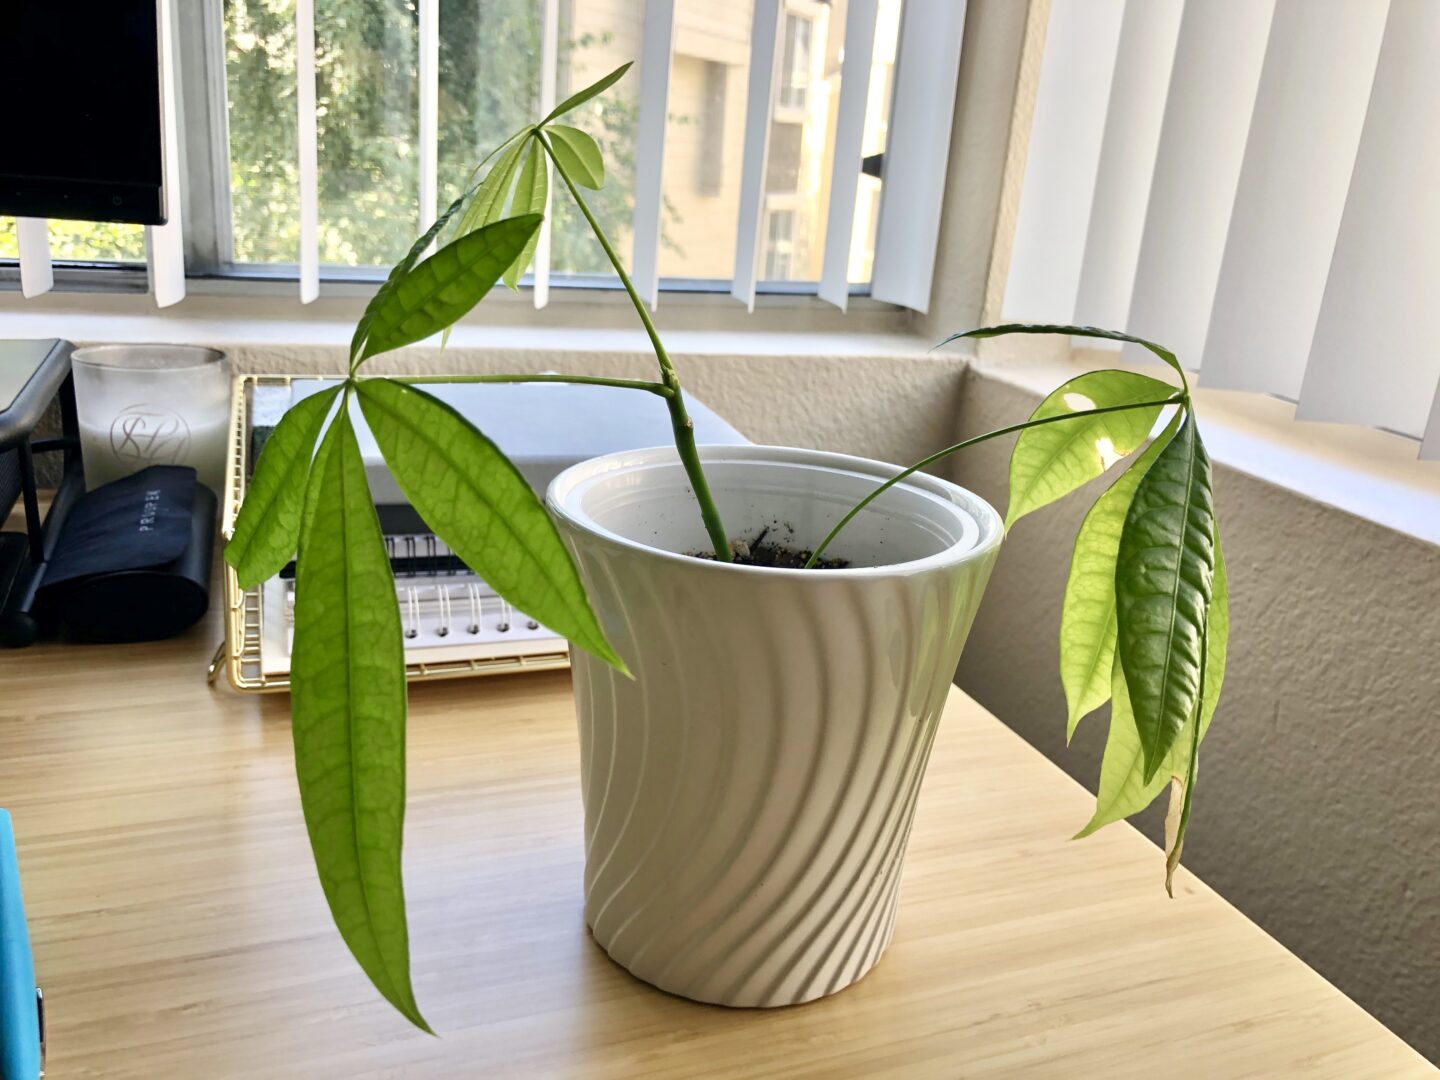
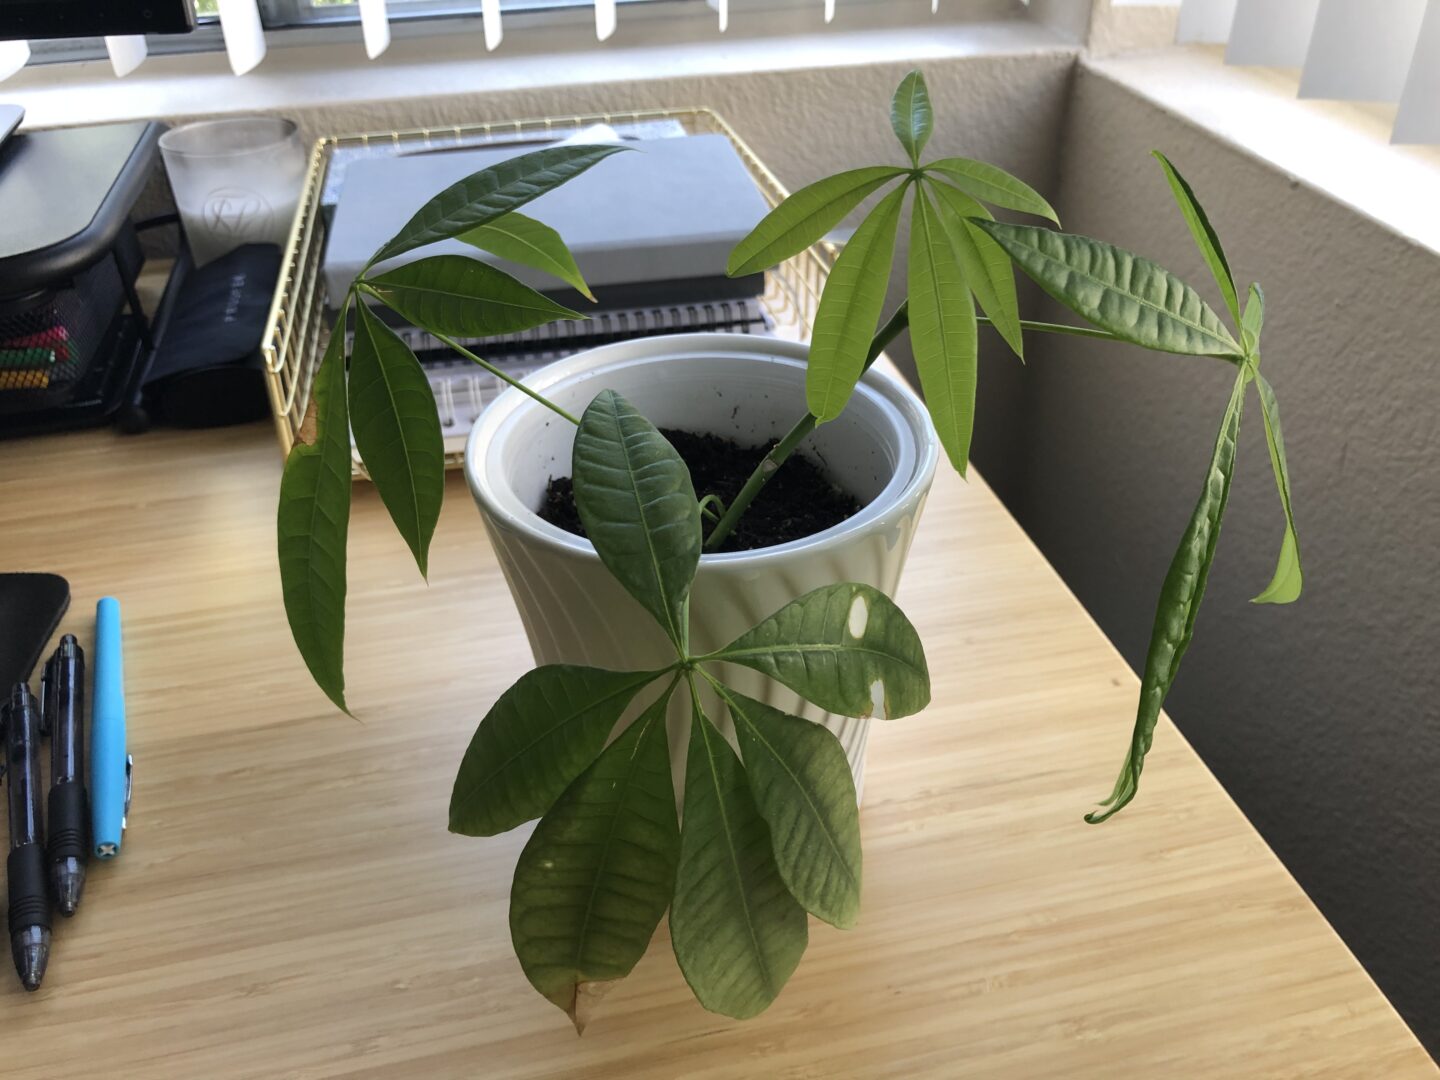
One thing’s for sure, Stem1 is growing very well. Just look at how green it is:
So an overall update of where we’re at:
- Stem1 – potted in soil, the OG propagated stem.
- S1LnA – originally potted in soil, but roots were too shallow so died in the soil, was then put back in the mason jar of water and is now starting to exhibit early signs of root development
- S1LnB – potted in soil with Stem1
- S1LnC – dead & discarded :(
- Stem2 – in mason jar, slightly damaged skin, strong roots growing and will be ready to plant soon
- S2LnA – in mason jar, buck teeth roots showing
- S2LnB – in mason jar, looks like it could be in early stages of root development.
- S2LnC – dead & discarded :(
- S2LnD – dead & discarded :(
Mother Tree is growing well too. I don’t have any non-blurry photos of MS2 but here’s its progress – it’s like a little baby hand!
I feel like a proud plant mummy, and quite amazed and surprised they’re still alive under my brown thumbs.
Your post has made my day. THANK YOU. I thought the white fuzz on my cutting in water might be roots but also thought, hmmm that looks gnarly as hell what if it’s not root but gross other thing. I also thought for certain I had cut mother plant too close to the node but I have confidence and faith now. Thank you again